Note

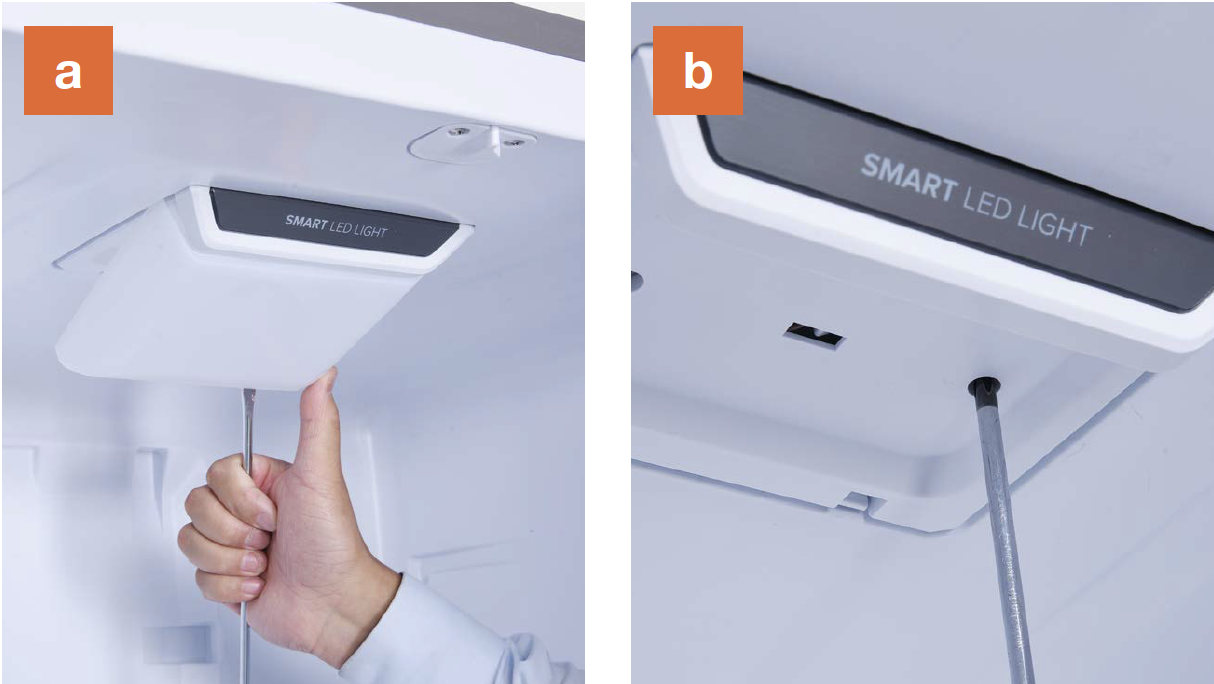
PROCEDURE 1

Step 1
a. Lever off the cover with
2mm slotted driver.
b. Unscrew with 6mm
cross-head screwdriver.
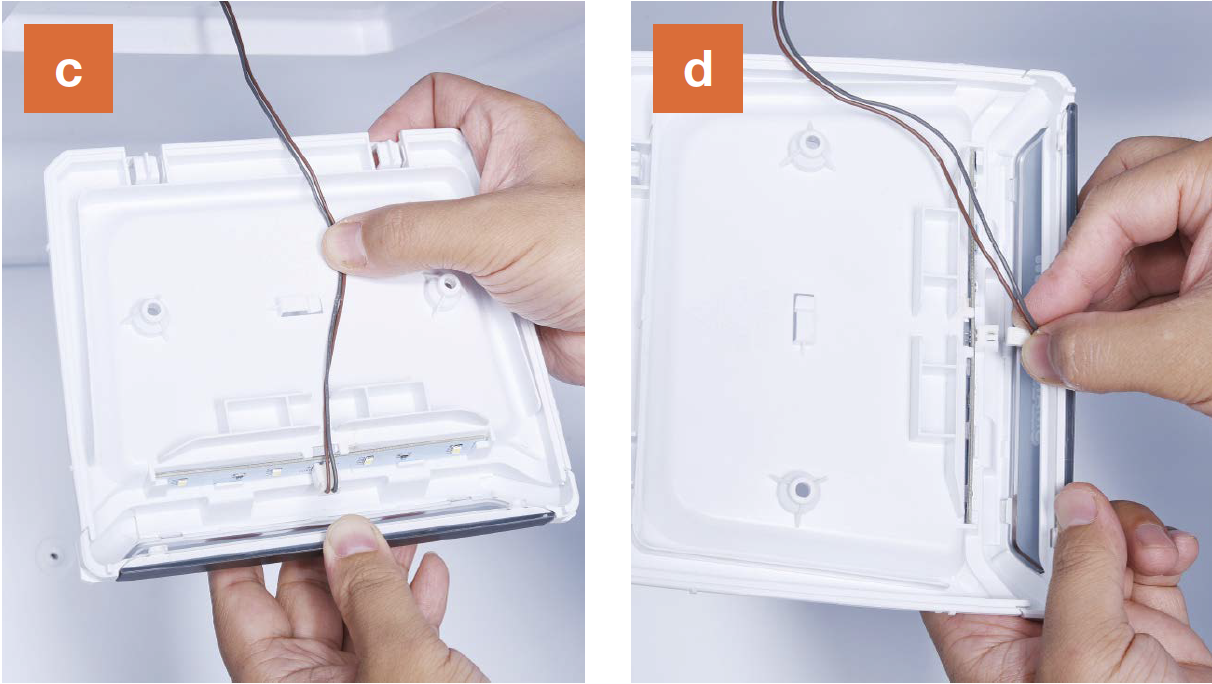
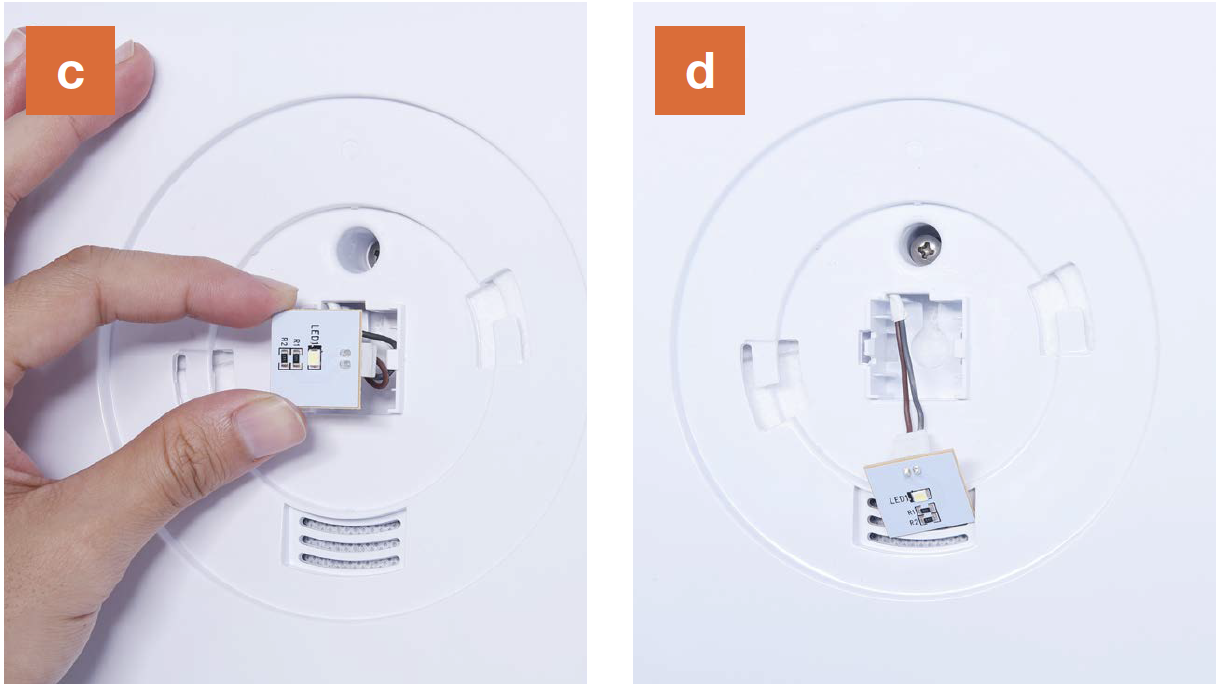
c. Disconnect the terminal
and remove LED.
d. Reverse above steps to
install LED.
REVERSE STEPS ABOVE TO INSTALL LED.
Note
Put wires into buckle to avoid damaging with screw when installing LED.
PROCEDURE 2
Step 1
b.Unfasten the clip.
c. Remove LED light.
d. Disconnect the
terminal.
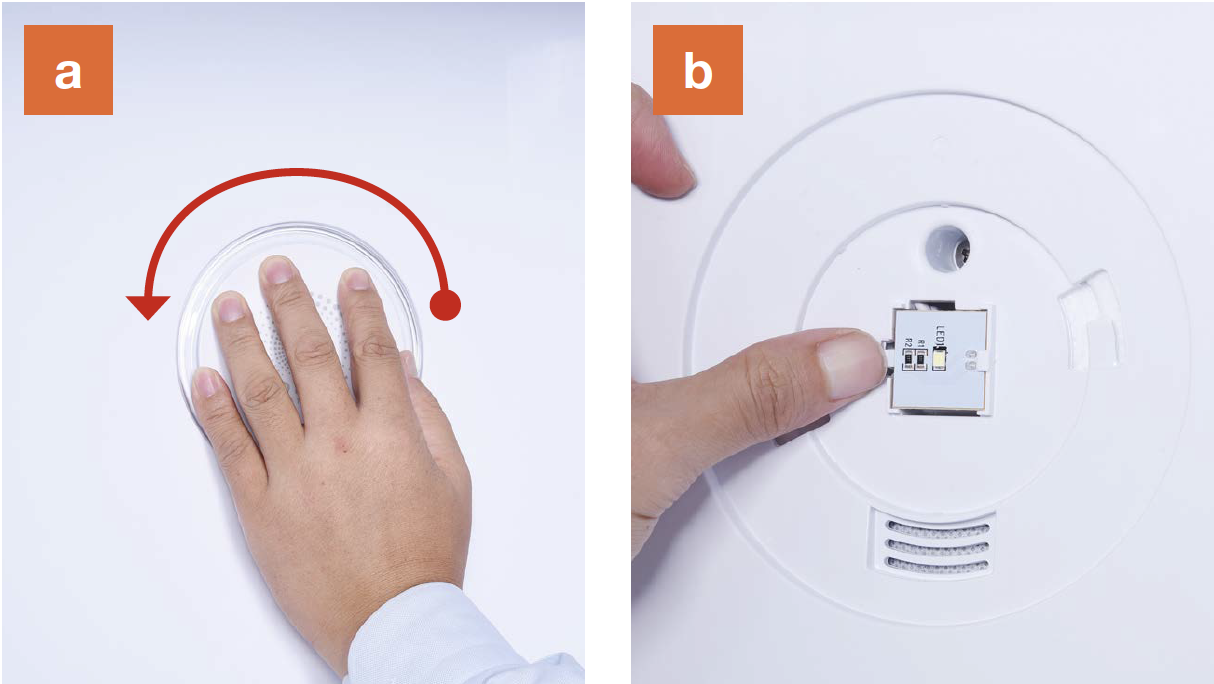
REVERSE STEPS ABOVE
TO INSTALL LED.
Note
When installing LED, please make sure glass pearl does not touch the hands or any stiff material.

CHECK AND TEST 1
Step 1
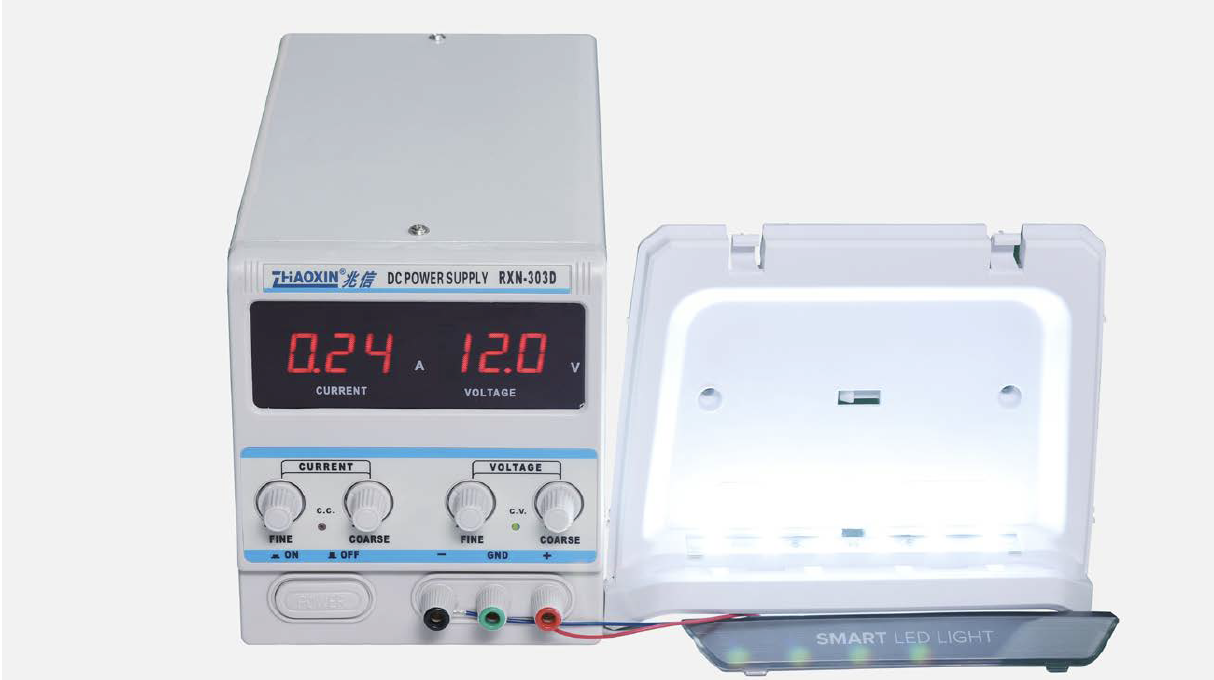
Provide upper LED with DC12V to check whether it turns on or not.
Step 2
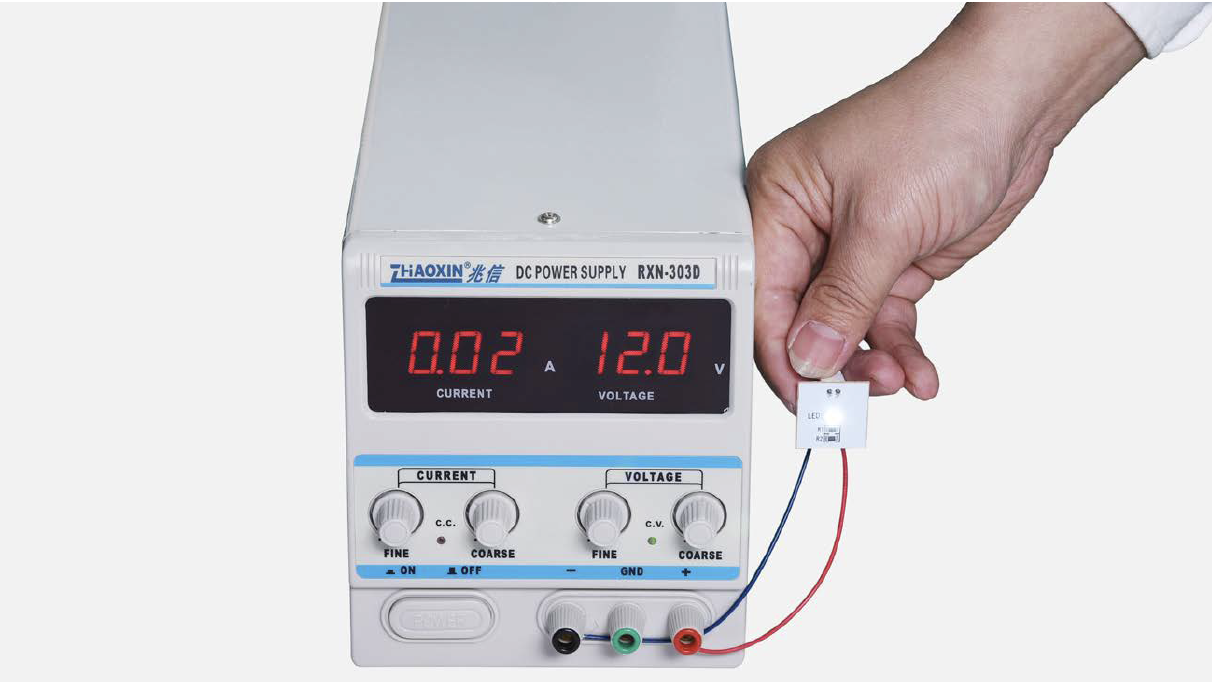
Provide LED in back with DC12V to check whether it turns on or not.
DIAGNOSIS 1

CHECK AND TEST 2
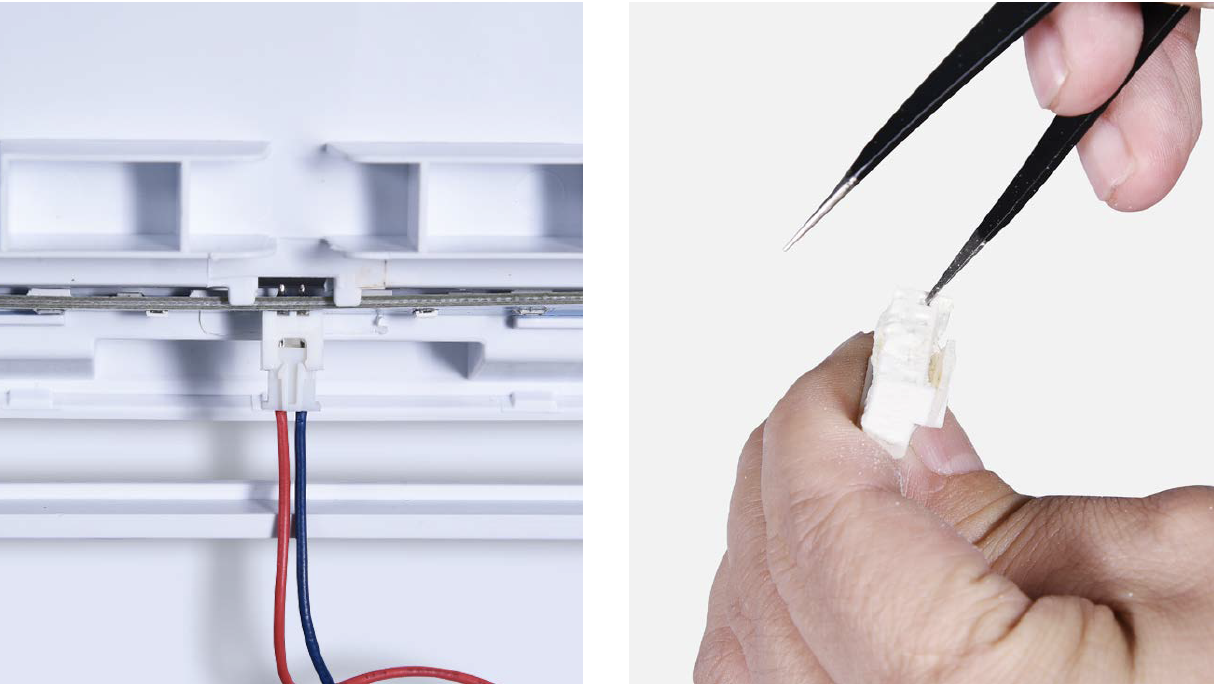
Step 1
Check to see if terminal A, B, C are dirtied by foam.

Step 2
Use tweezers to remove the foam clearly.
DIAGNOSIS 2

CHECK AND TEST 3
Step 1
testo testo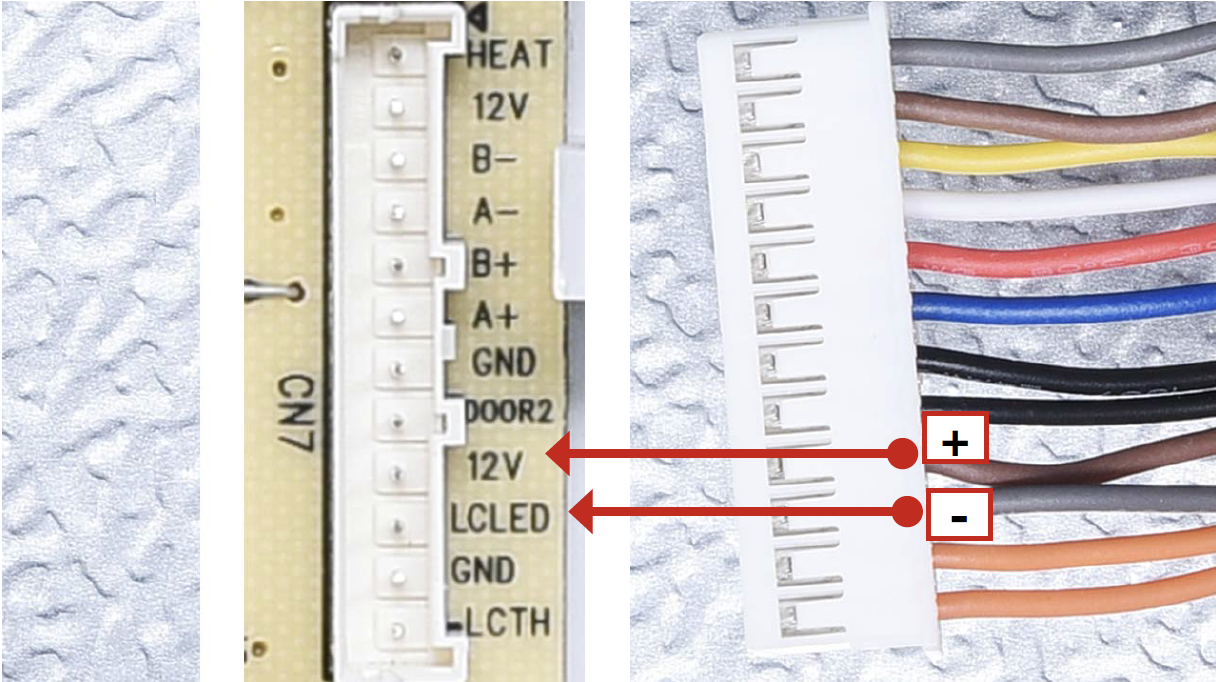
Step 2
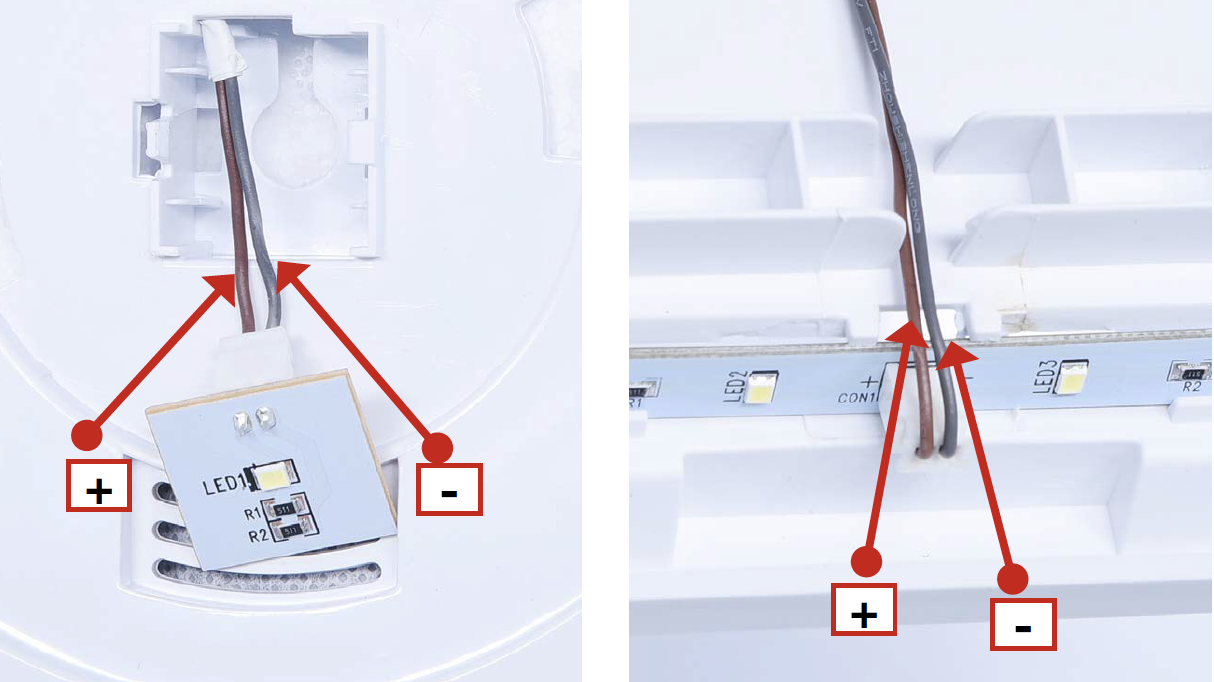
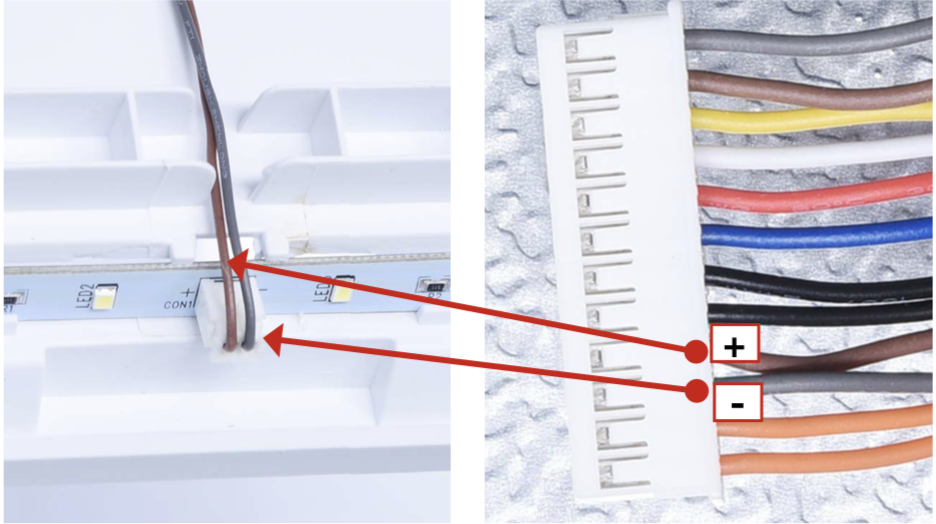
Check if wire order for LED on the back is correct.
Step 3
Check if wire order for LED on the back is correct.
Step 4
Check to make sure there is a good connection.
DIAGNOSIS 3

PROCEDURE 2

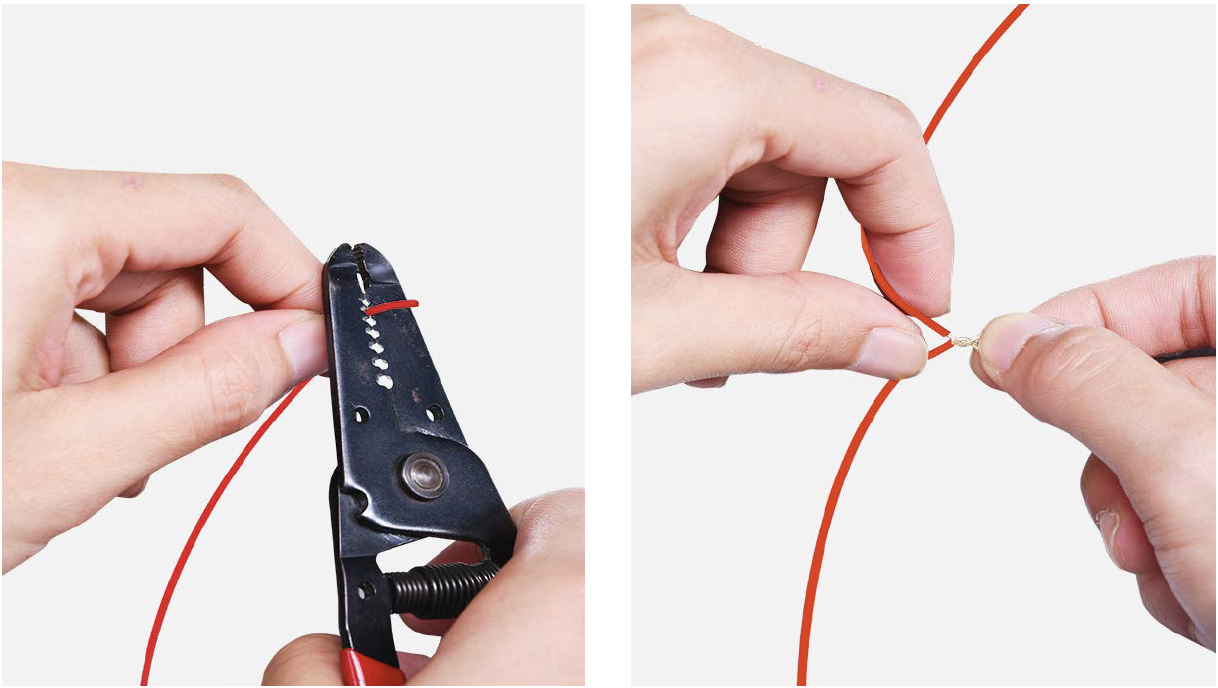
Step 1
Cut off the wire.

Step 2
Peel off the sleeves.
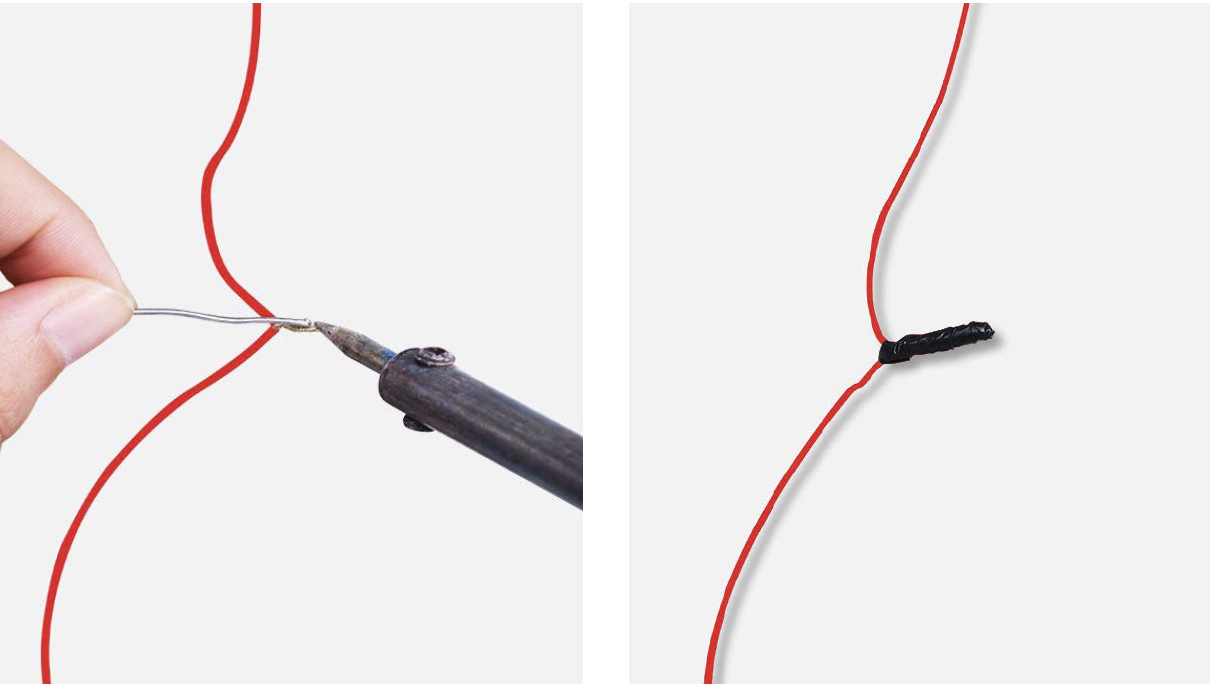
Step 3
Ensure proper wire order and connect.
Step 4
Tin soldering.
Step 5
Cover connecting point with electrical tape.
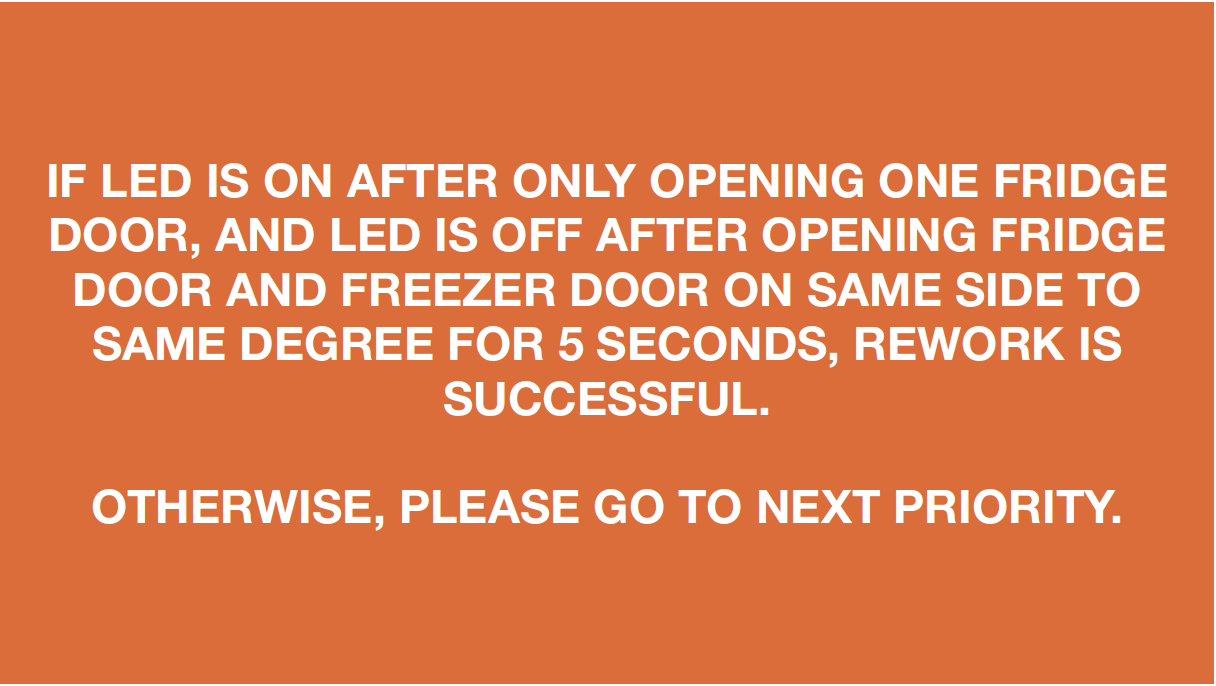
CHECK AND TEST 4
Step 1
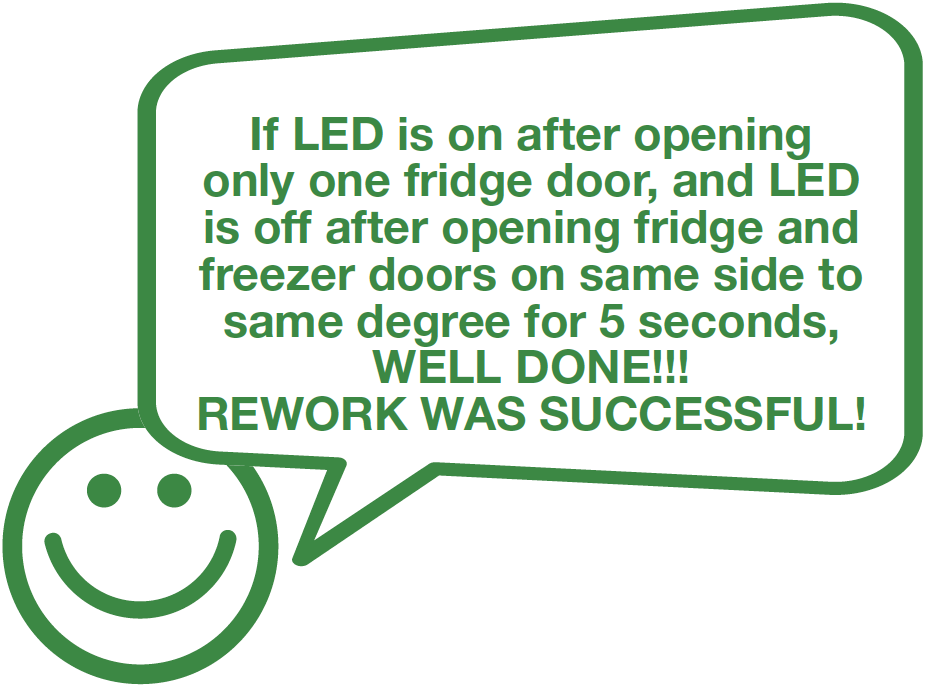
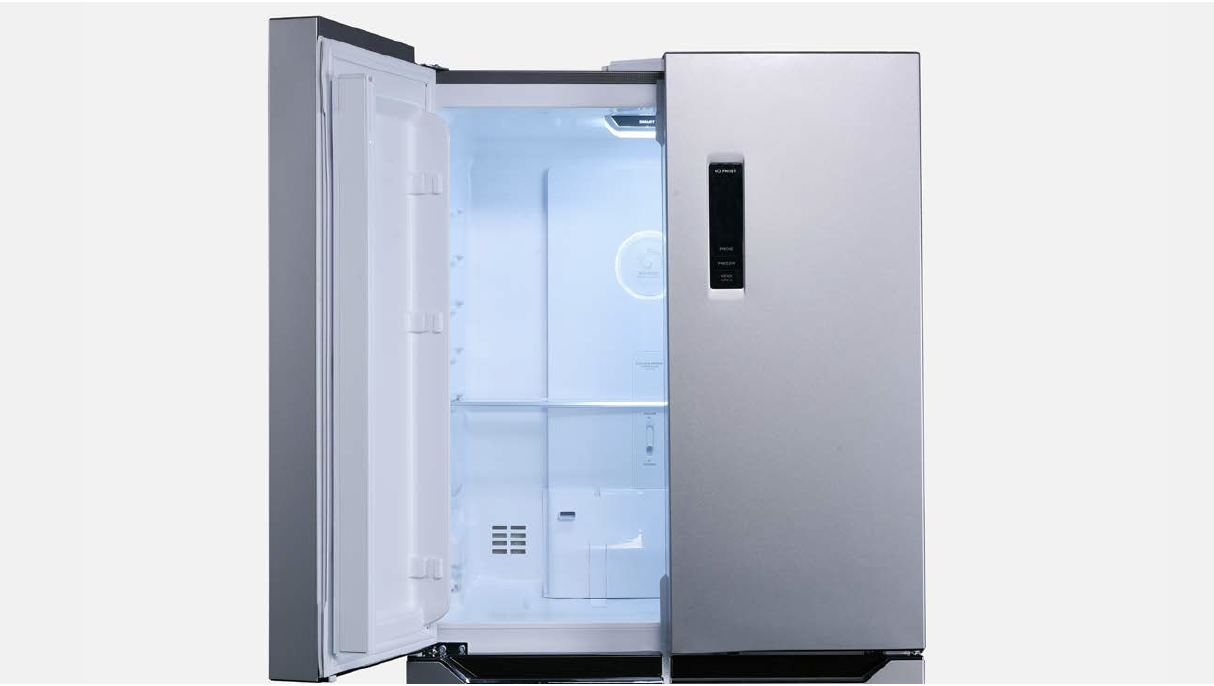
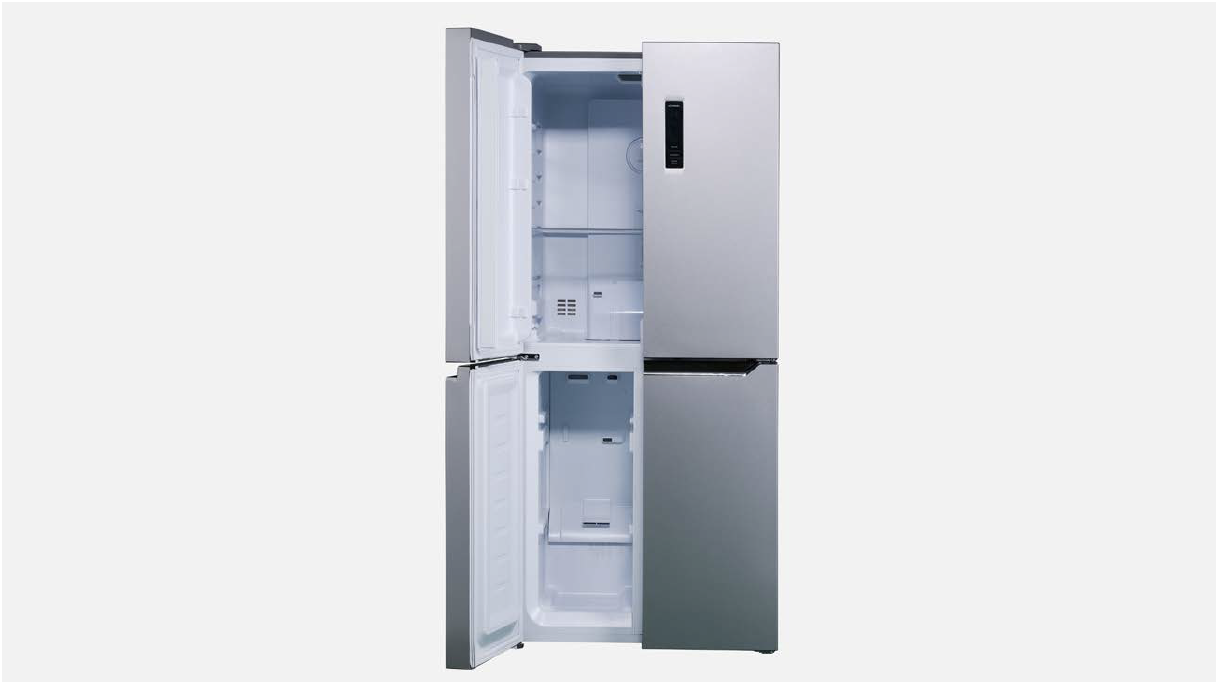
After reworking, open one fridge door to see if LED is on or not.
Step 2
Open fridge door and freezer door on same side to same degree for 5 seconds.
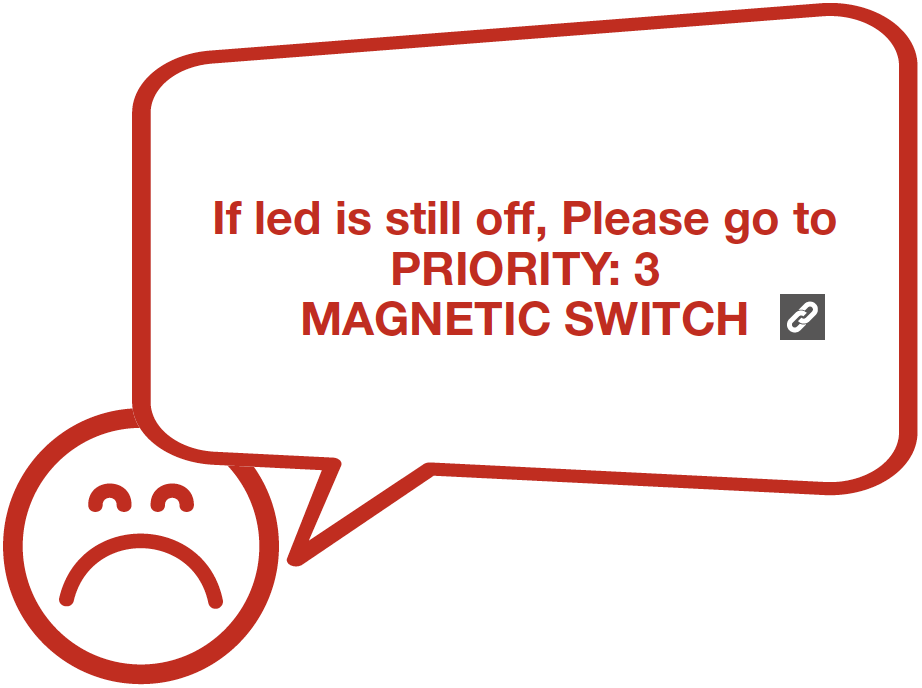
DIAGNOSIS 4