

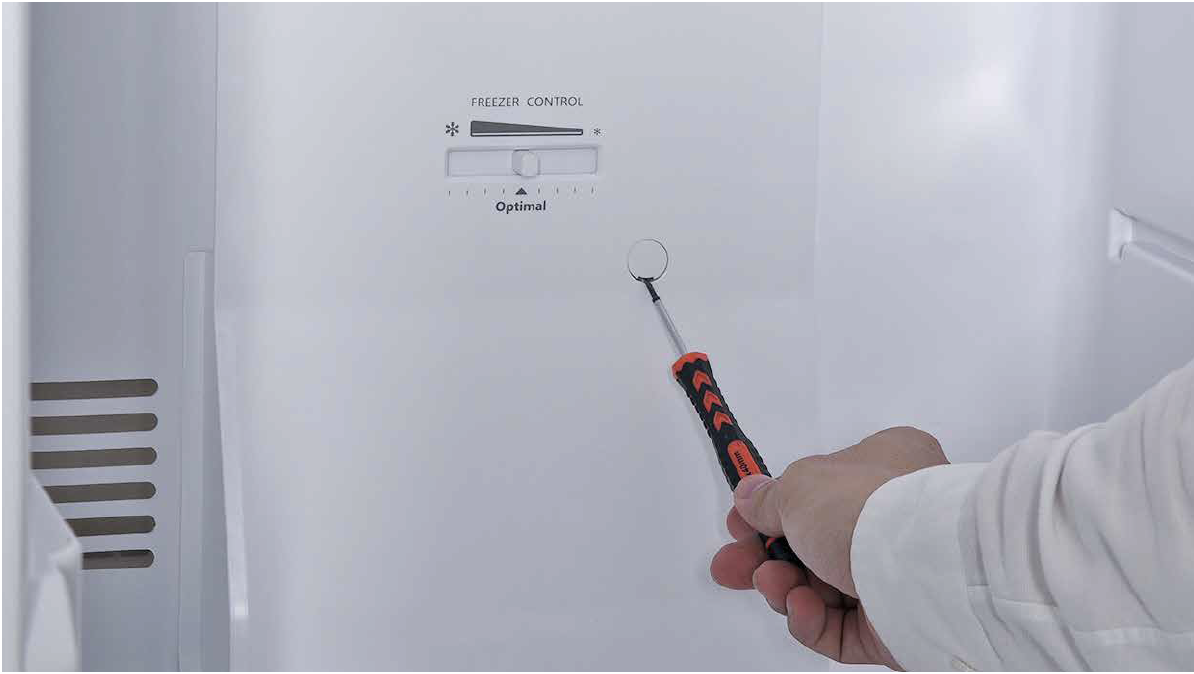
CHECK AND TEST 1
Step 1
Unscrew cover of
mainboard with a
Cross-head screwdriver.

Step 2
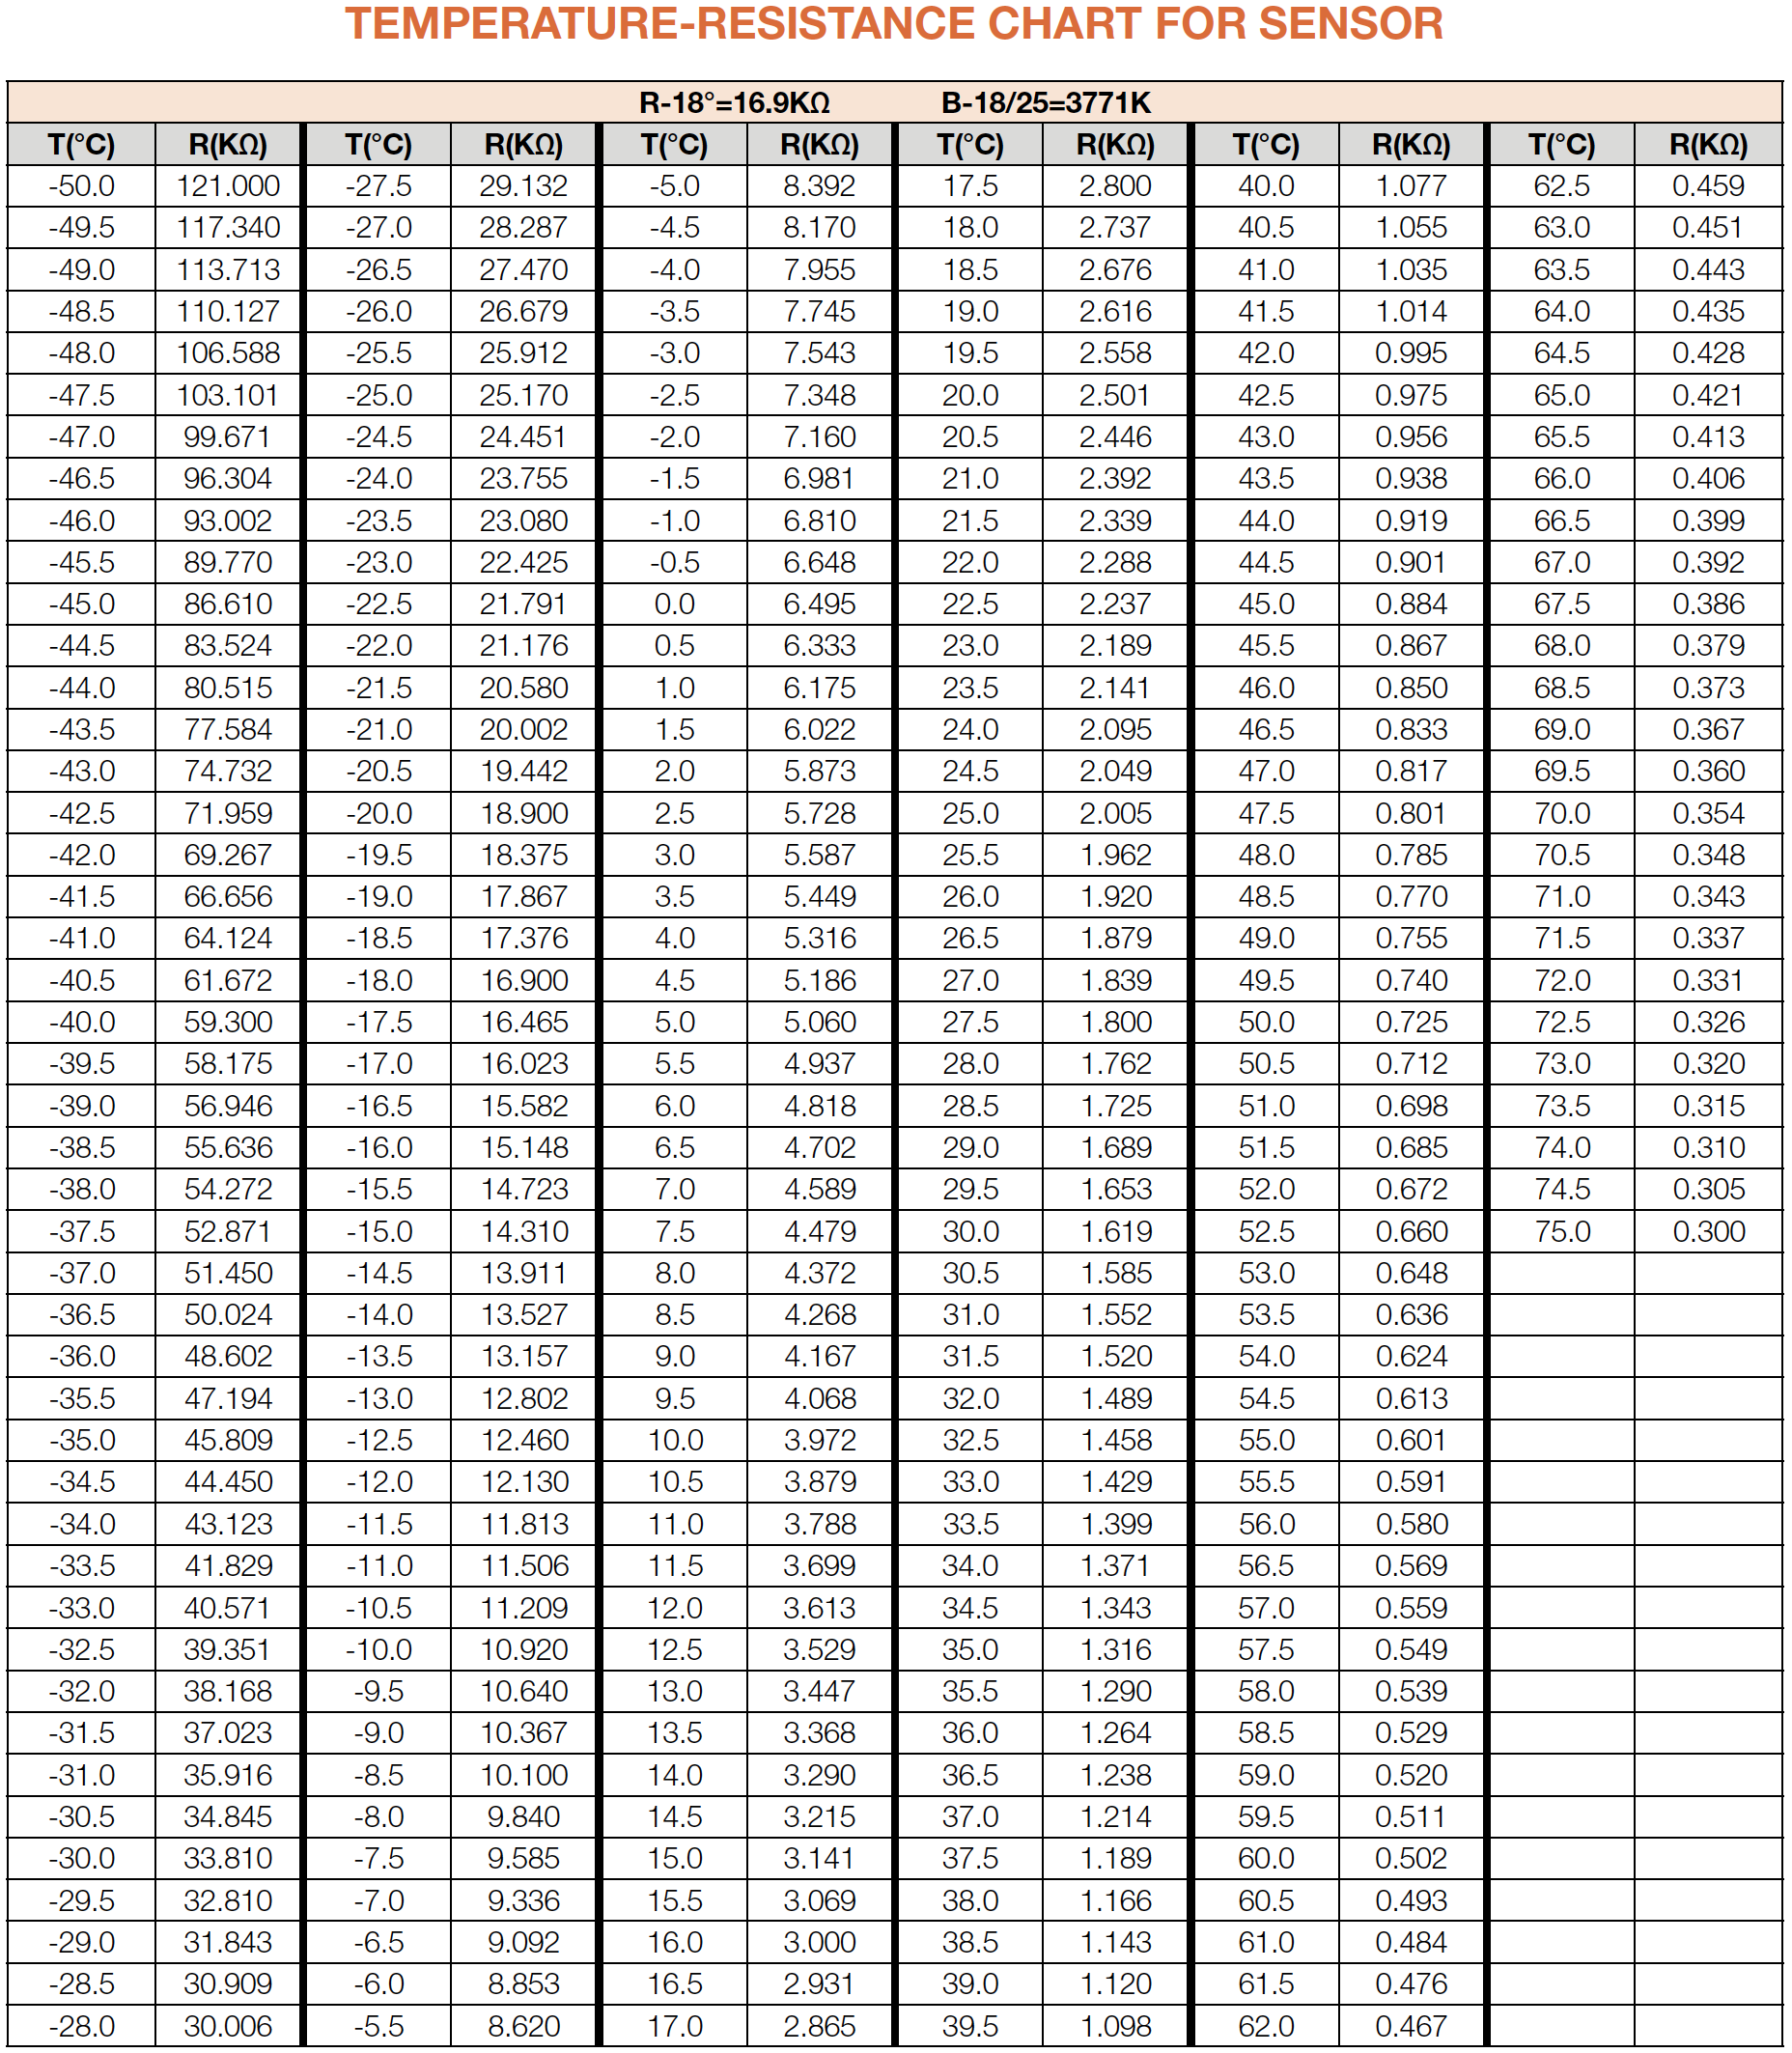
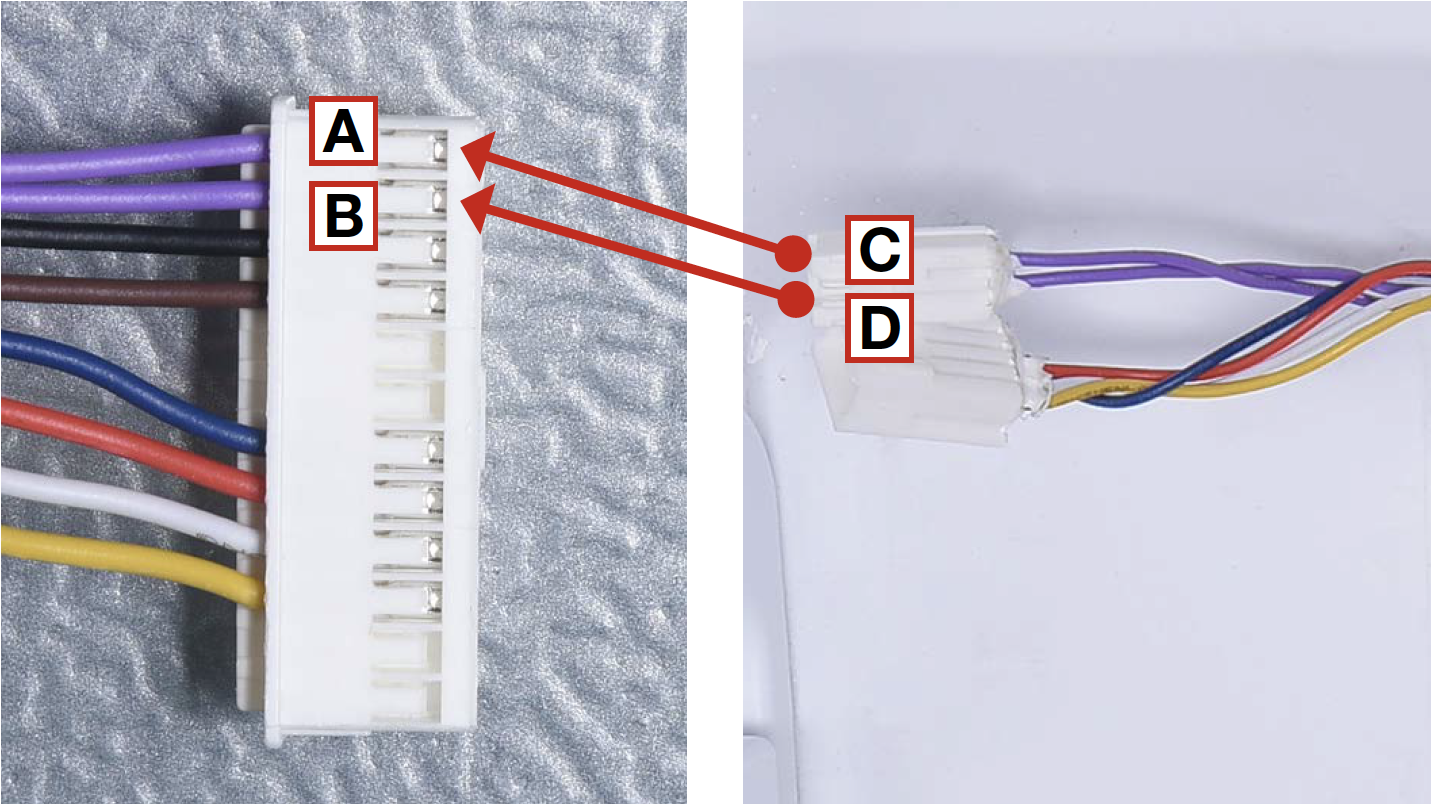
Check if the terminal is filled with foam or not, then test resistance of fridge sensor from terminal in PCB area.

Step 3
Take note of value.
Step 4
Measure the temperature of sensor.


DIAGNOSIS 1


PROCEDURE 1
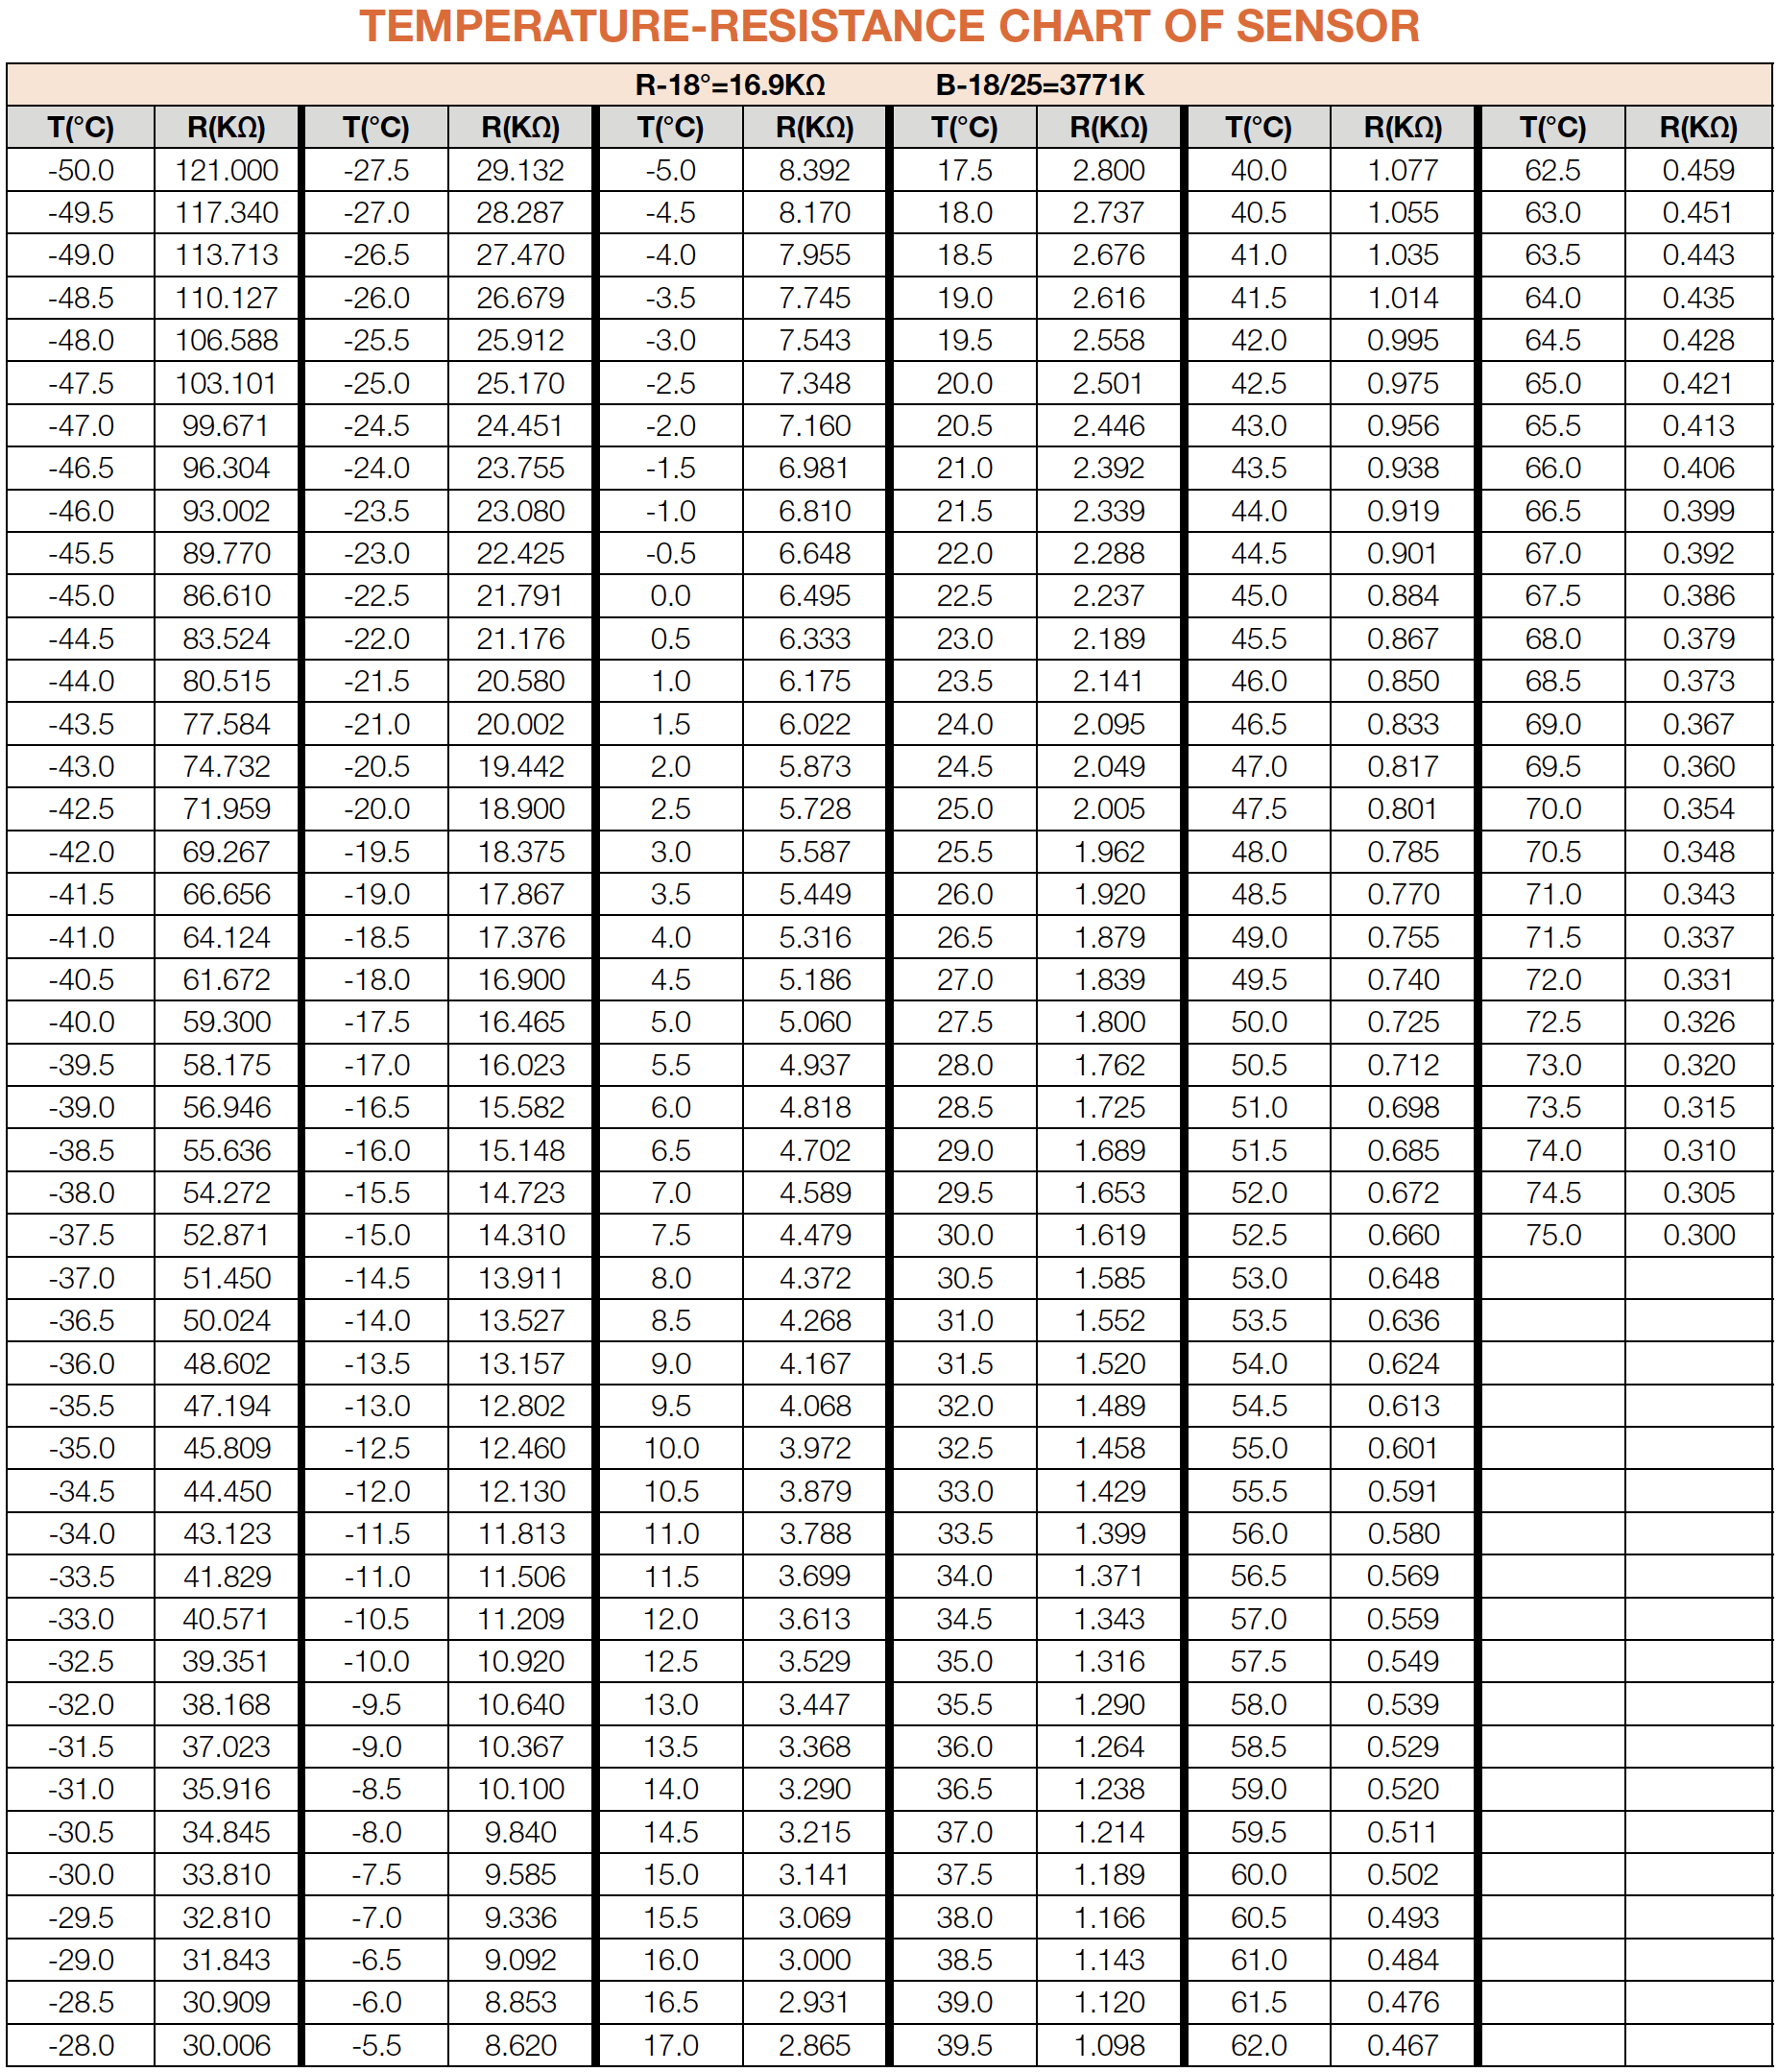
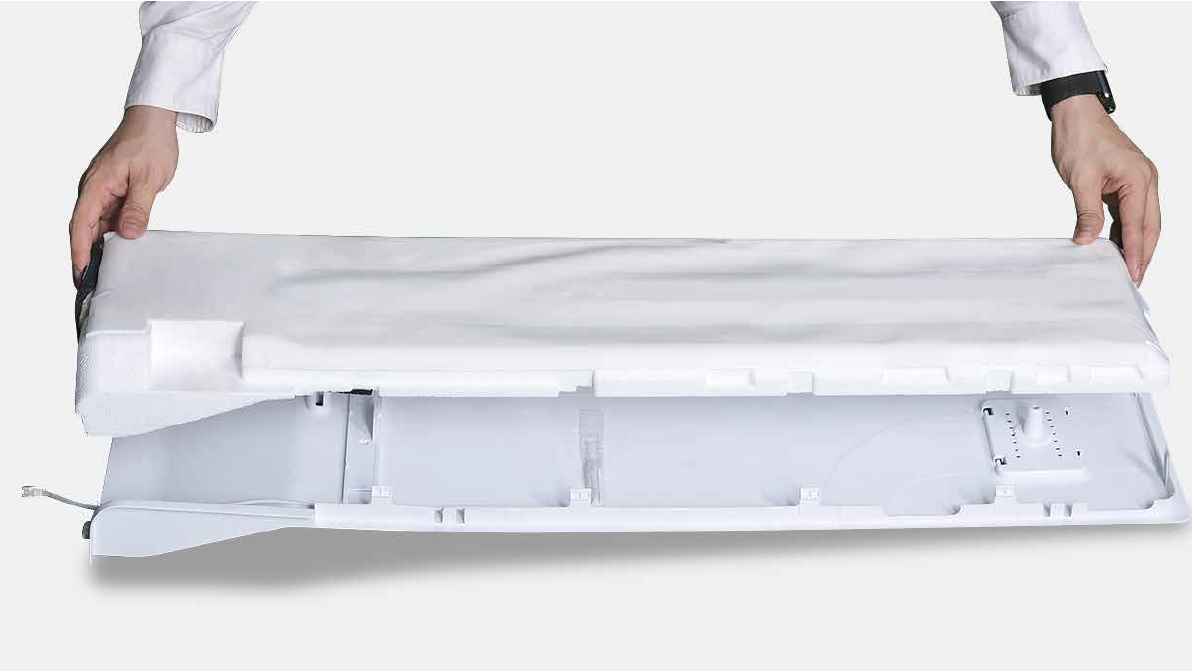
Step 1
Remove shelves
Step 2
Remove crisper drawer

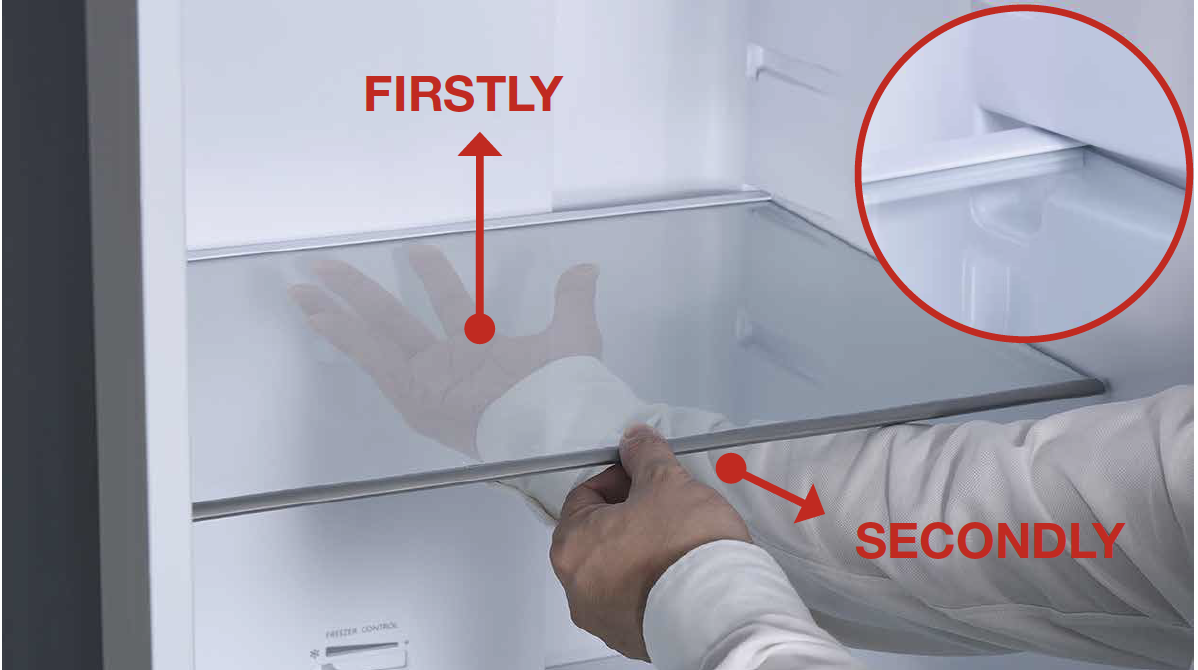
Step 3
Remove crisper drawer
cover shelf.
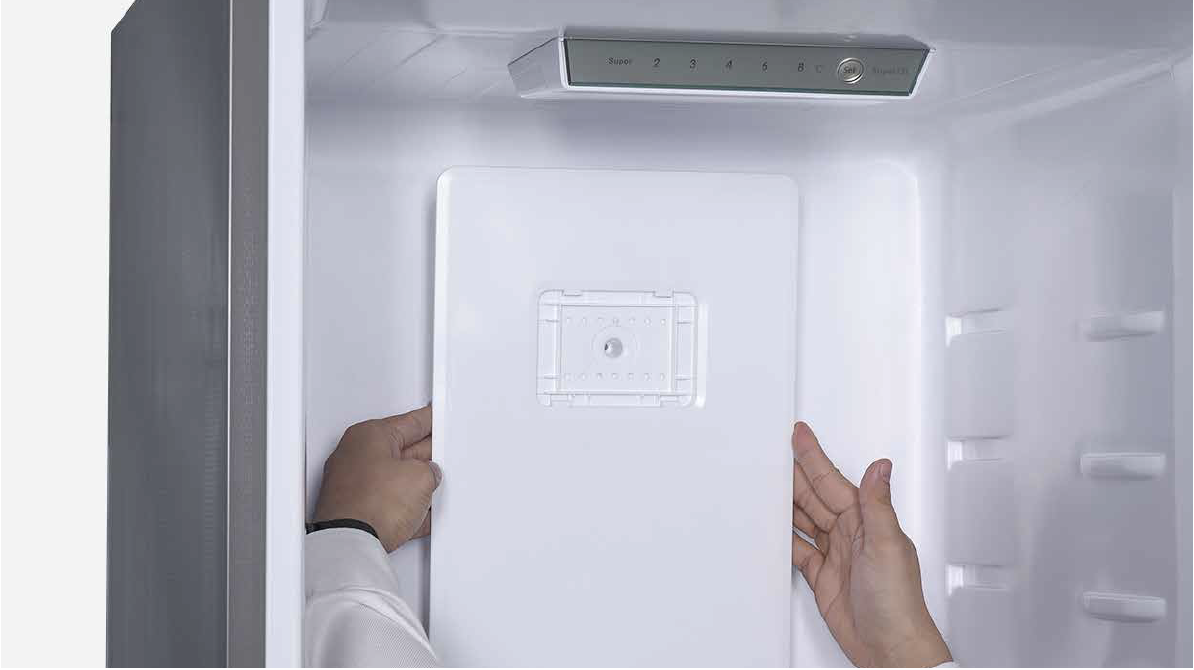
Step 4
Remove crisper drawer cover shelf.
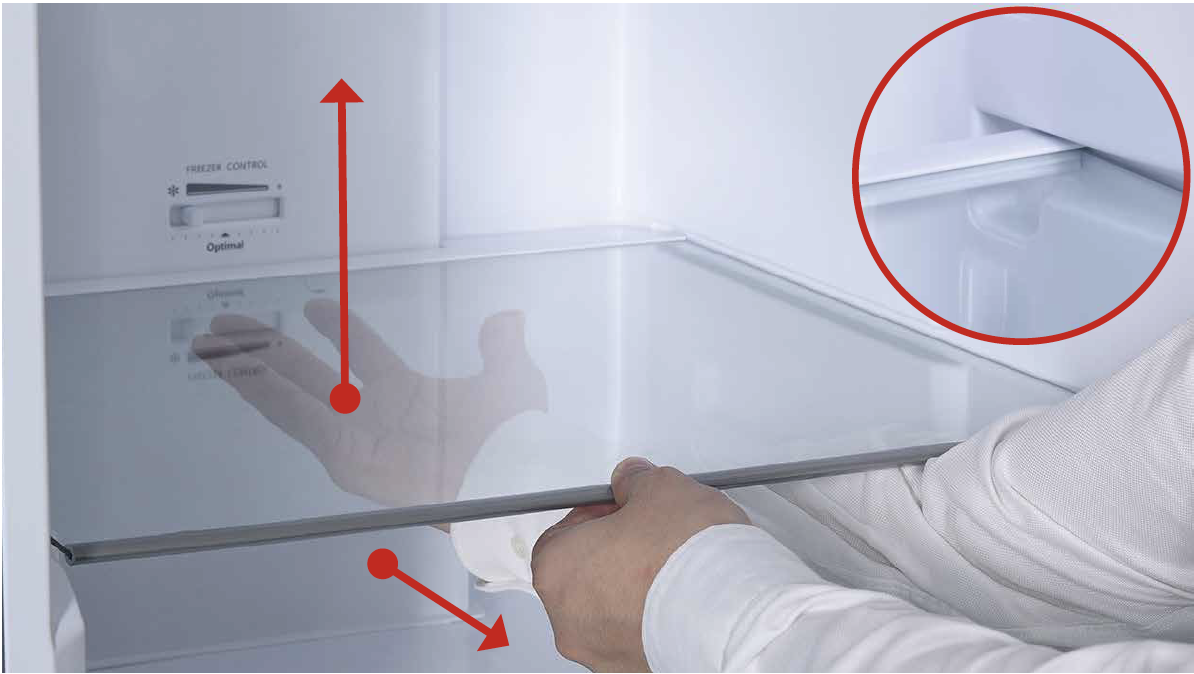
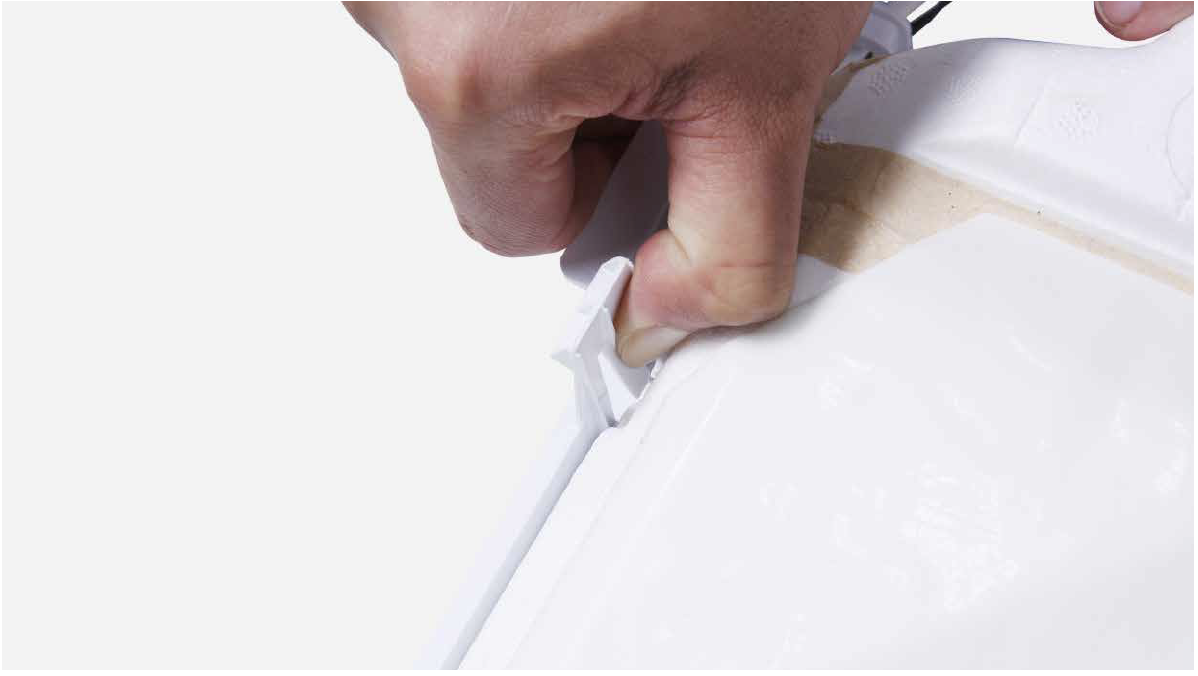
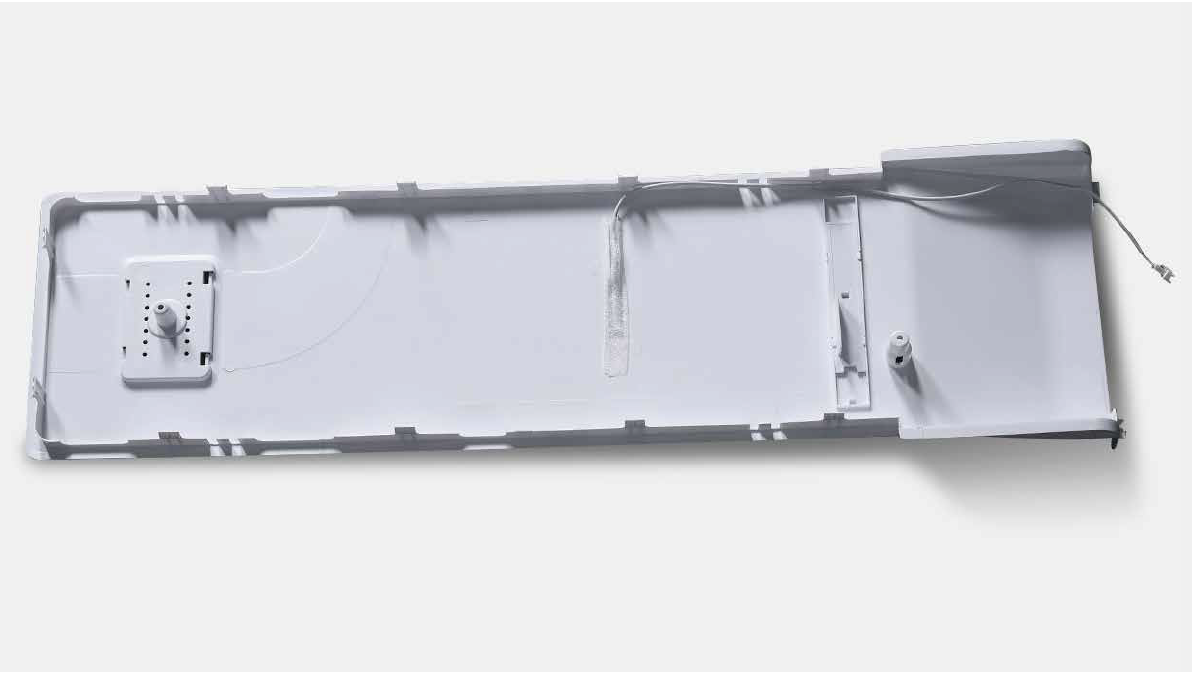
Step 5
Use screwdriver to leverage decorative panels from the bottom and remove.
Step 6
Remove the 2 screws on fridge air duct.
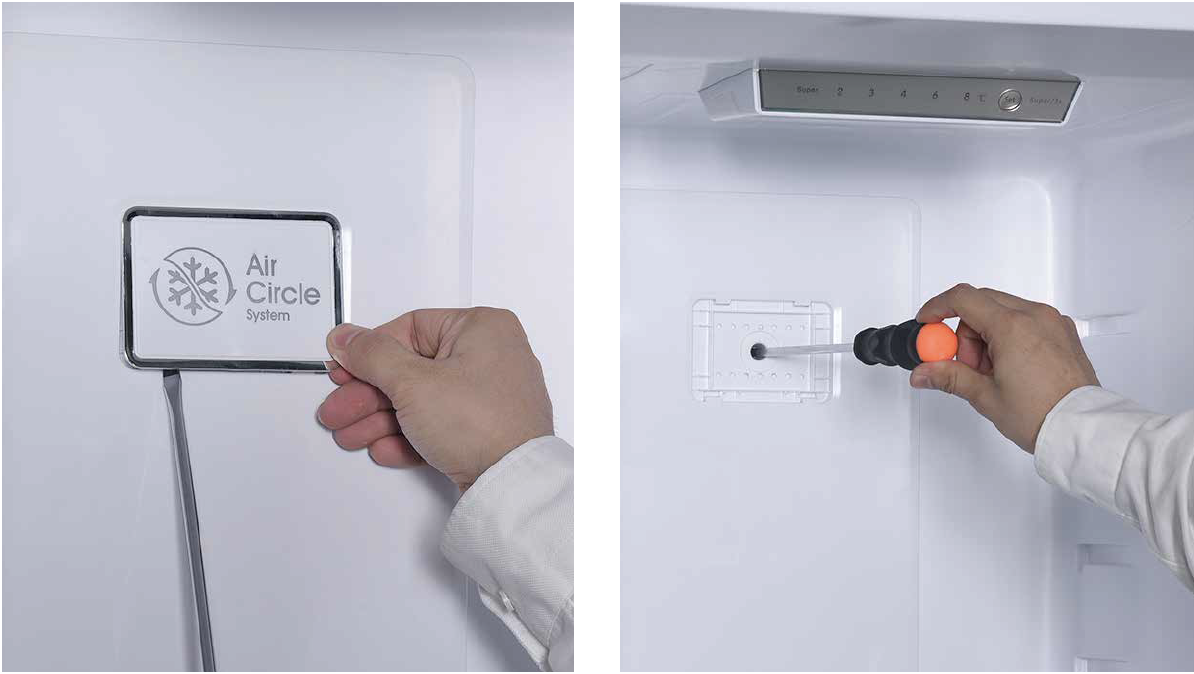
Step 7
Pull out the air duct.
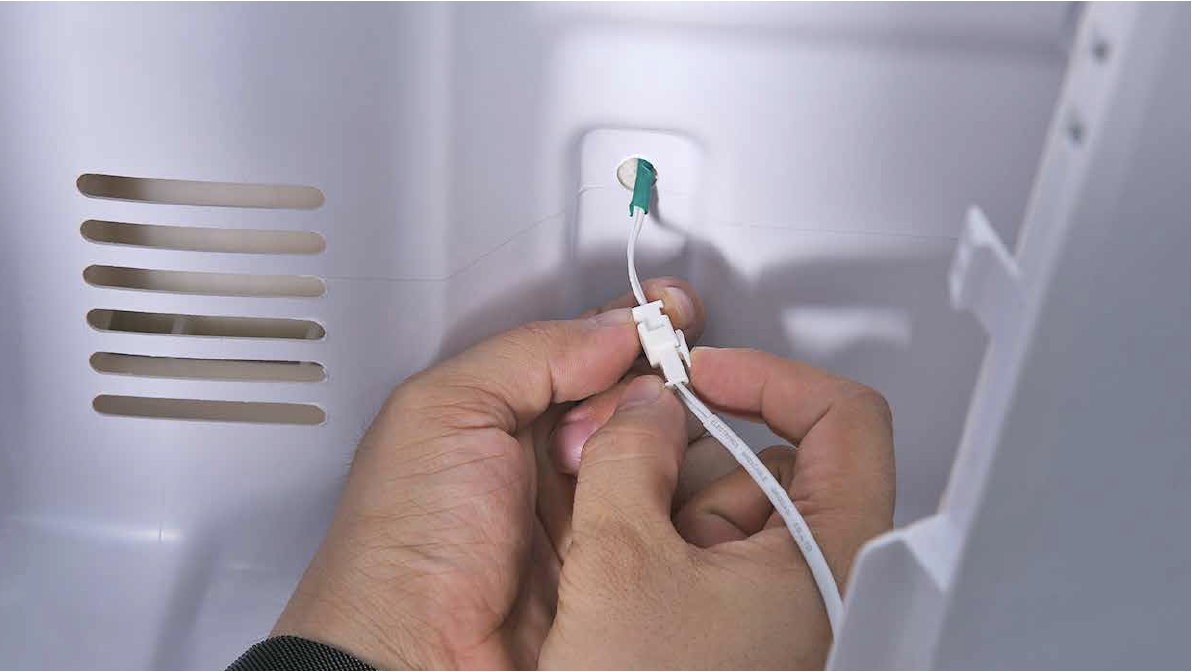
Step 8
Disconnect the terminals.
CHECK AND TEST 2
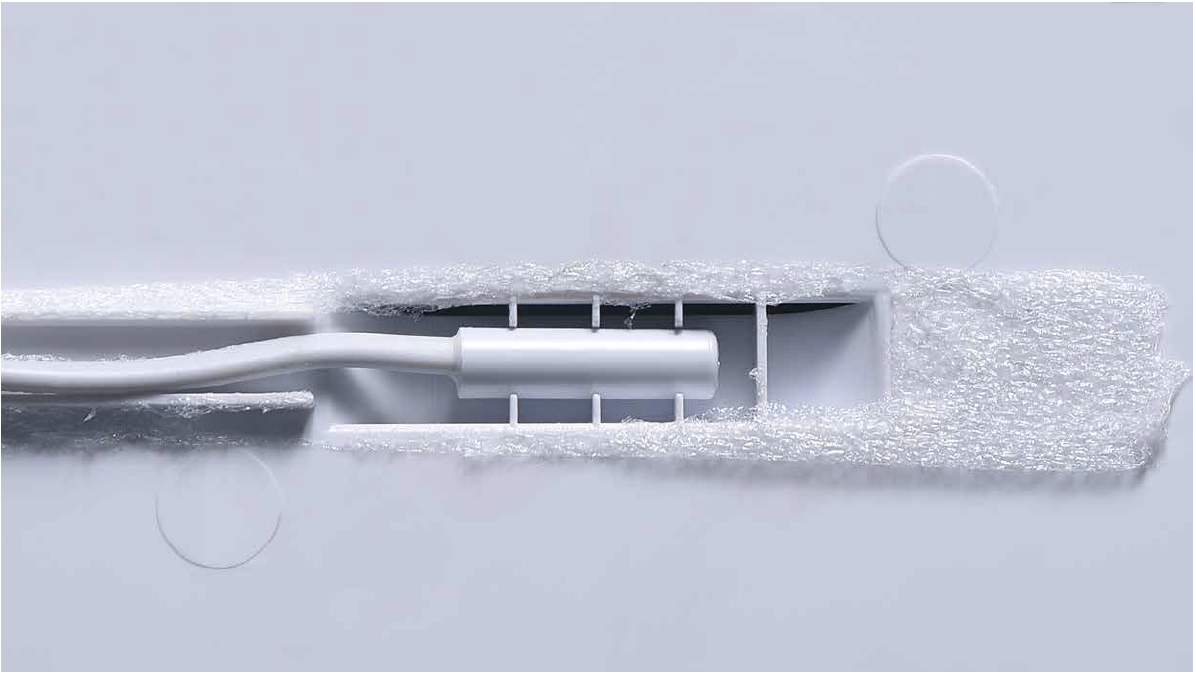
Step 1
Test resistance of sensor
from terminal in duct
cover.
DIAGNOSIS 2

PROCEDURE 2
Step 1
Release the clasp.
Step 2
Remove the foam air duct.
Step 3
Remove tape.
Step 4
Remove the broken sensor.
Reverse above procedures to reinstall temp. sensor and fridge air duct.
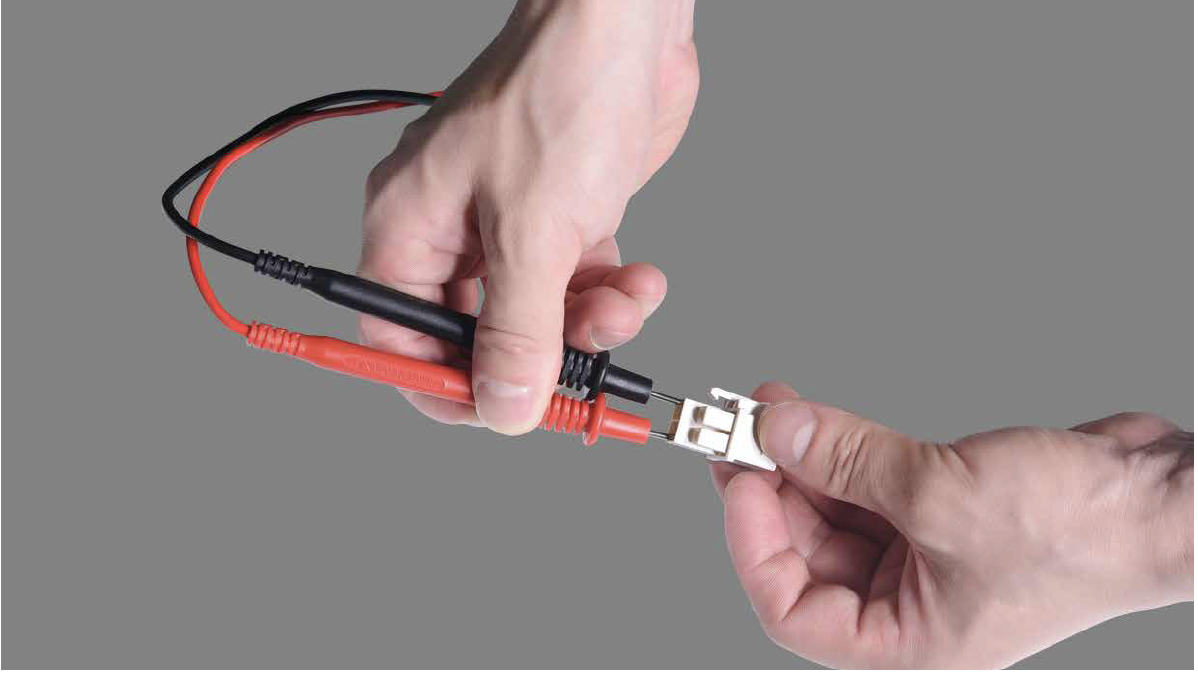
CHECK AND TEST 3
Step 1
Set multimeter to
resistance gear.
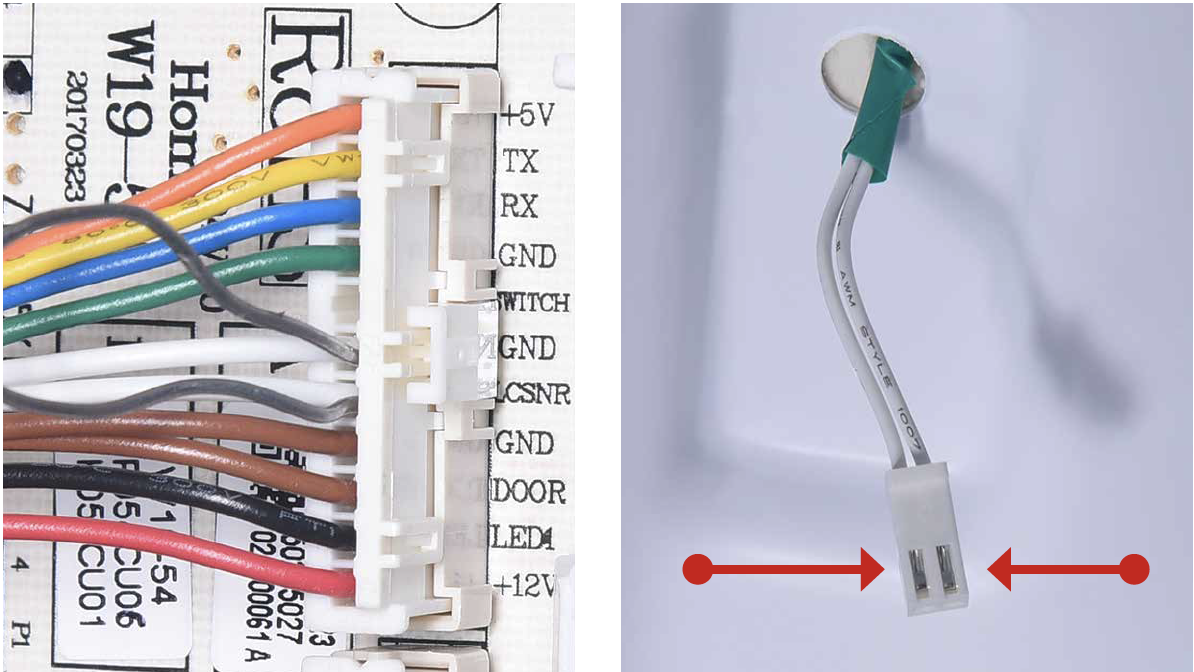
Step 2
Use a wire to connects 2 pins of terminals in PCB area, then measure the connection.
DIAGNOSIS 3


PROCEDURE 3

DIAGNOSIS 5


GO BACK TO COMPONENT LIST