
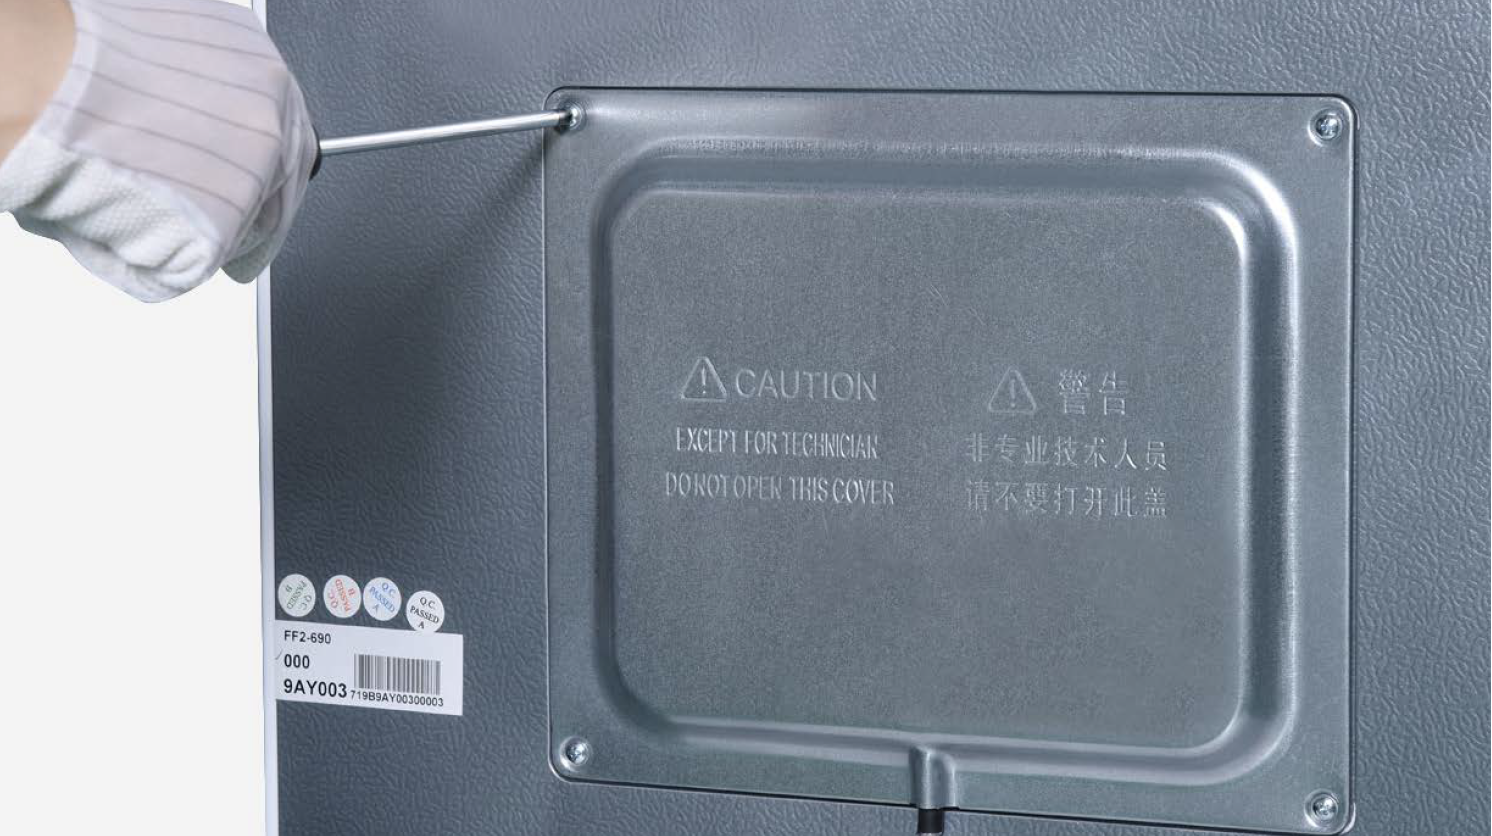
CHECK AND TEST 1
Step 1
Unscrew cover of mainboard with a Cross-head screwdriver.
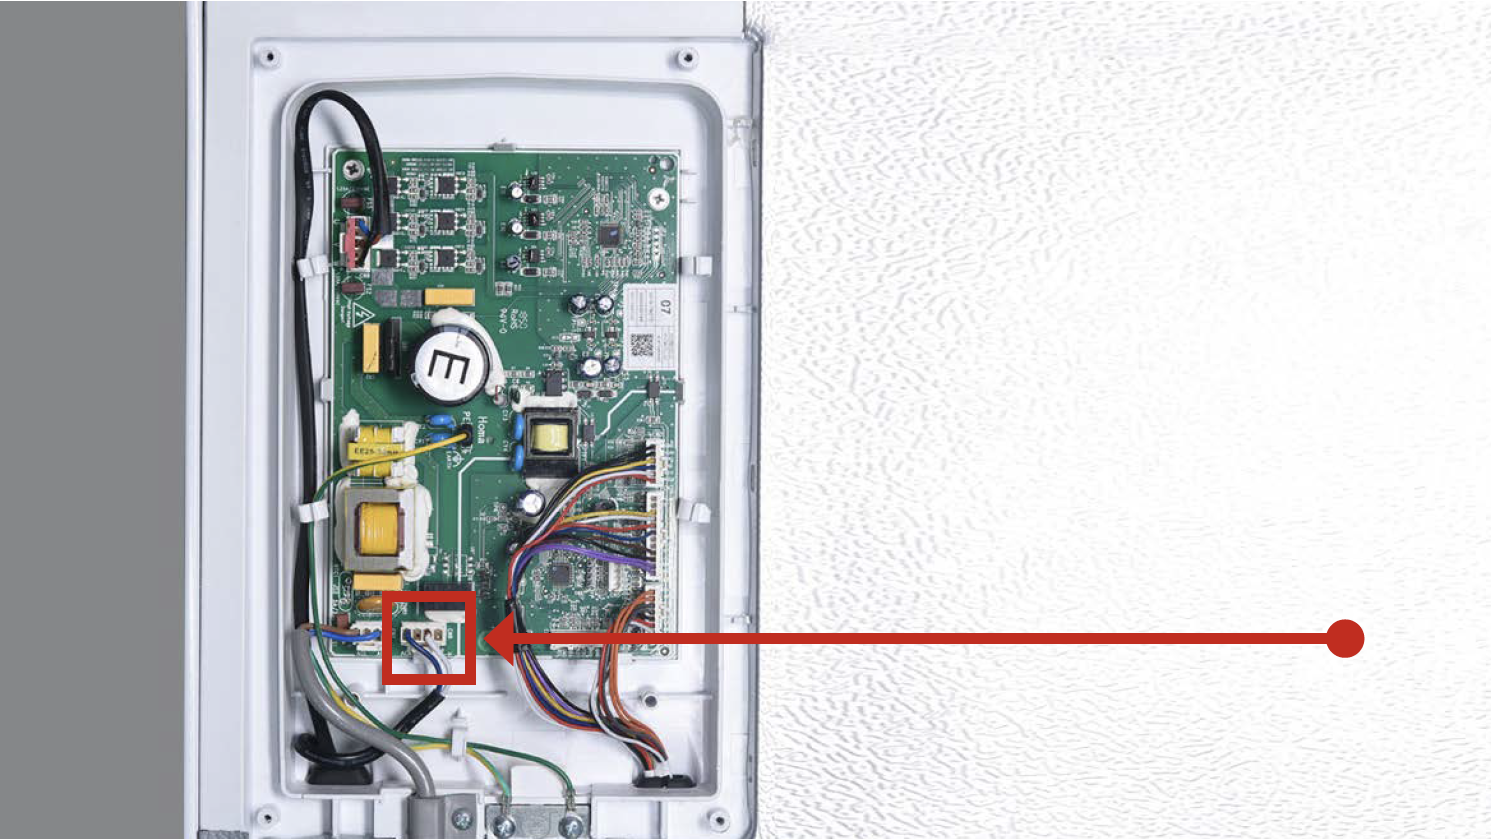
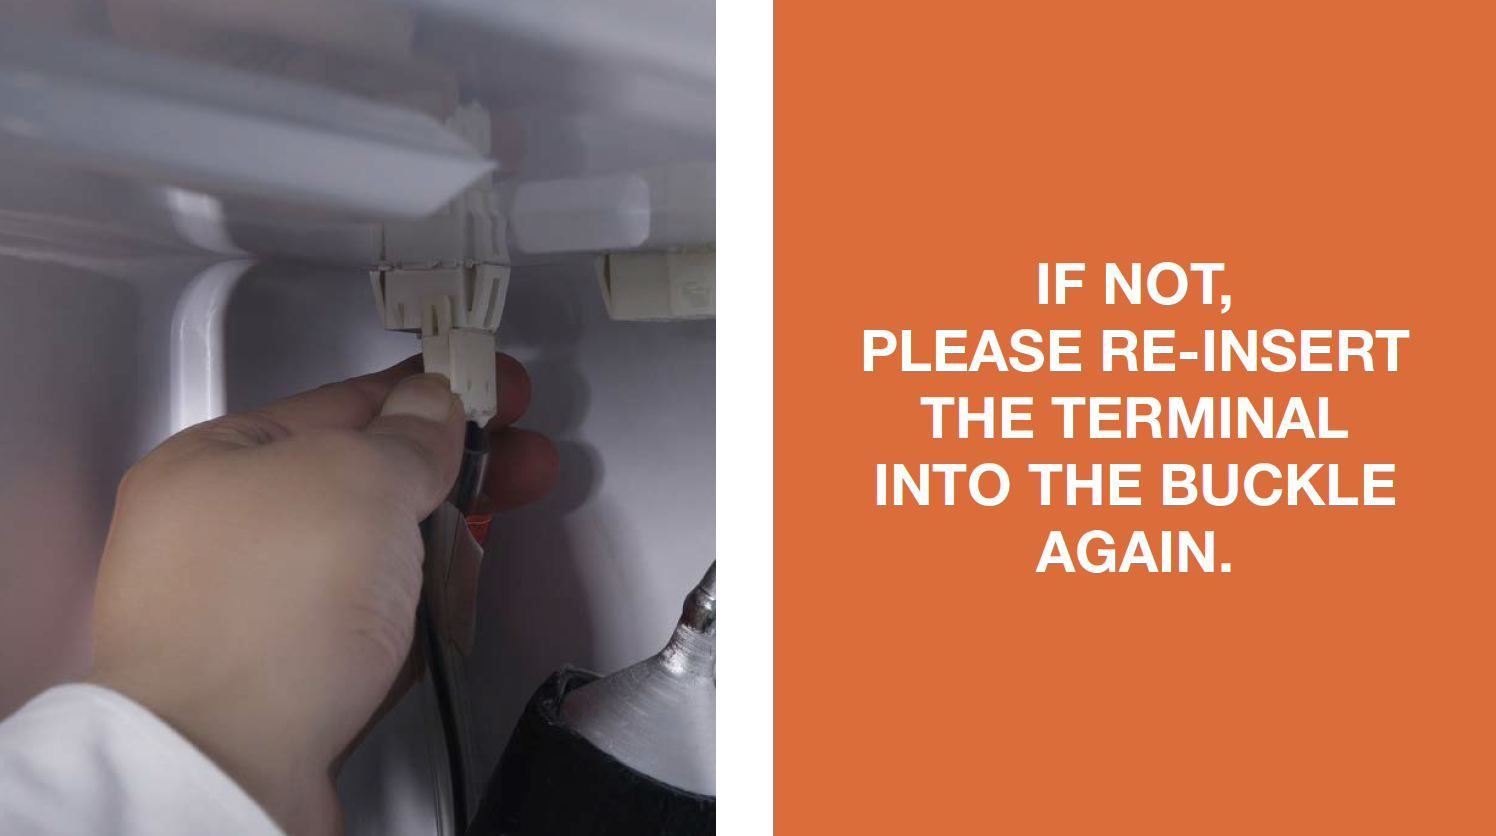
Step 2
In PCB area, check if terminal is inserted to final position.
If not, reinsert it to final position.
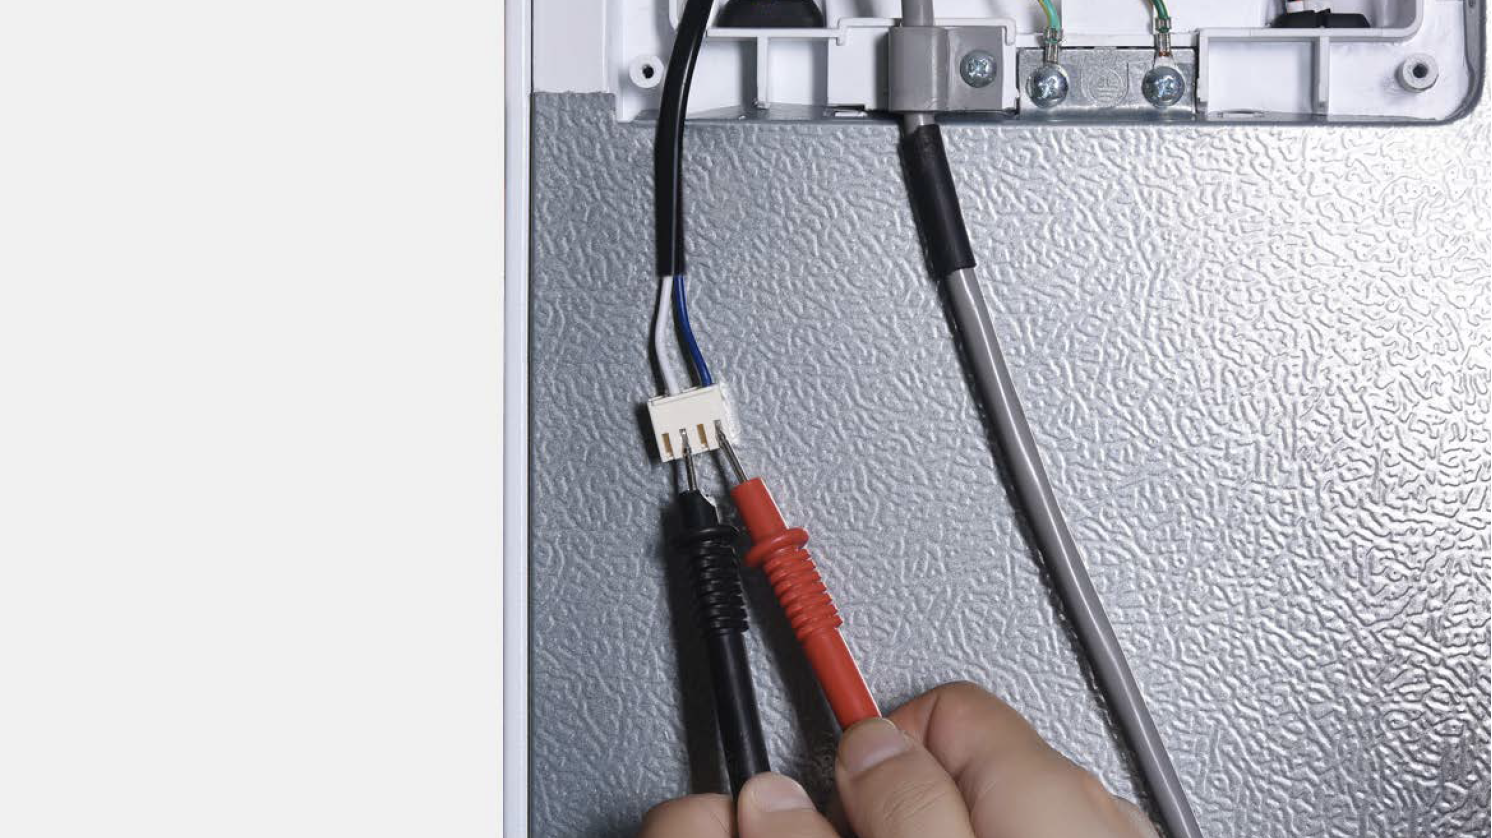
Step 3
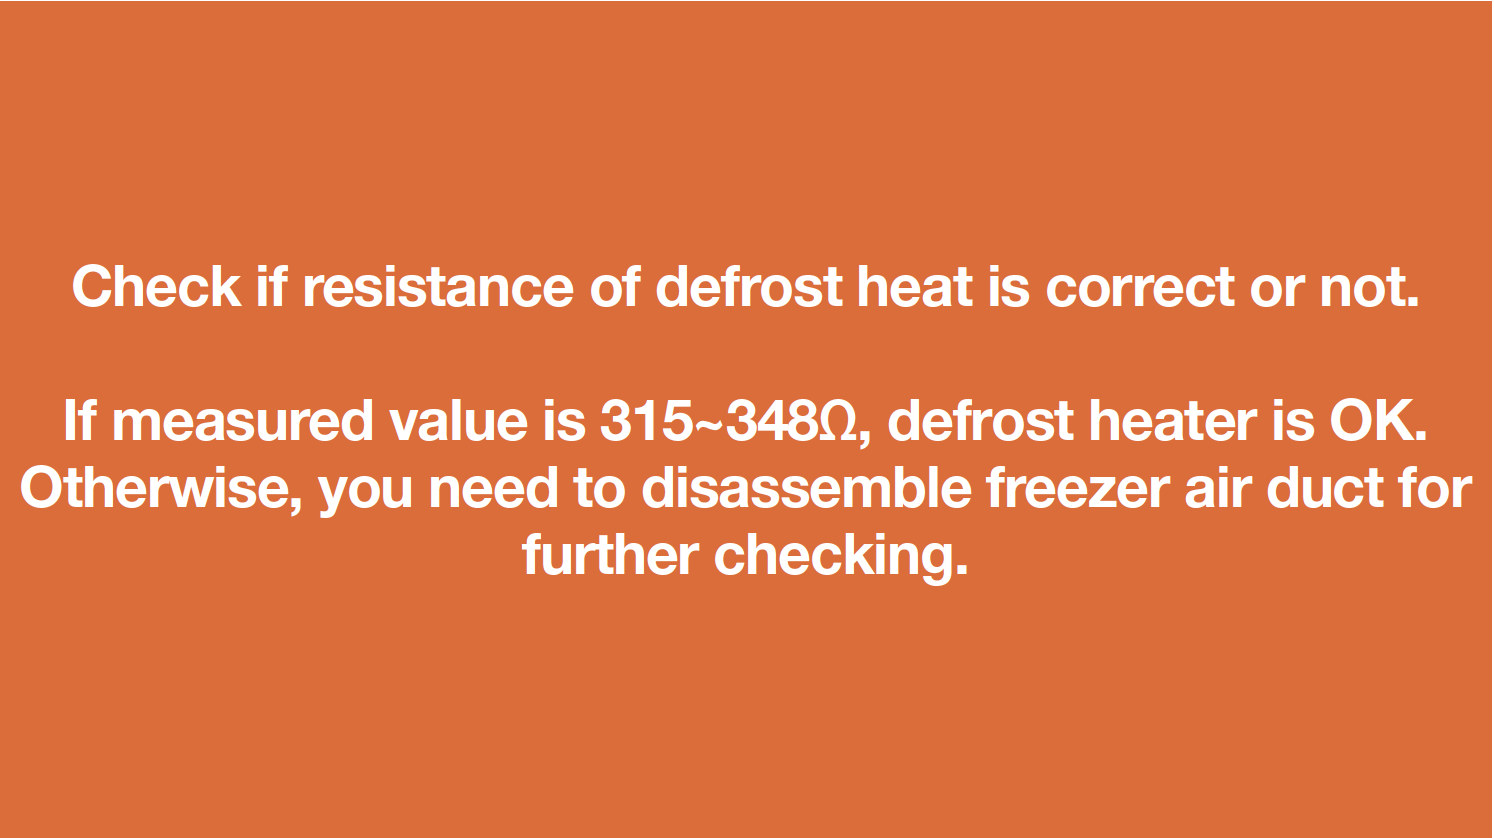
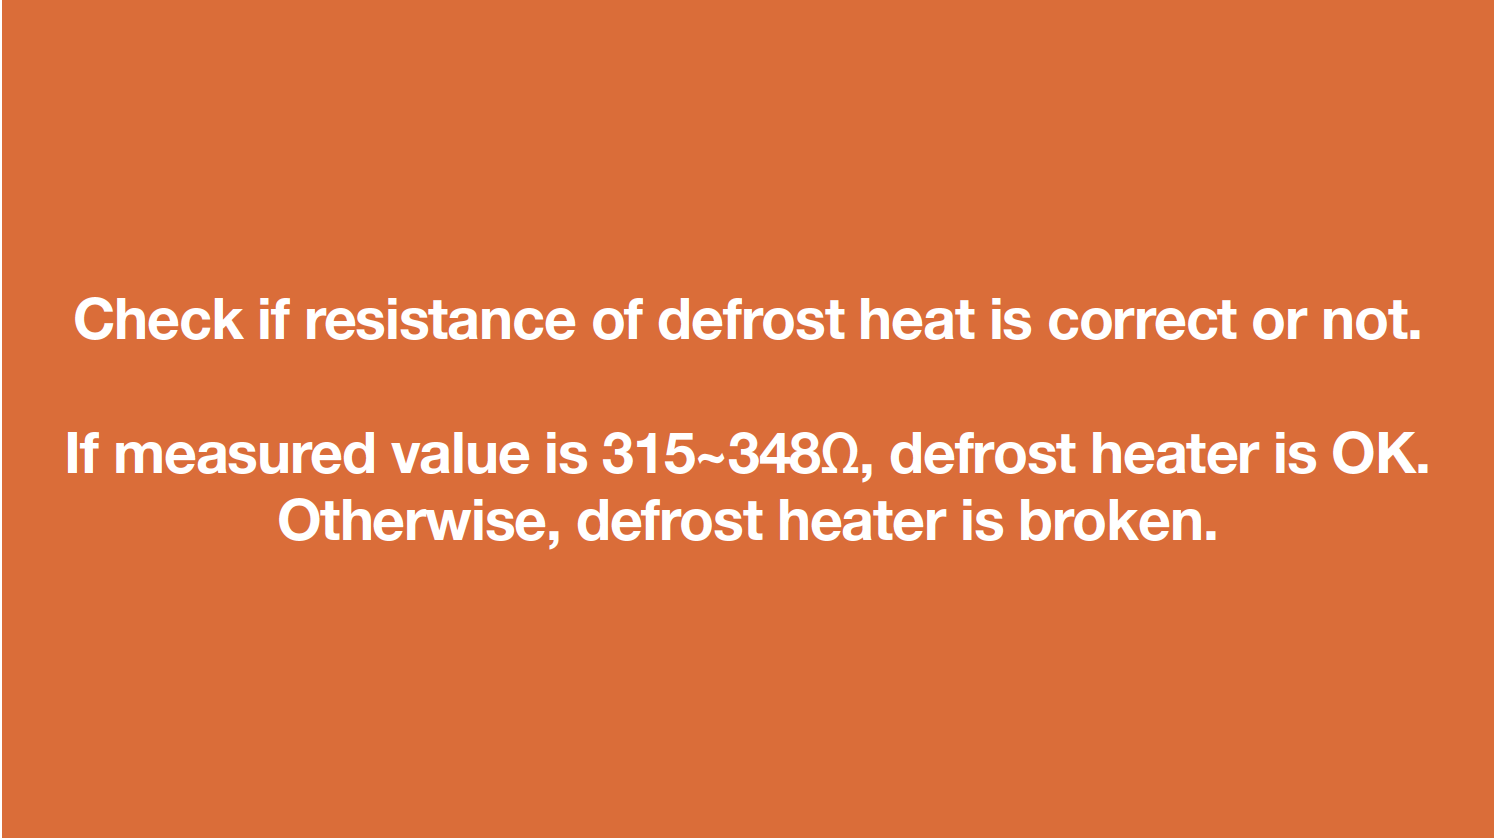
Measure resistance of heater from terminal in PCB area.
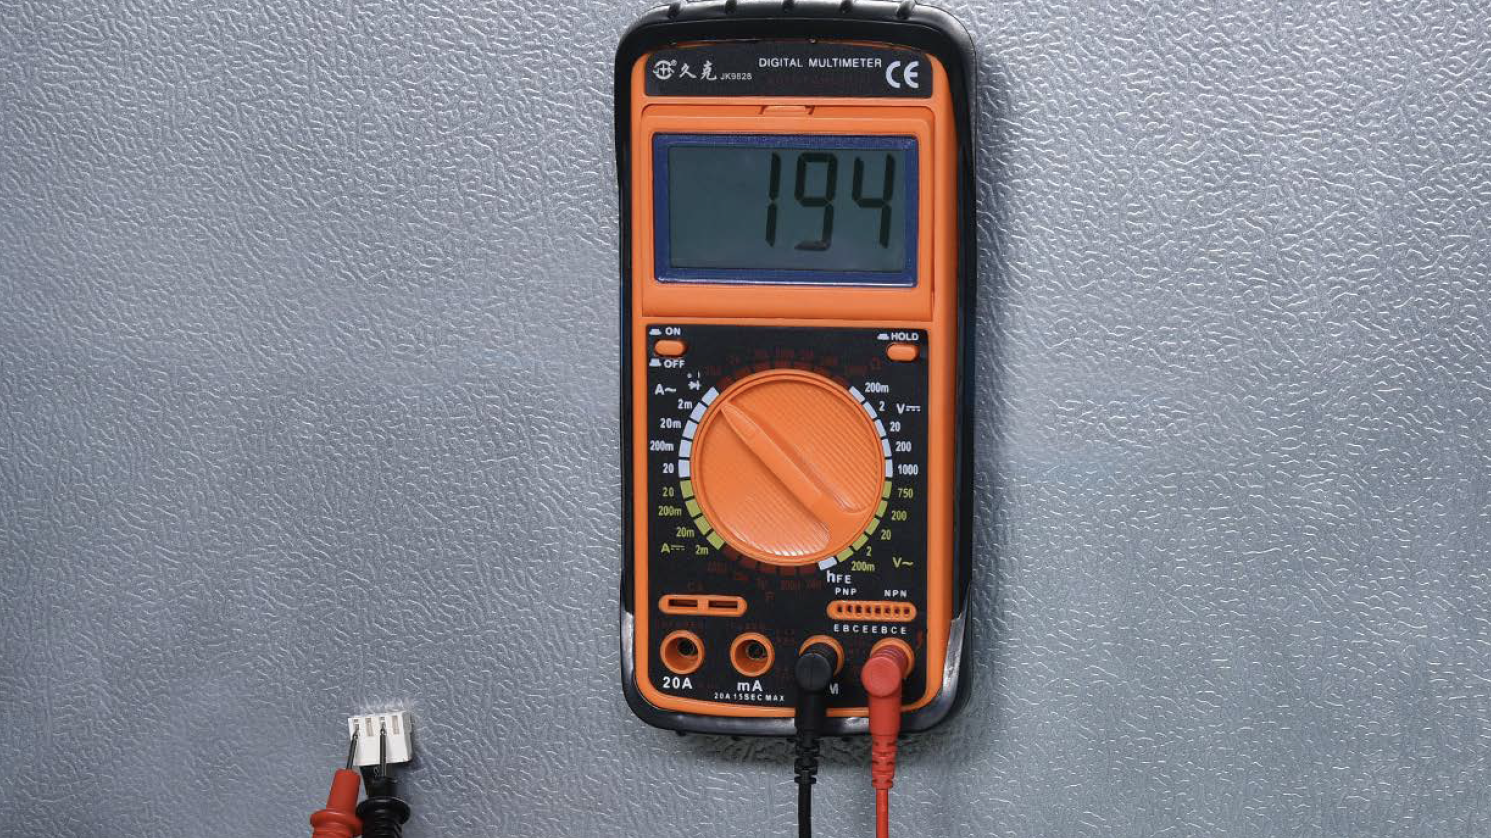
Step 4
Check the result.

DIAGNOSIS 1

PROCEDURE 1
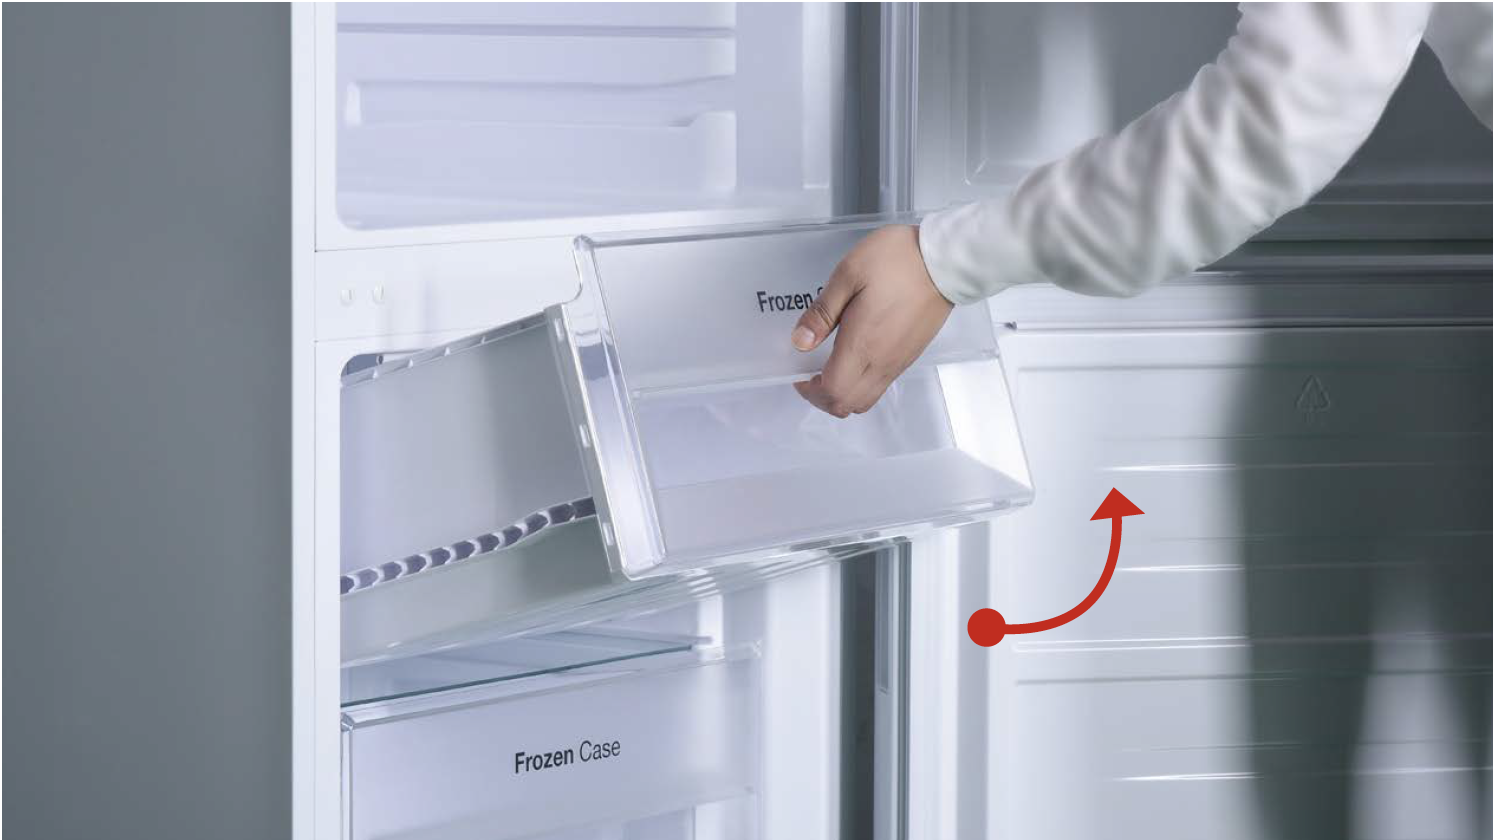
Step 1
Remove all freezer drawers.
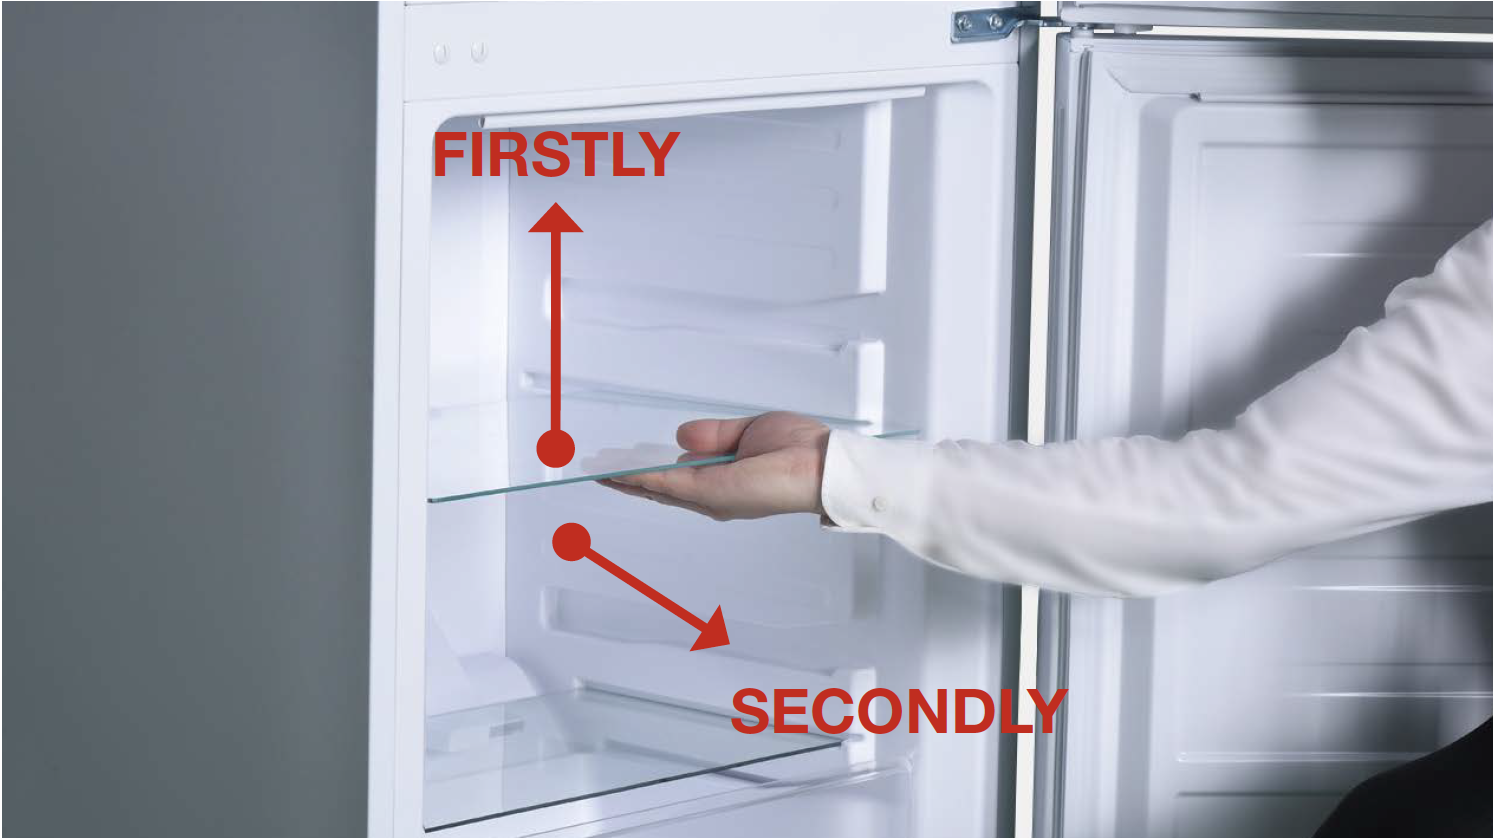
Step 2
Remove all glass shelves.
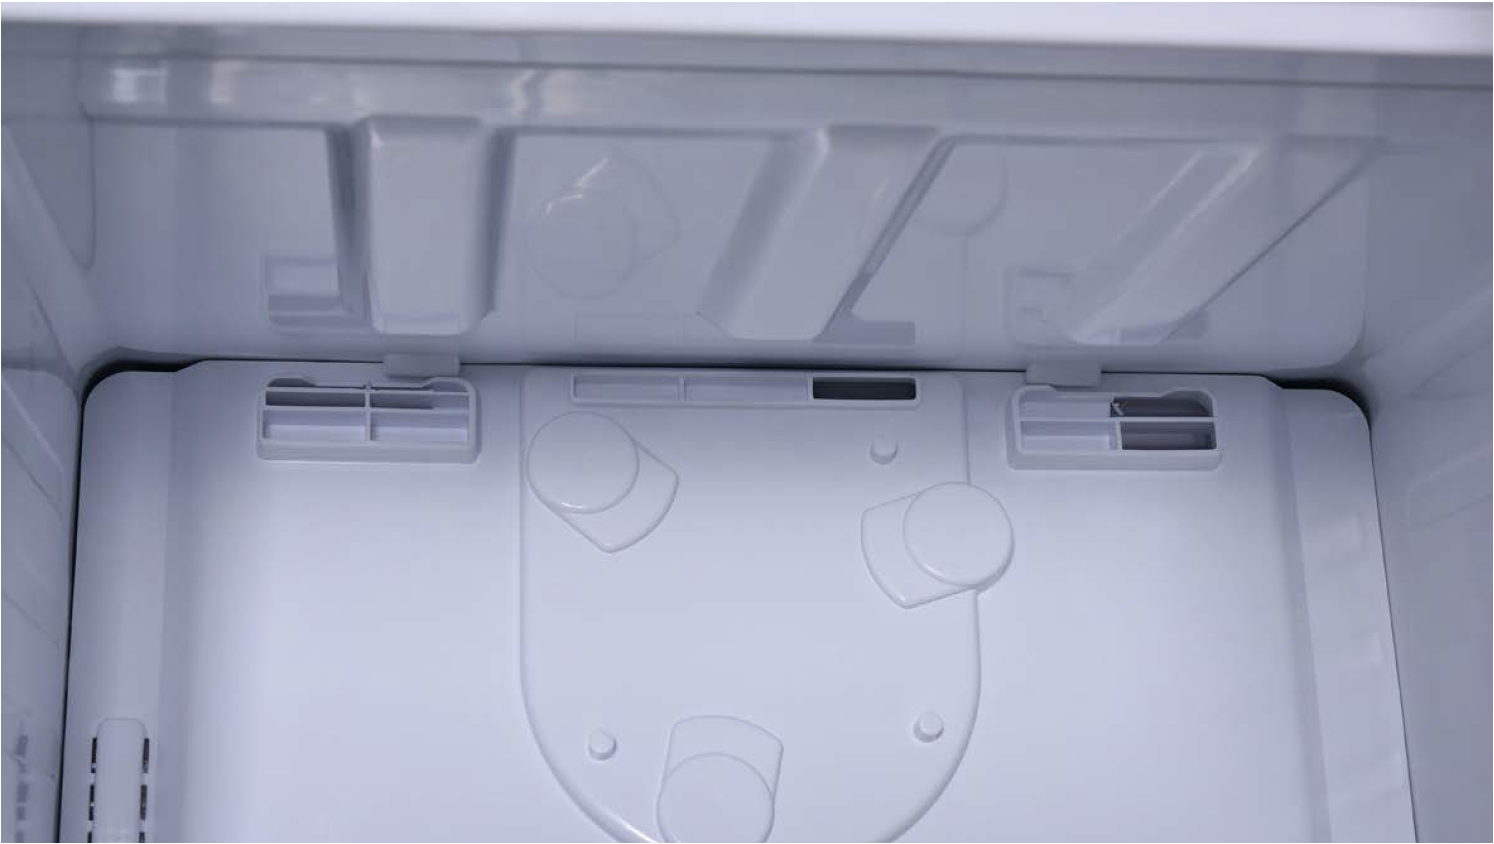
Step 3
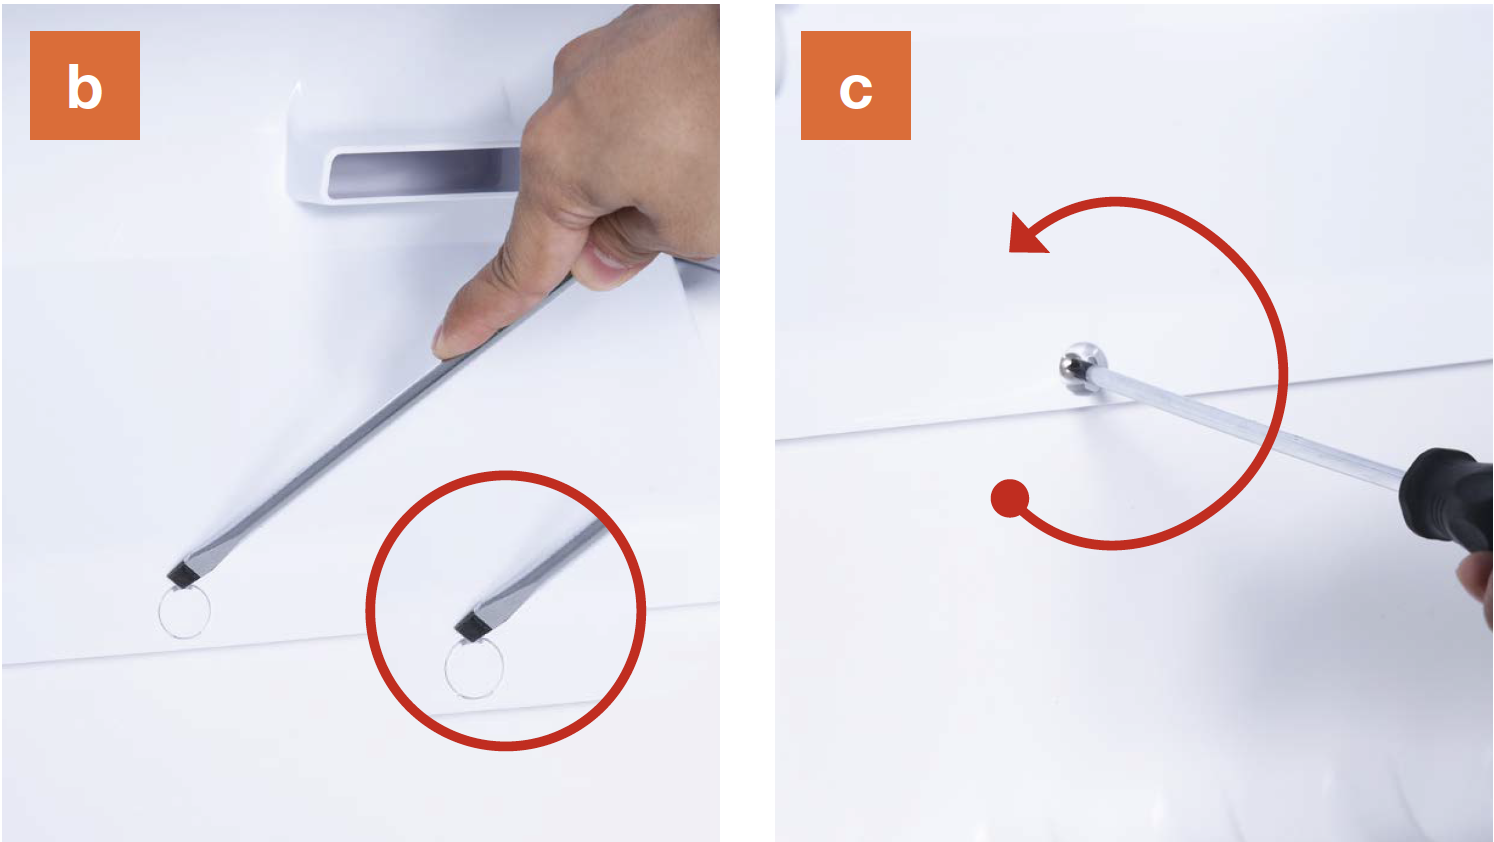
Unscrew the screws on
air duct.
a. Check the freezer air
duct to find the three
screw covers.
b. Remove the screw
covers (total of three)
on the air duct with
slotted screw driver.
Step 4
Dismantle the air duct.
a. Catch the bottom of
air duct and pull down
the air duct.

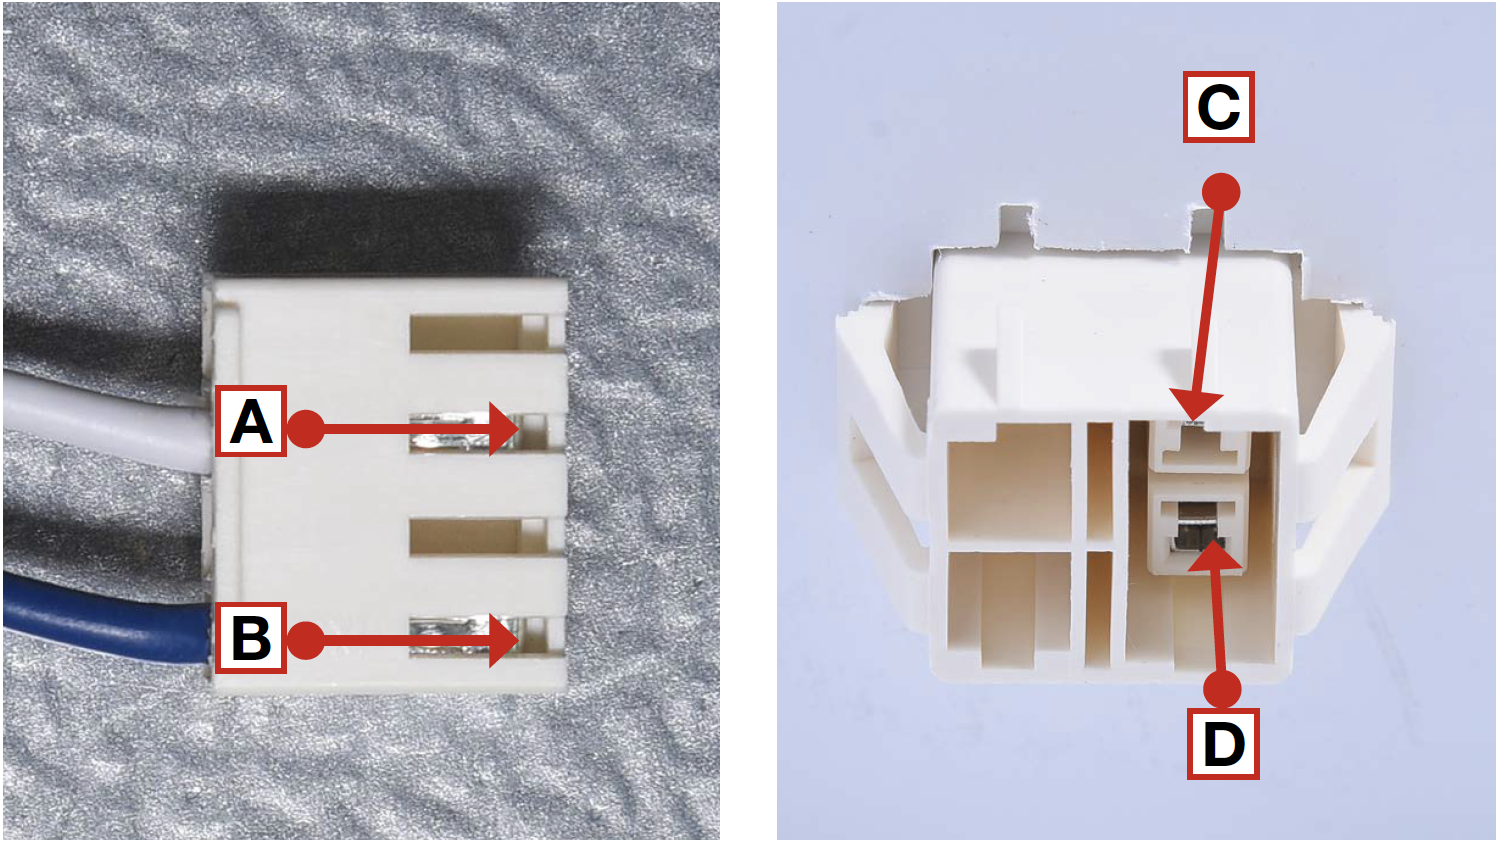
b. Pay attention to the connectors when pulling out the air duct.
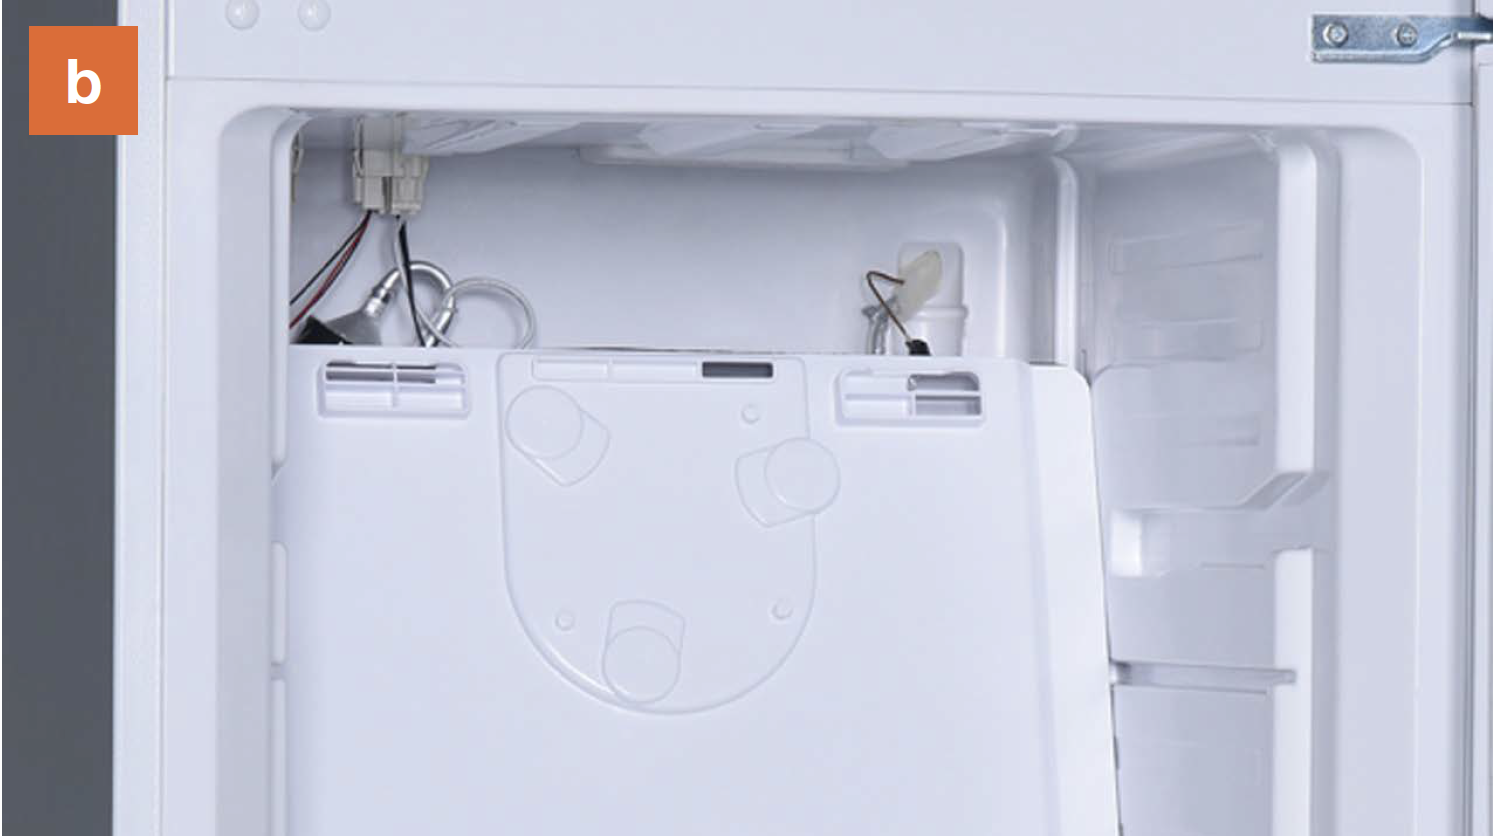
c. Disconnect the
terminal for fan motor.
Disconnect the
terminal for freezer
temp. sensor.
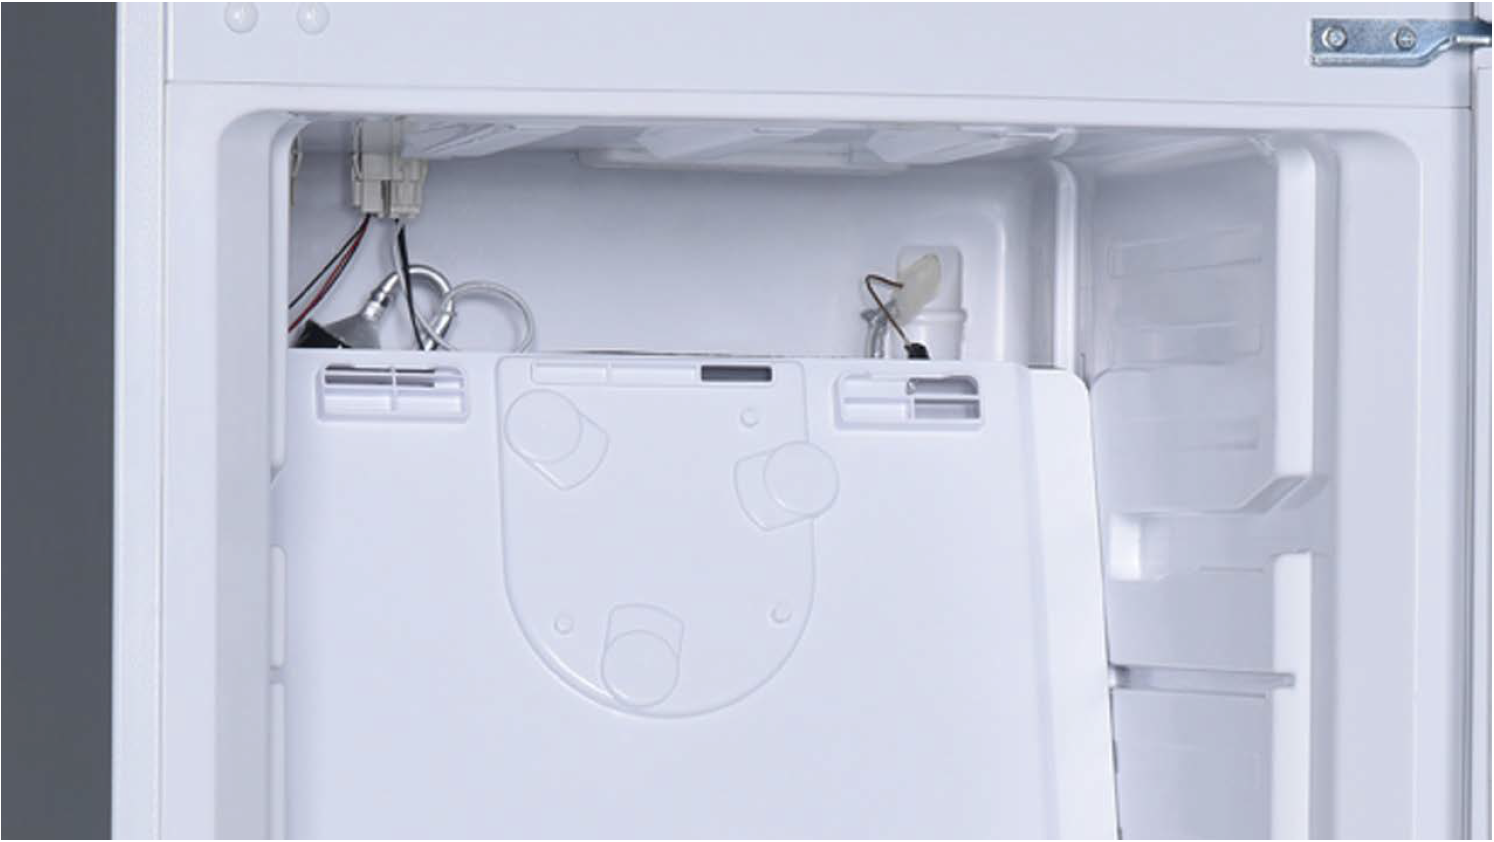
d. Move the air duct out of the freezer compartment.
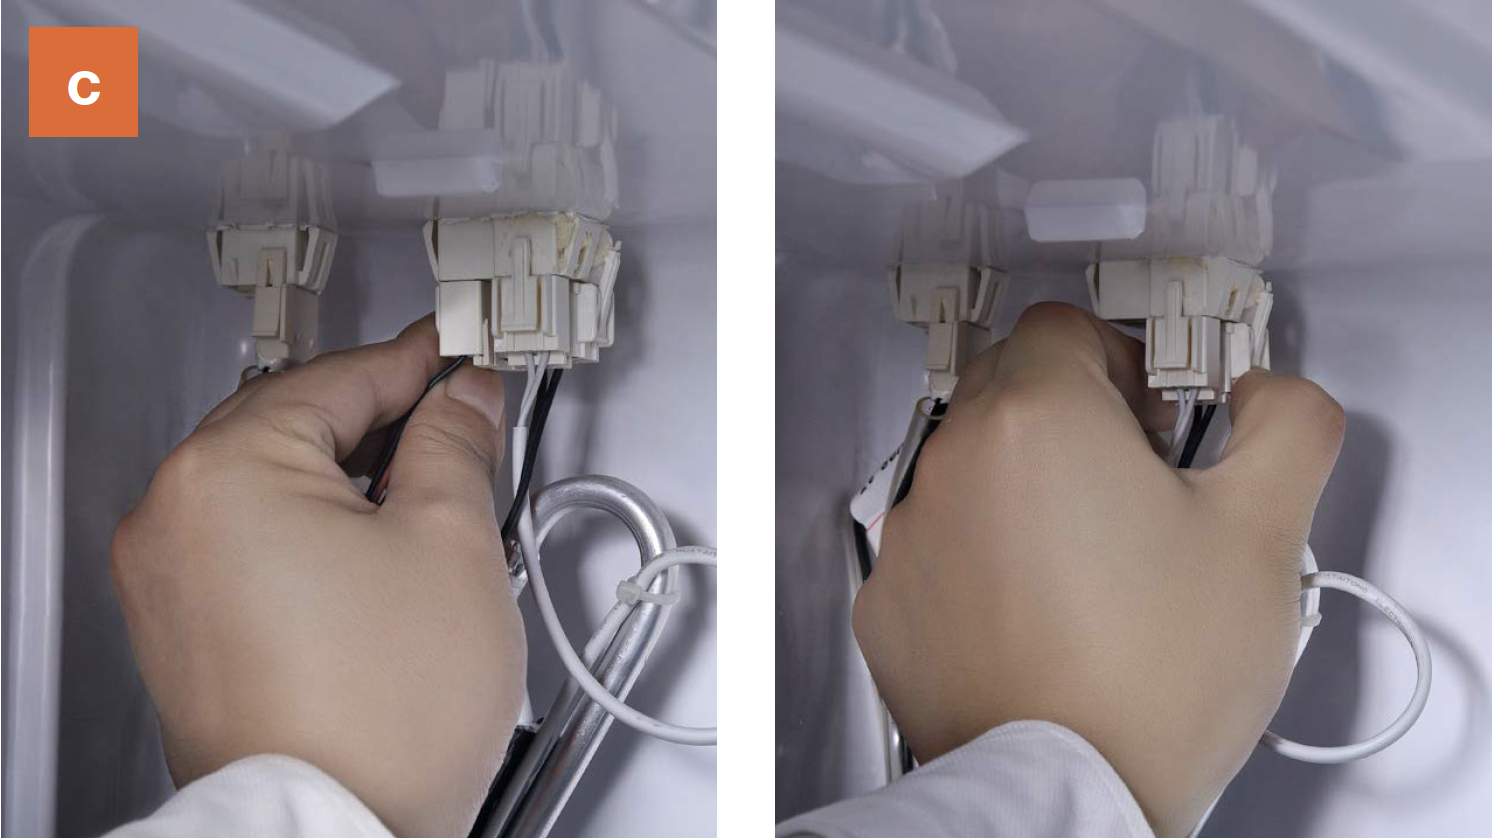
CHECK AND TEST 2
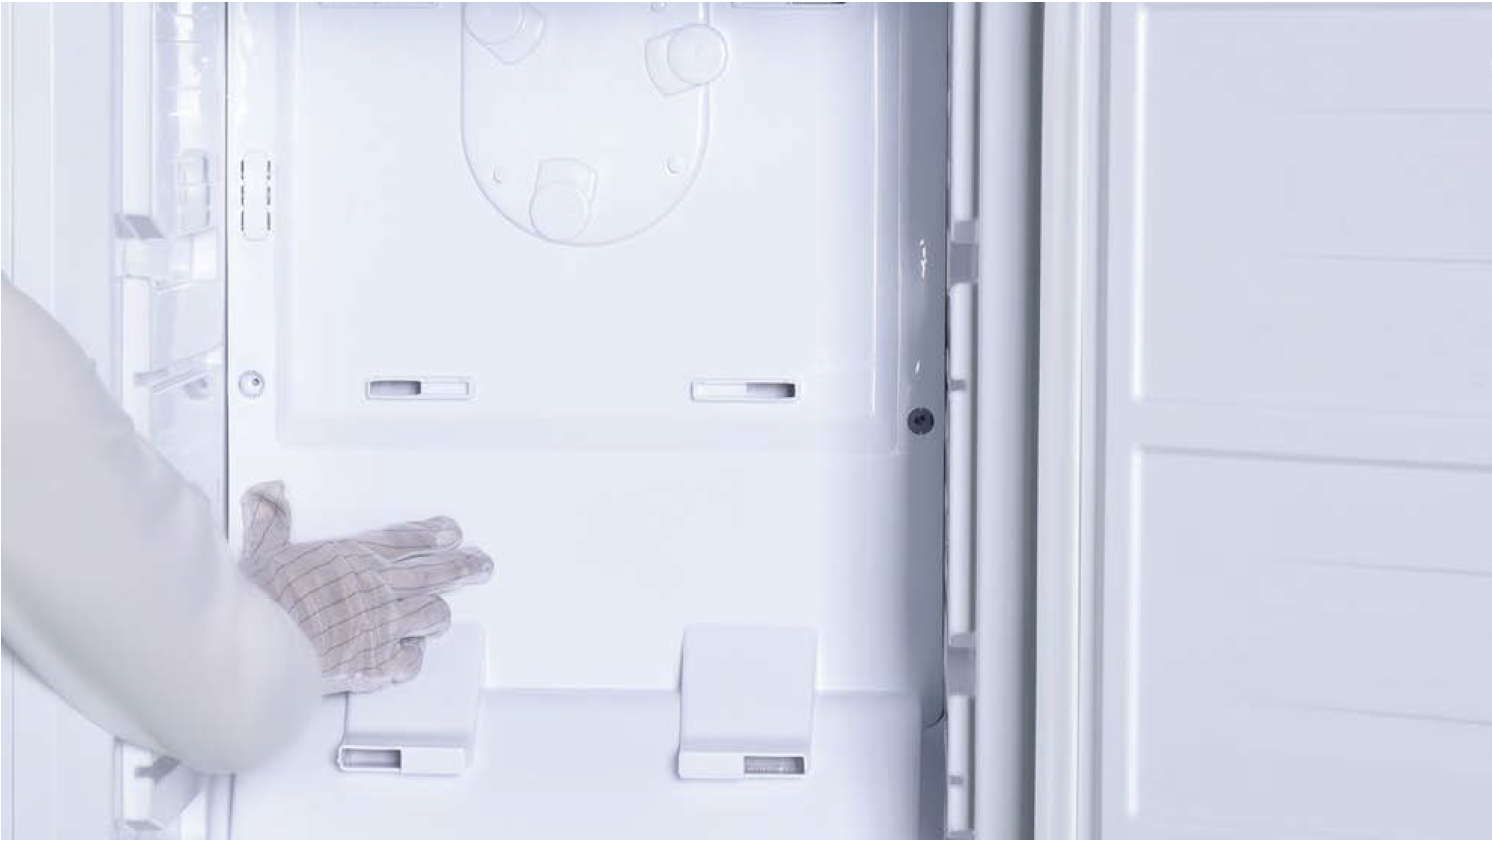
Step 1
Check if terminal is pushed properly into final position.
Step 2
Check if the terminal is stuffed with foam.
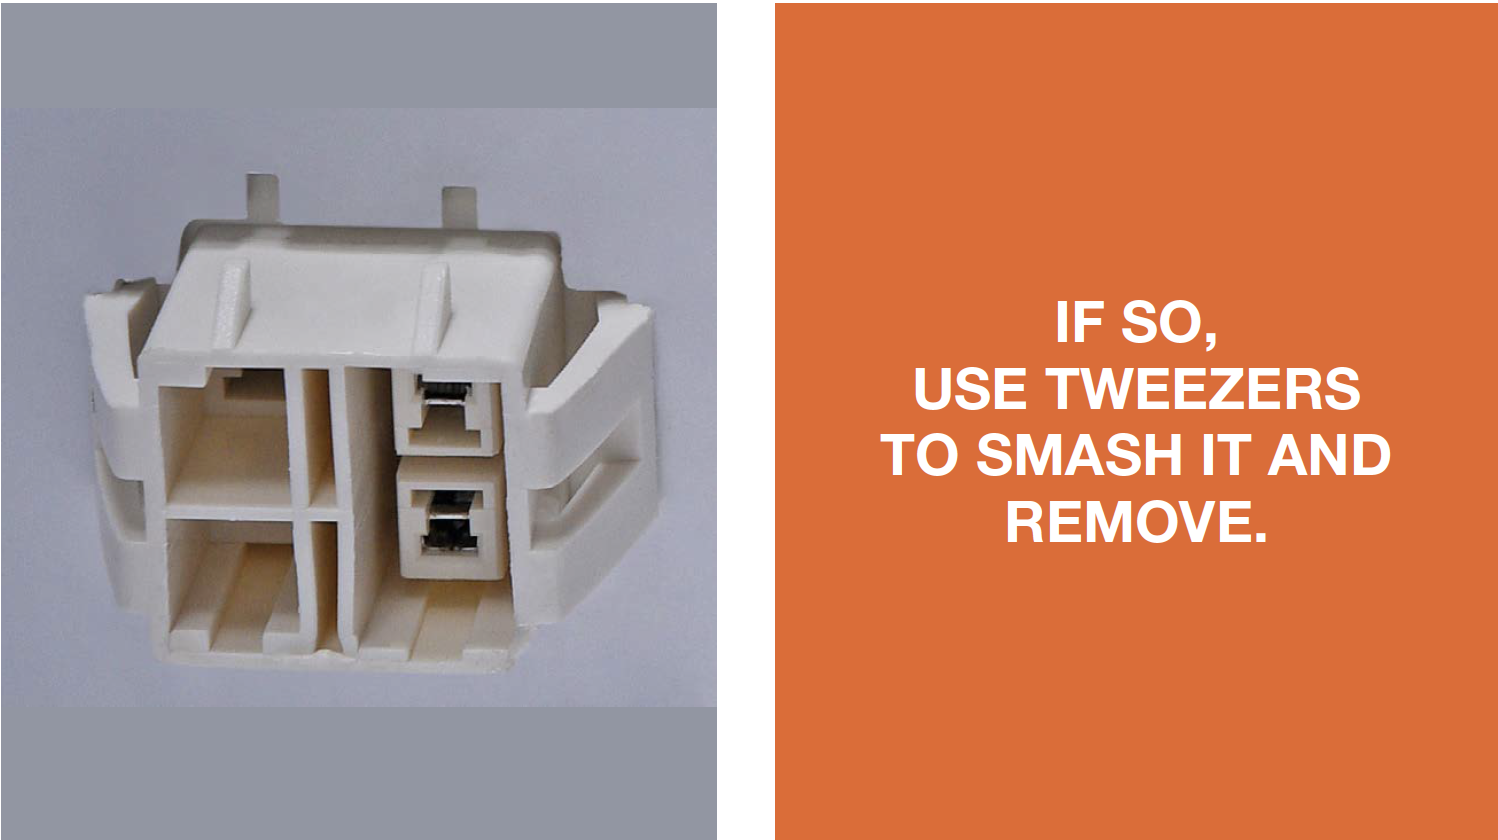
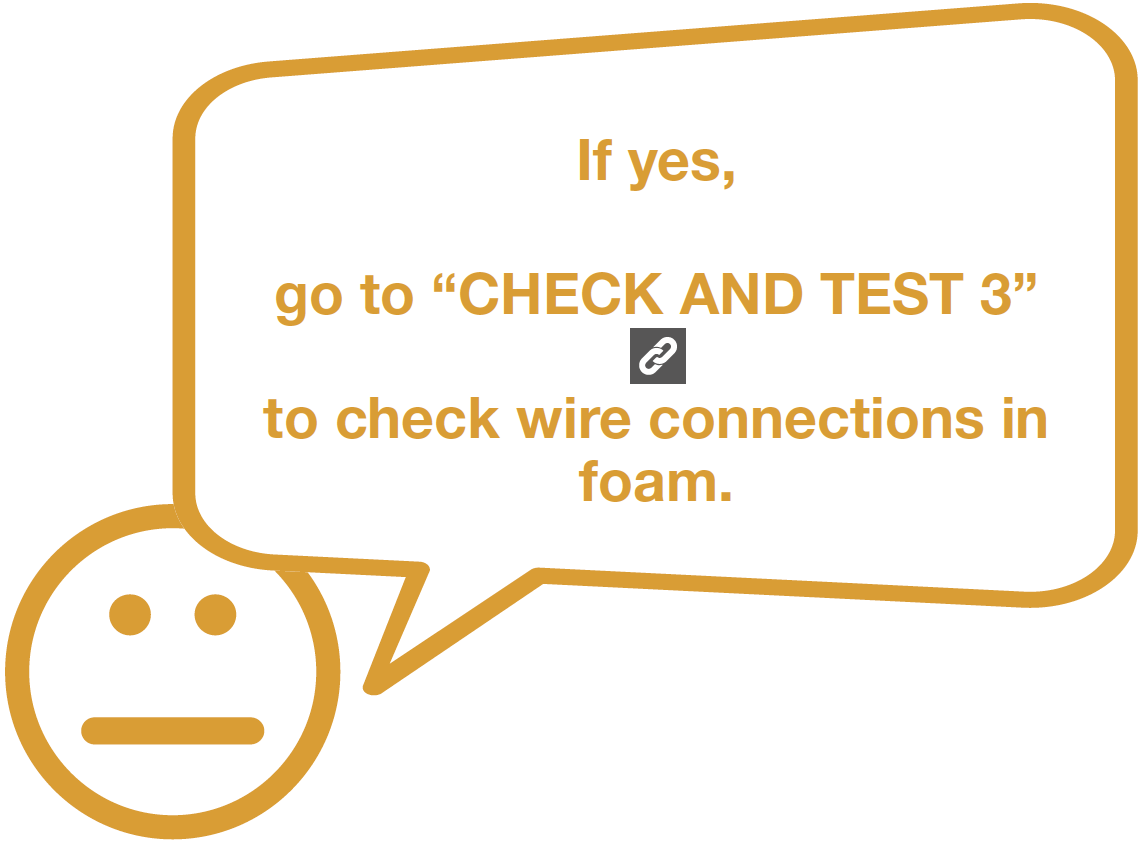
Step 3
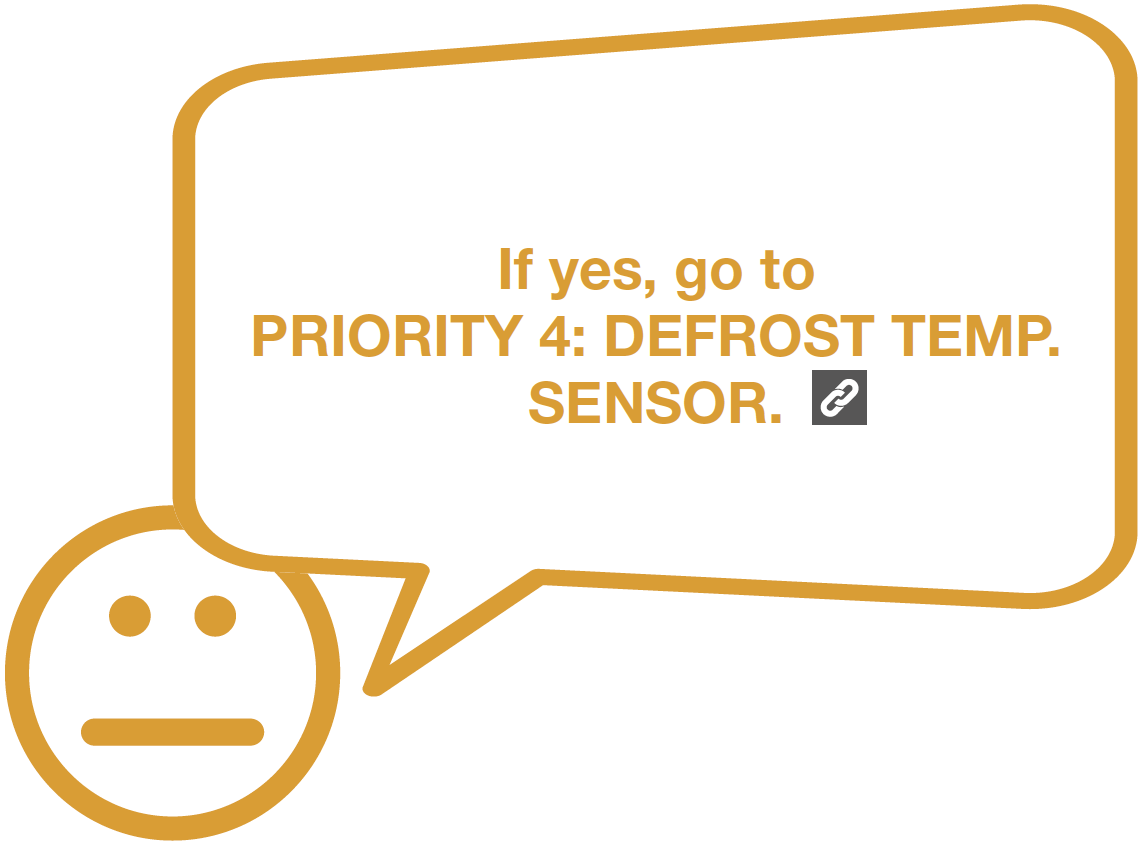
Check if wires of defrost
heater are broken.
If yes, follow procedures
on next page to replace
the heater.

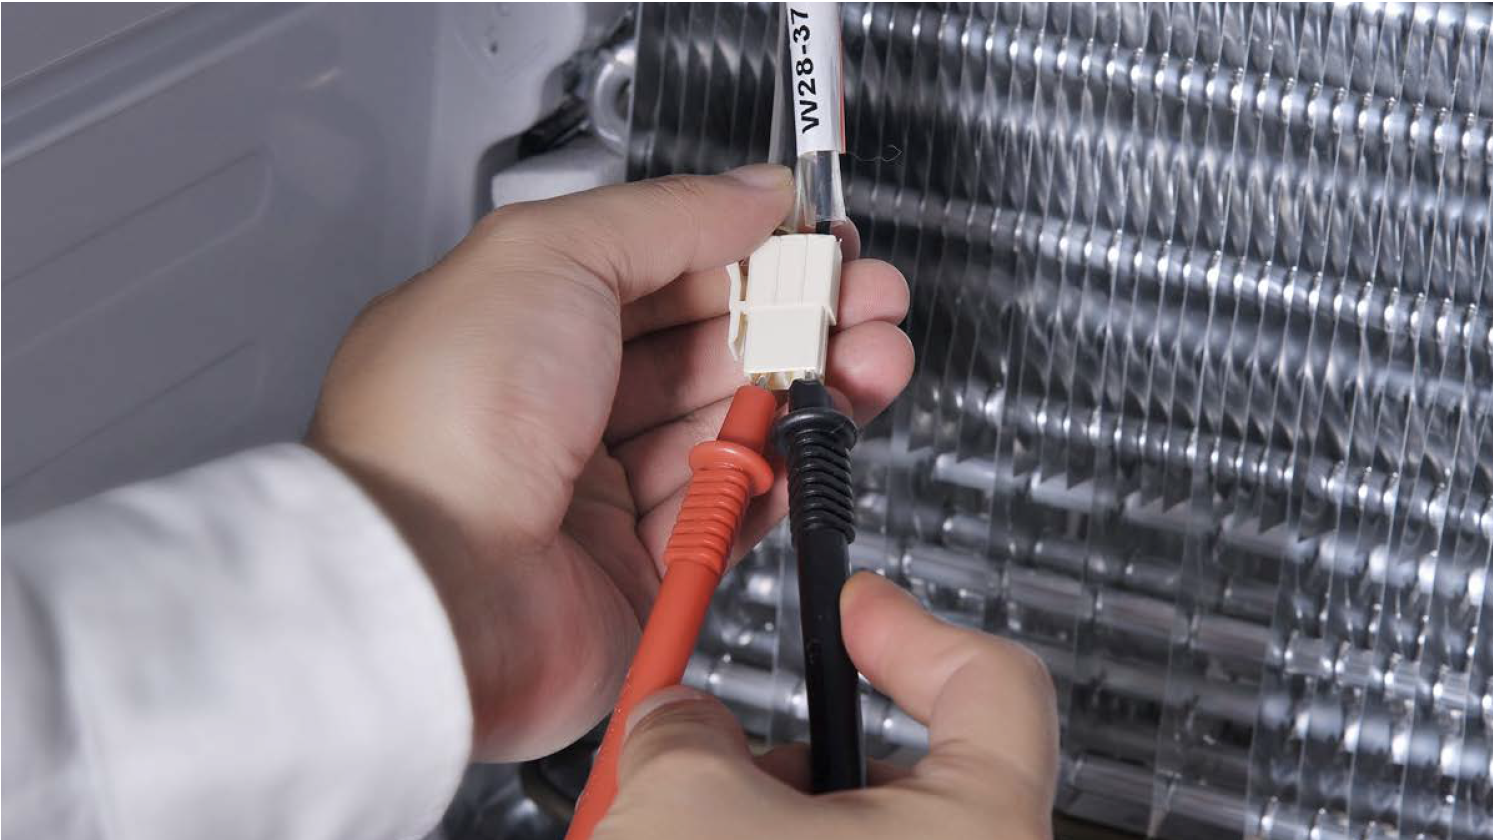
Step 4
Measure resistance of heater from terminal in freezer.
DIAGNOSIS 2
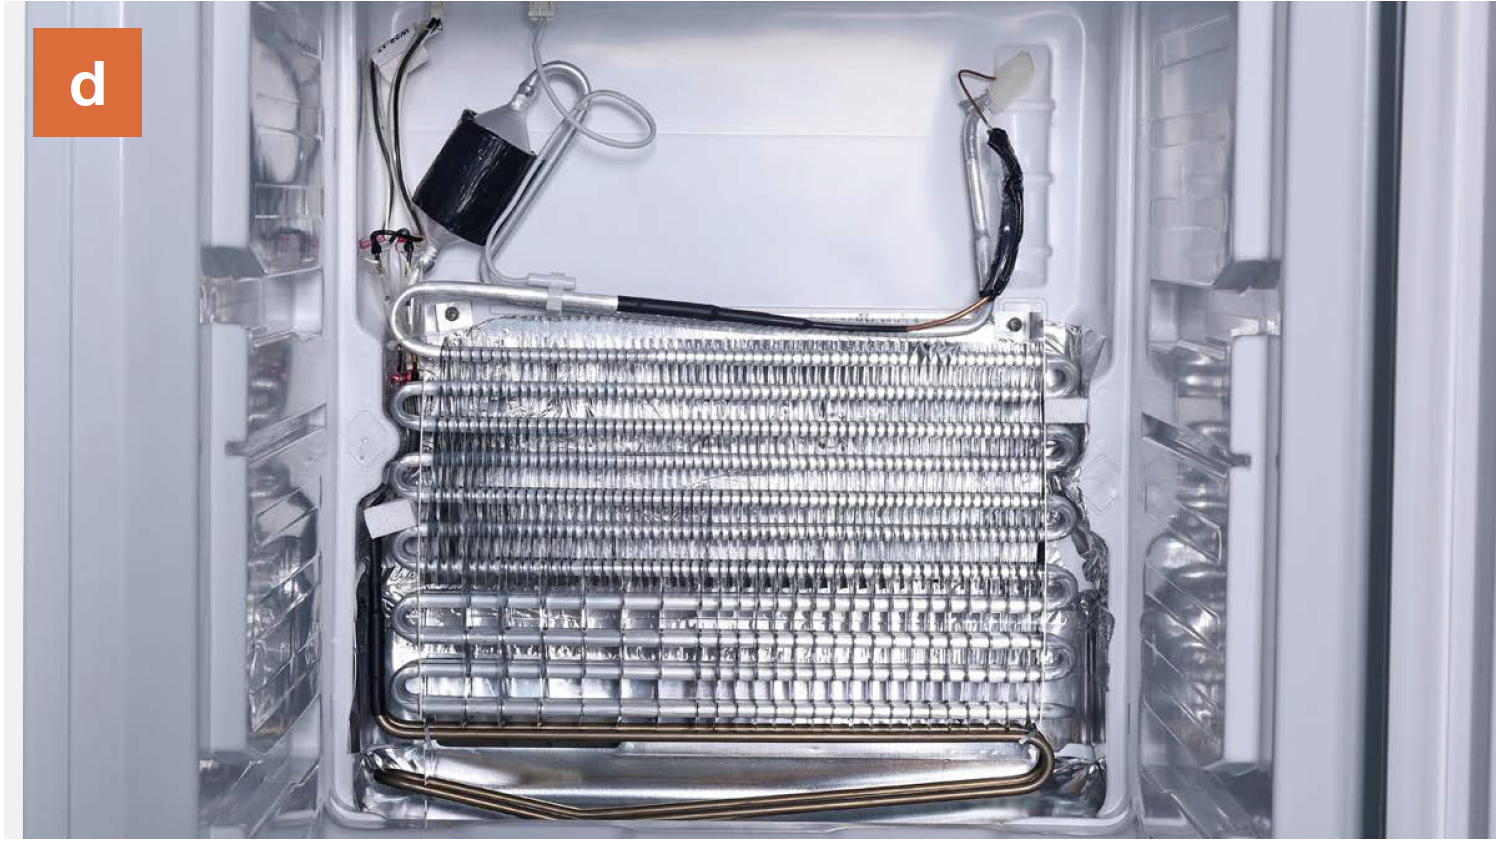
PROCEDURE 2
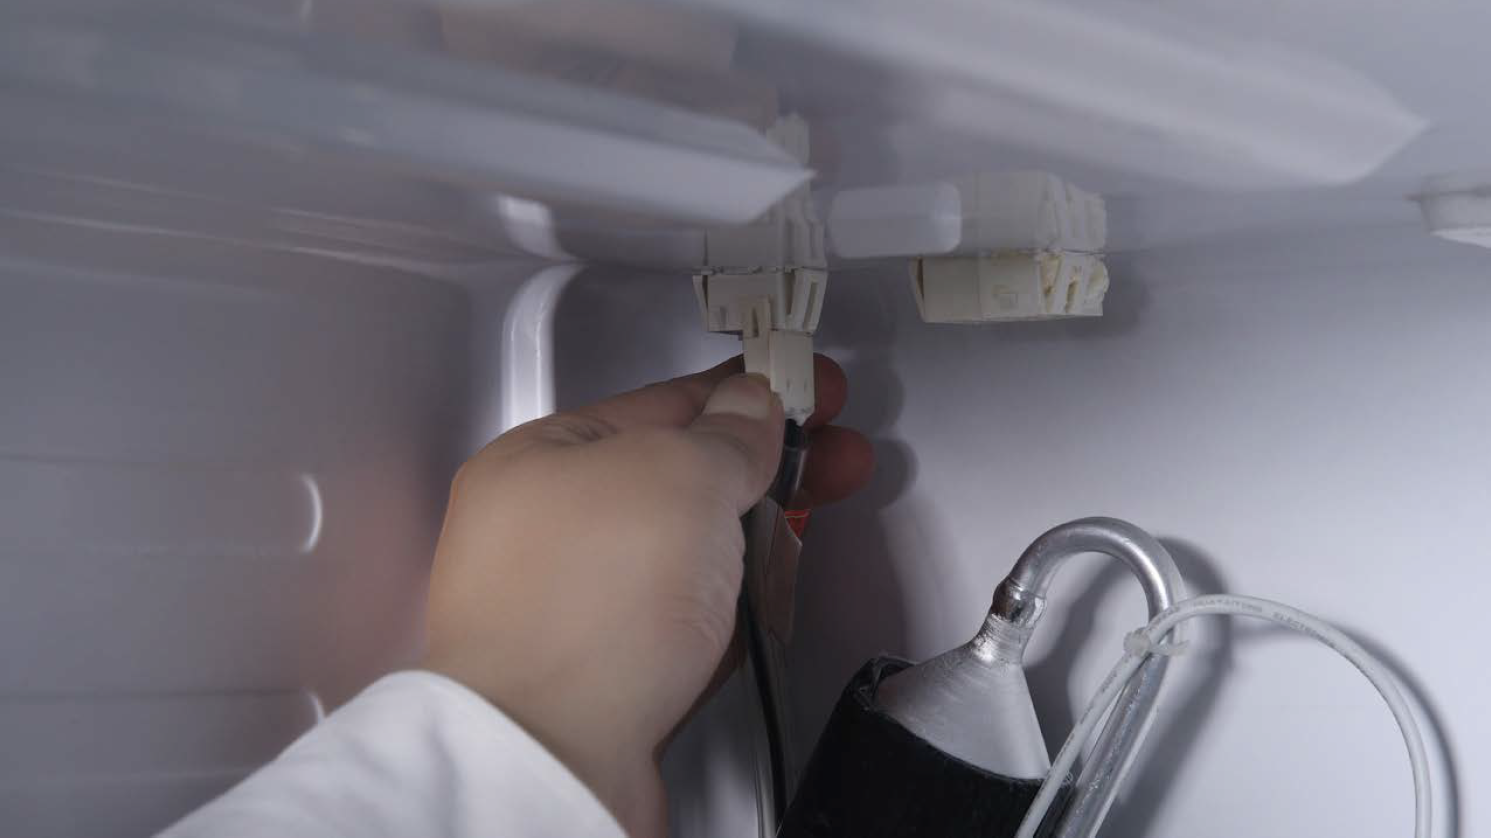
Step 1
Disconnect terminal of heater.
Step 2
Unscrew the two screws with 6mm Philips driver.
Step 3
Cut off the fastening strap.
Step 4
Take out the holding foam.
Step 5
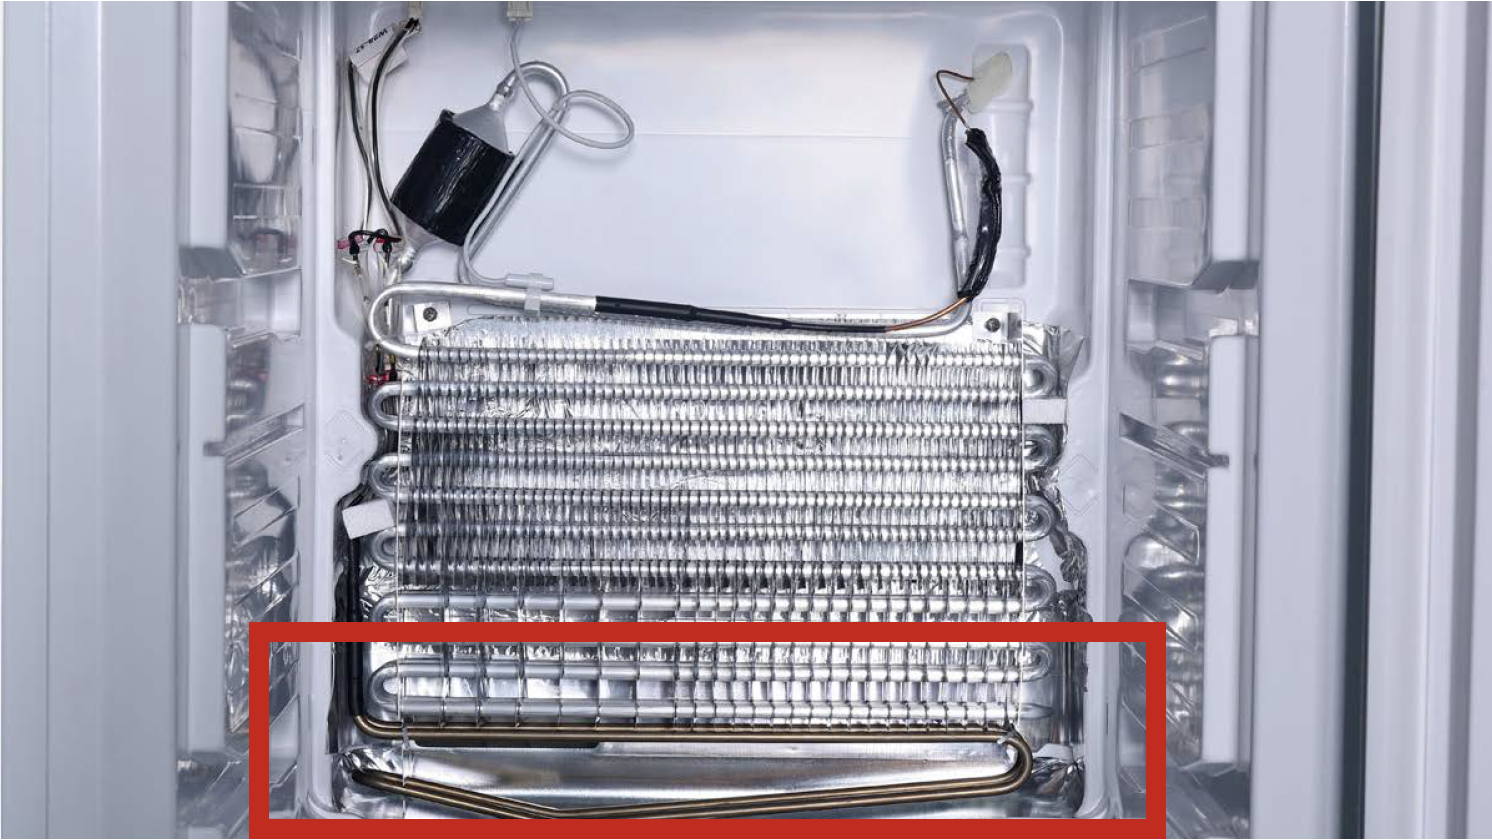
Loosen heater fastening clips.
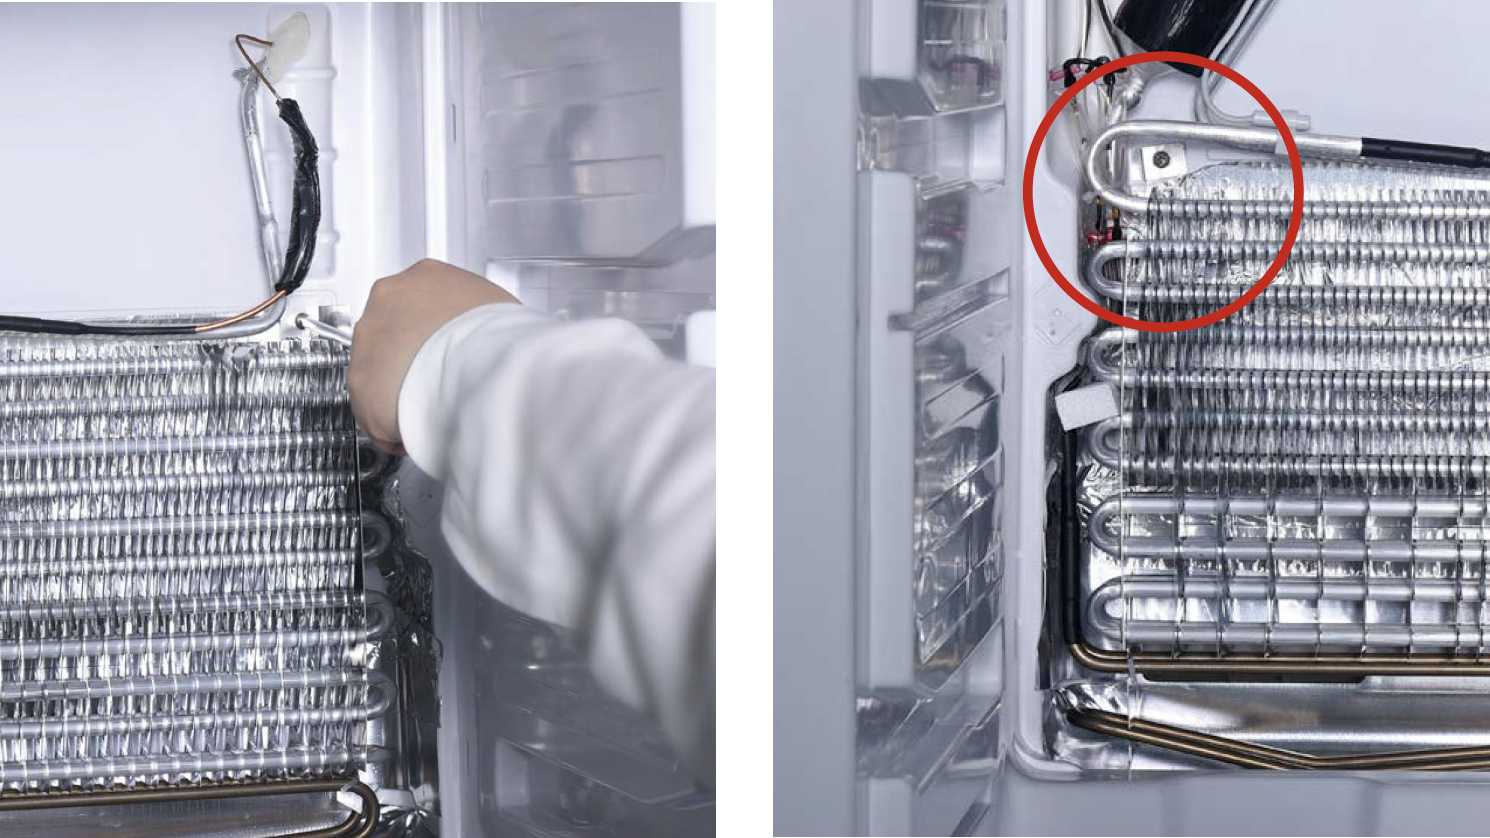
Step 6
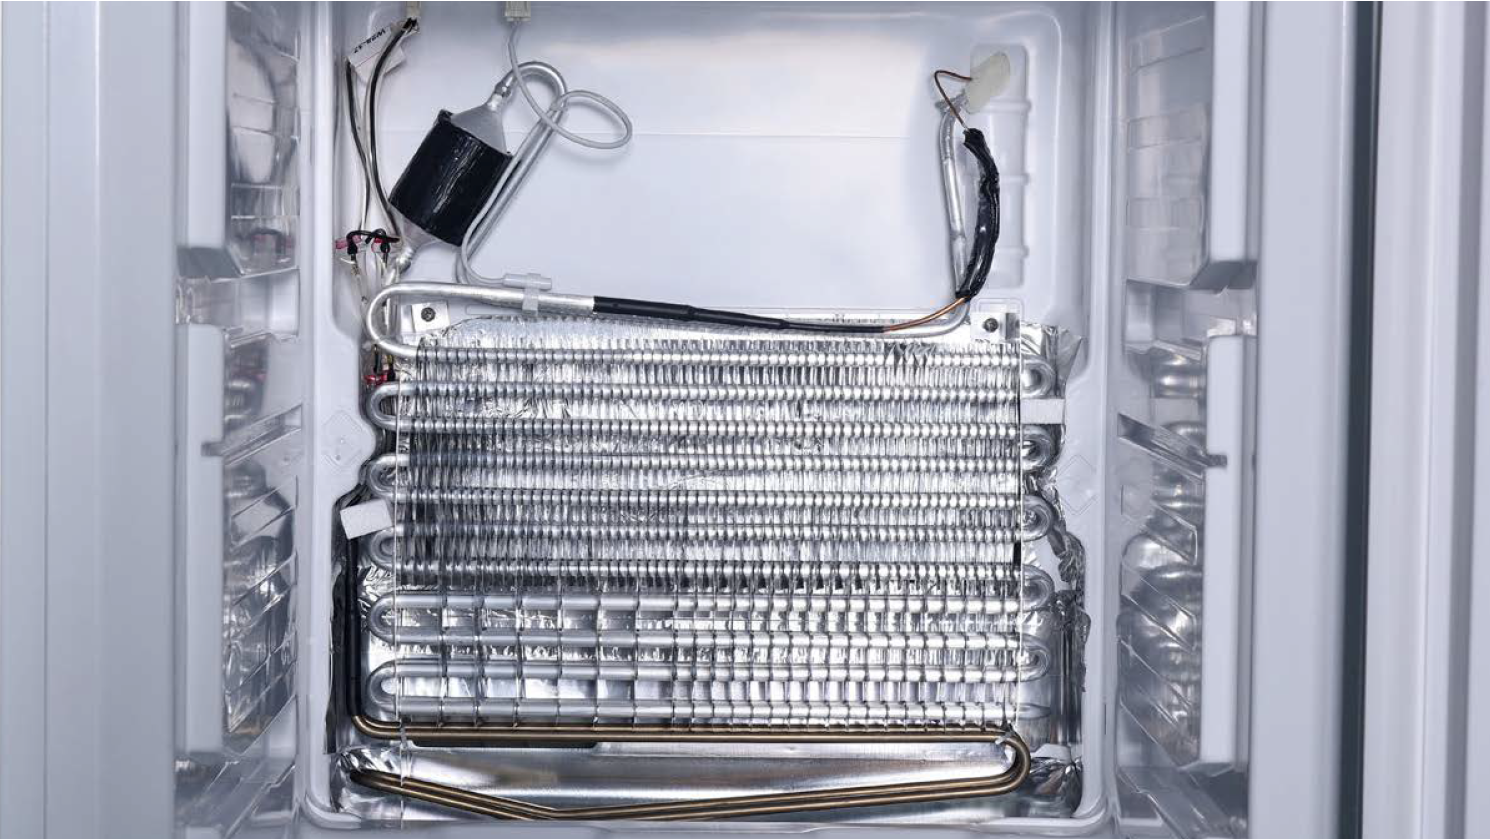
Lift evaporator with heater up 20mm. Bottom of evaporator must be higher than the edge of water trough.
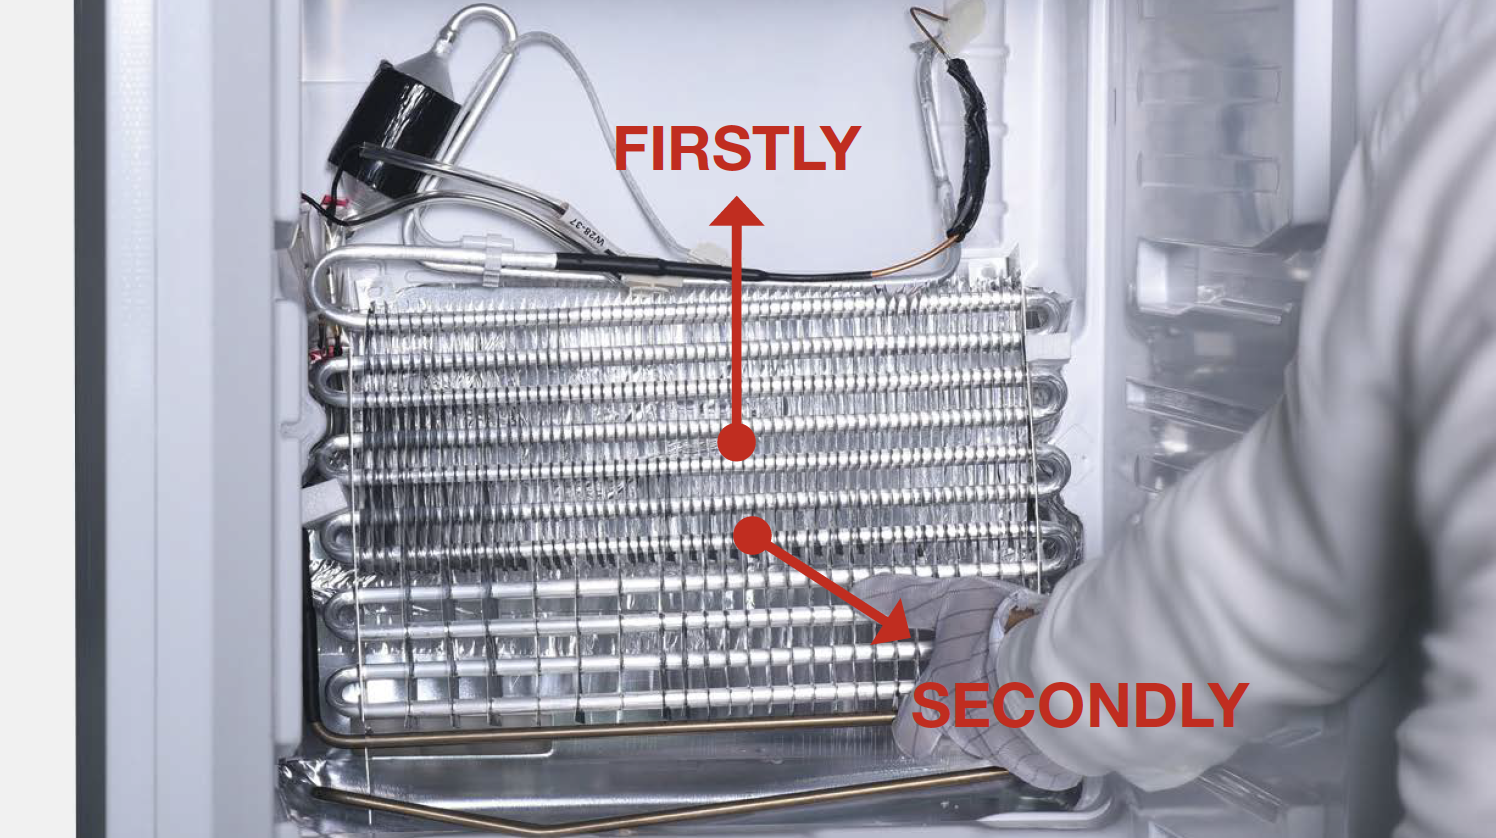
Step 7
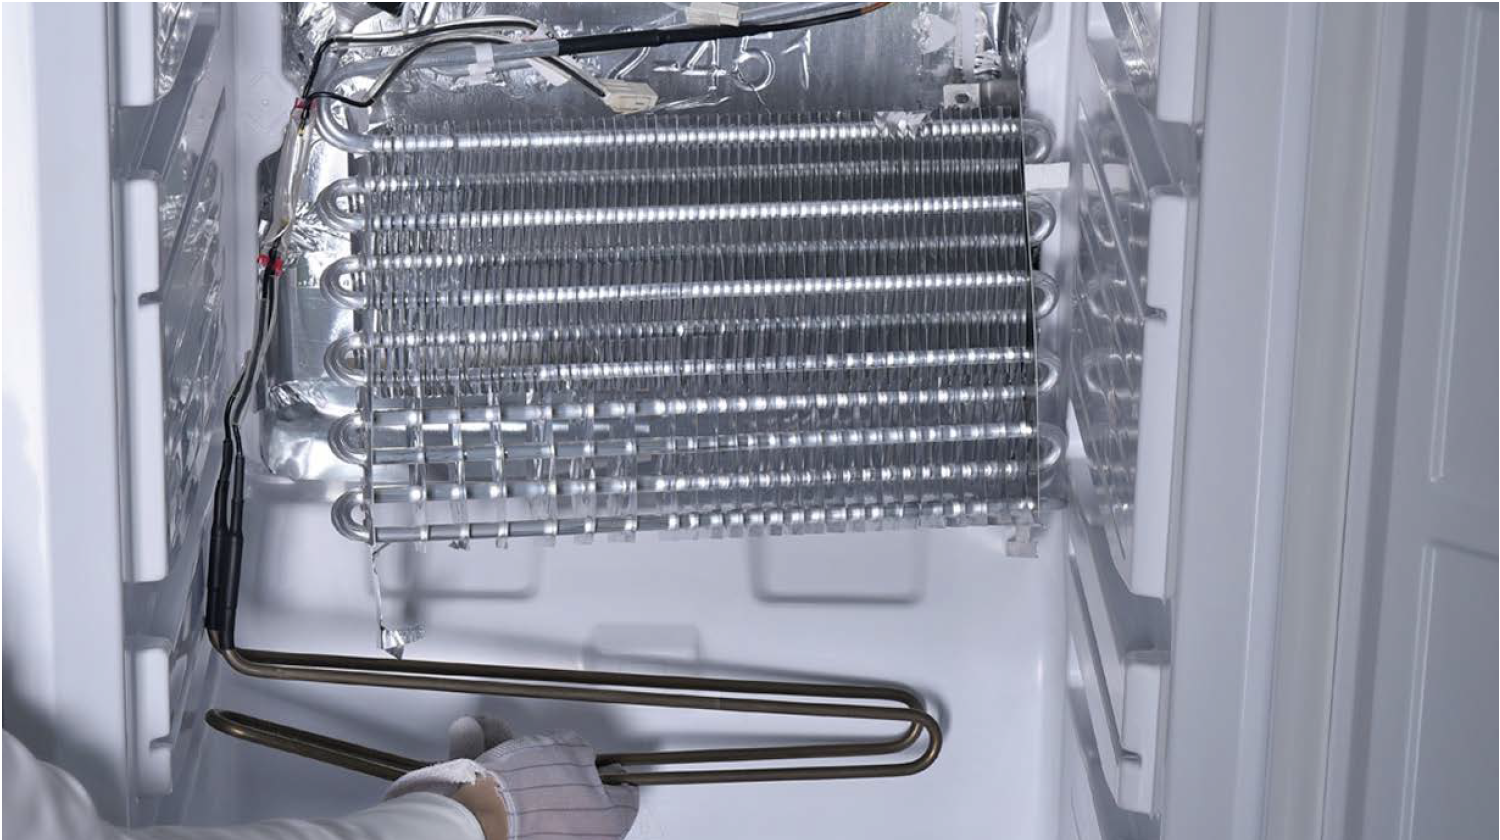
Remove the heater.
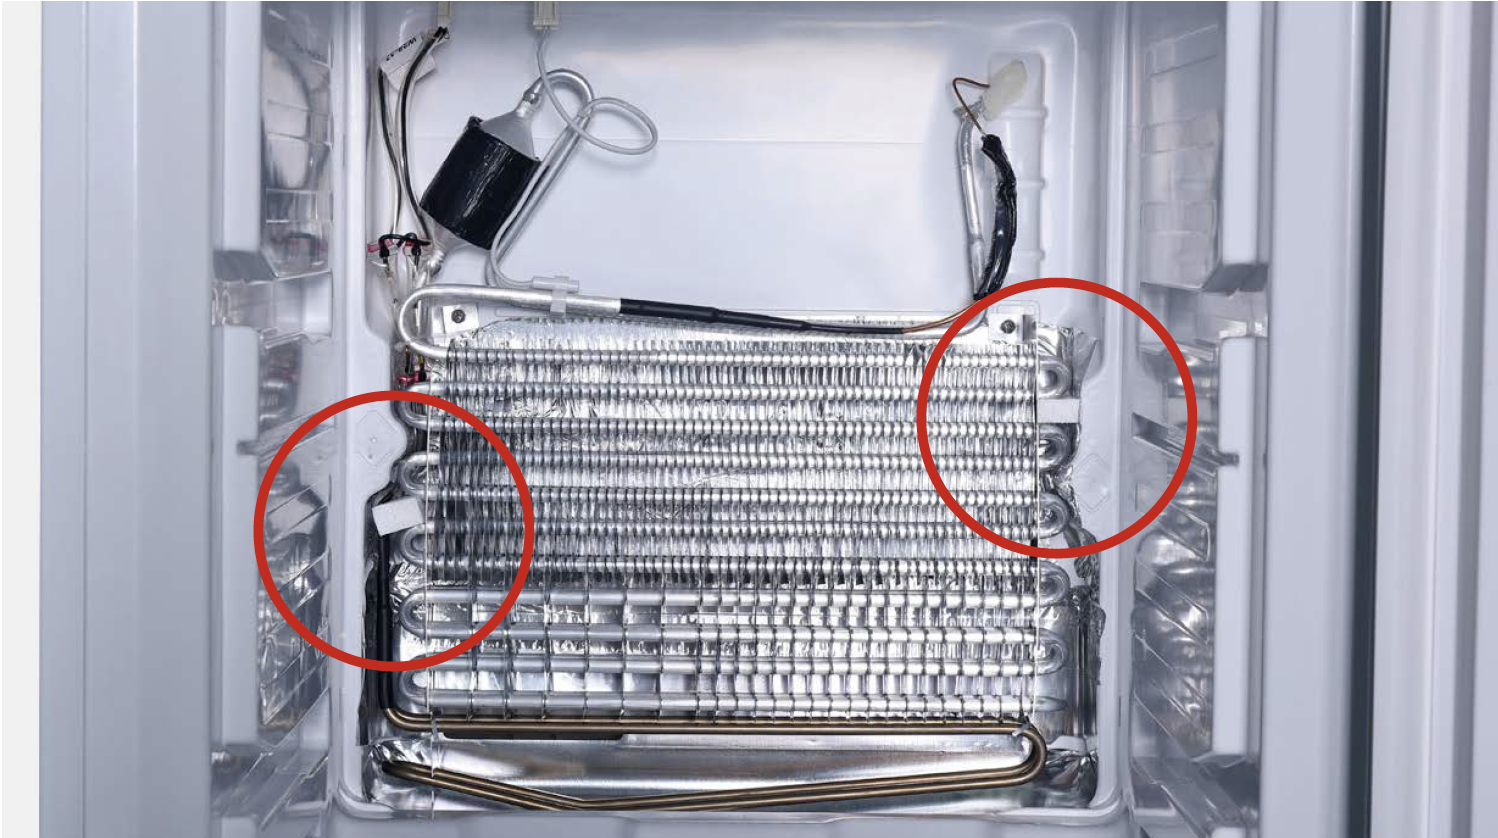
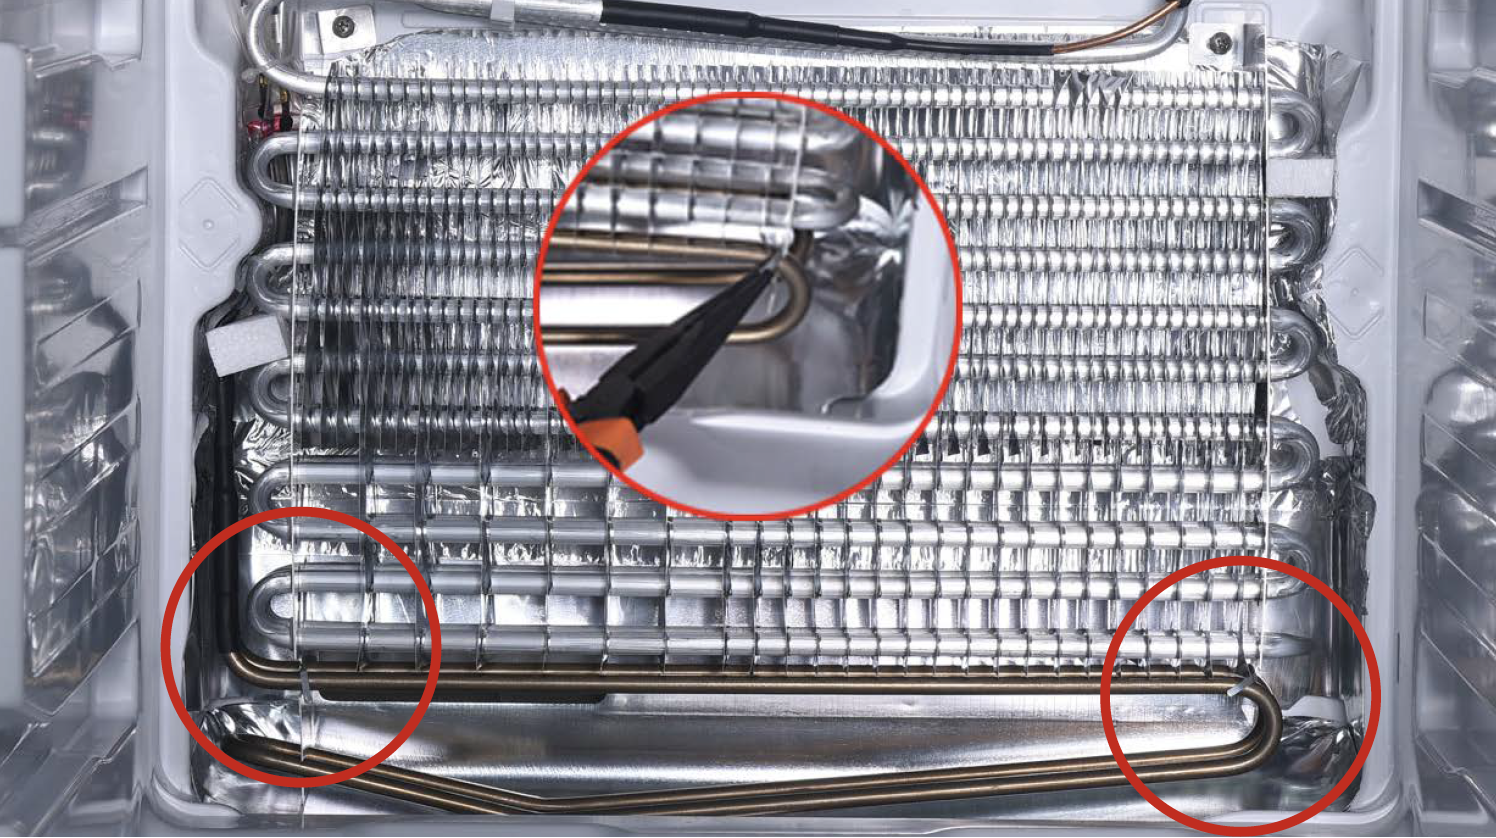
WARNING
Make sure not to deform pipes in red square during steps 5 to step 7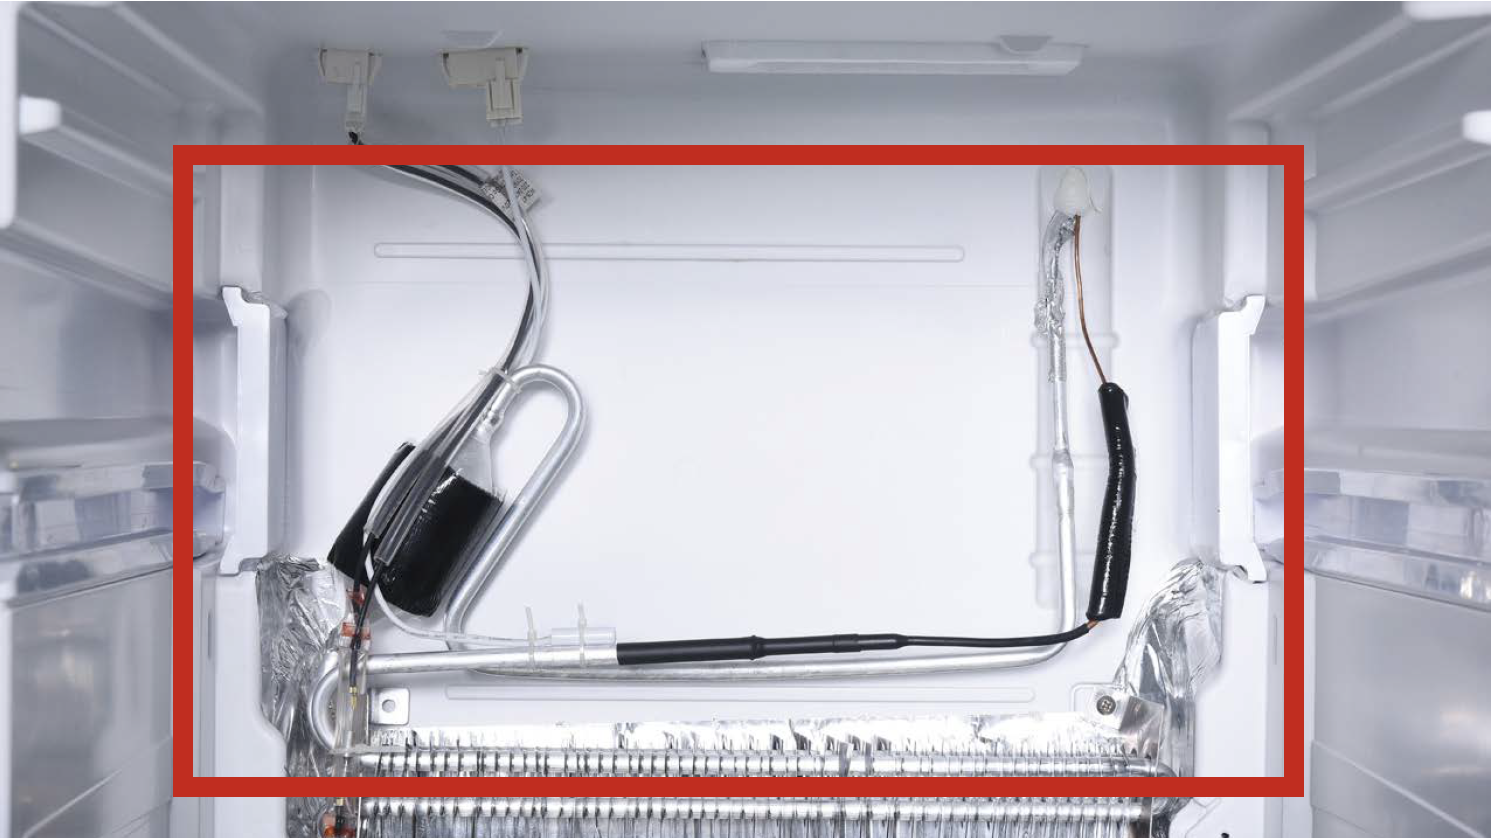
Reverse steps above to reinstall the heater and pay attention to the key points below
Tip 1
Do not damage the wires of the heater while installing the new heater.
CHECK AND TEST 3
Step 1
Set multimeter to resistance gear.
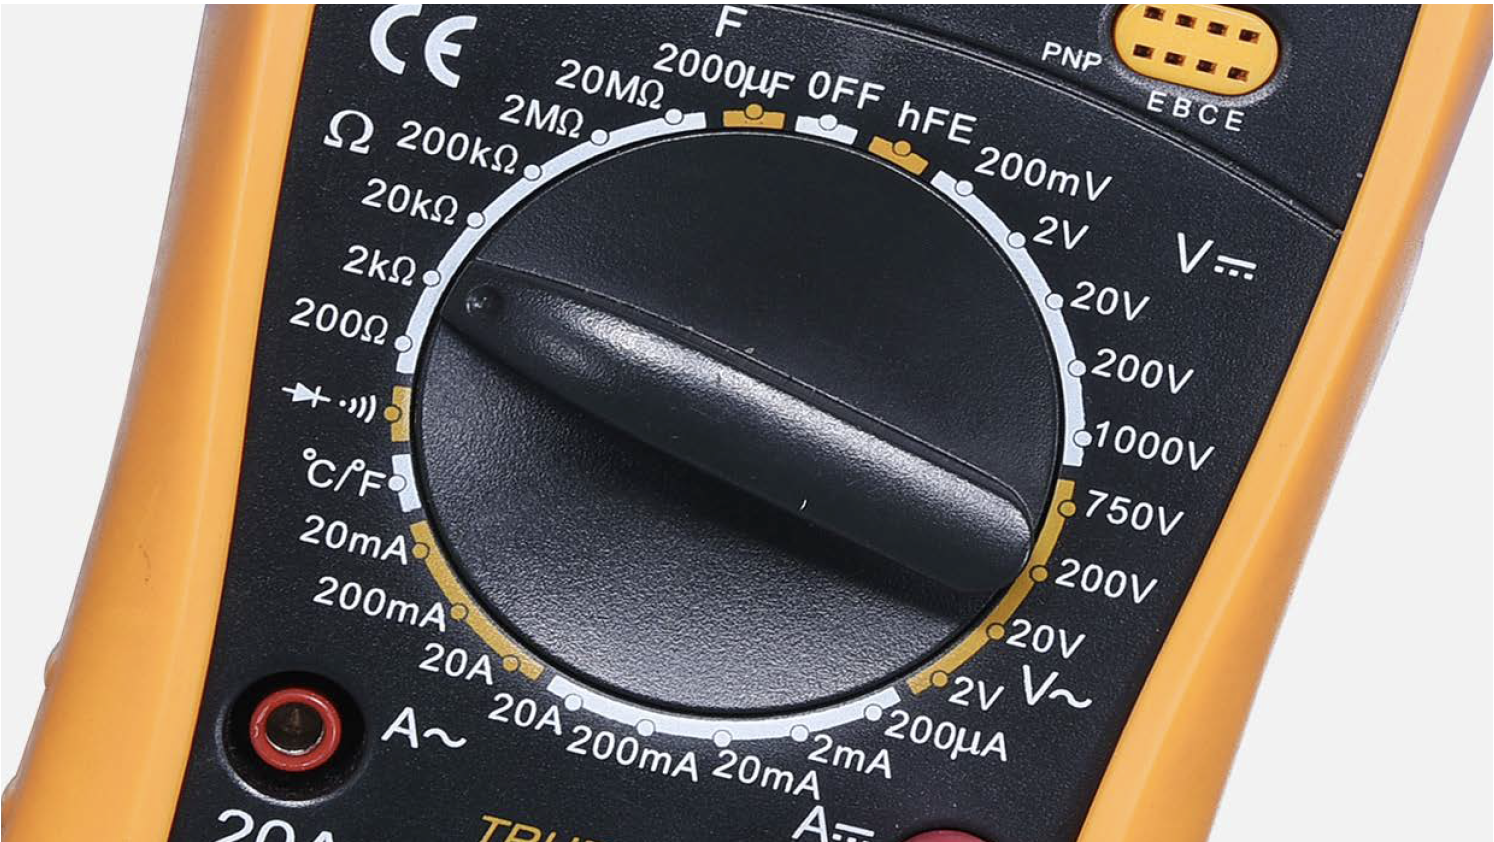
Step 2
Put detector into one
end of wires in PCB area.
Put another detector into
end of wires behind air
duct.
DIAGNOSIS 3
CHECK AND TEST 4
Step 1
Power on the appliance, and start manual defrost.
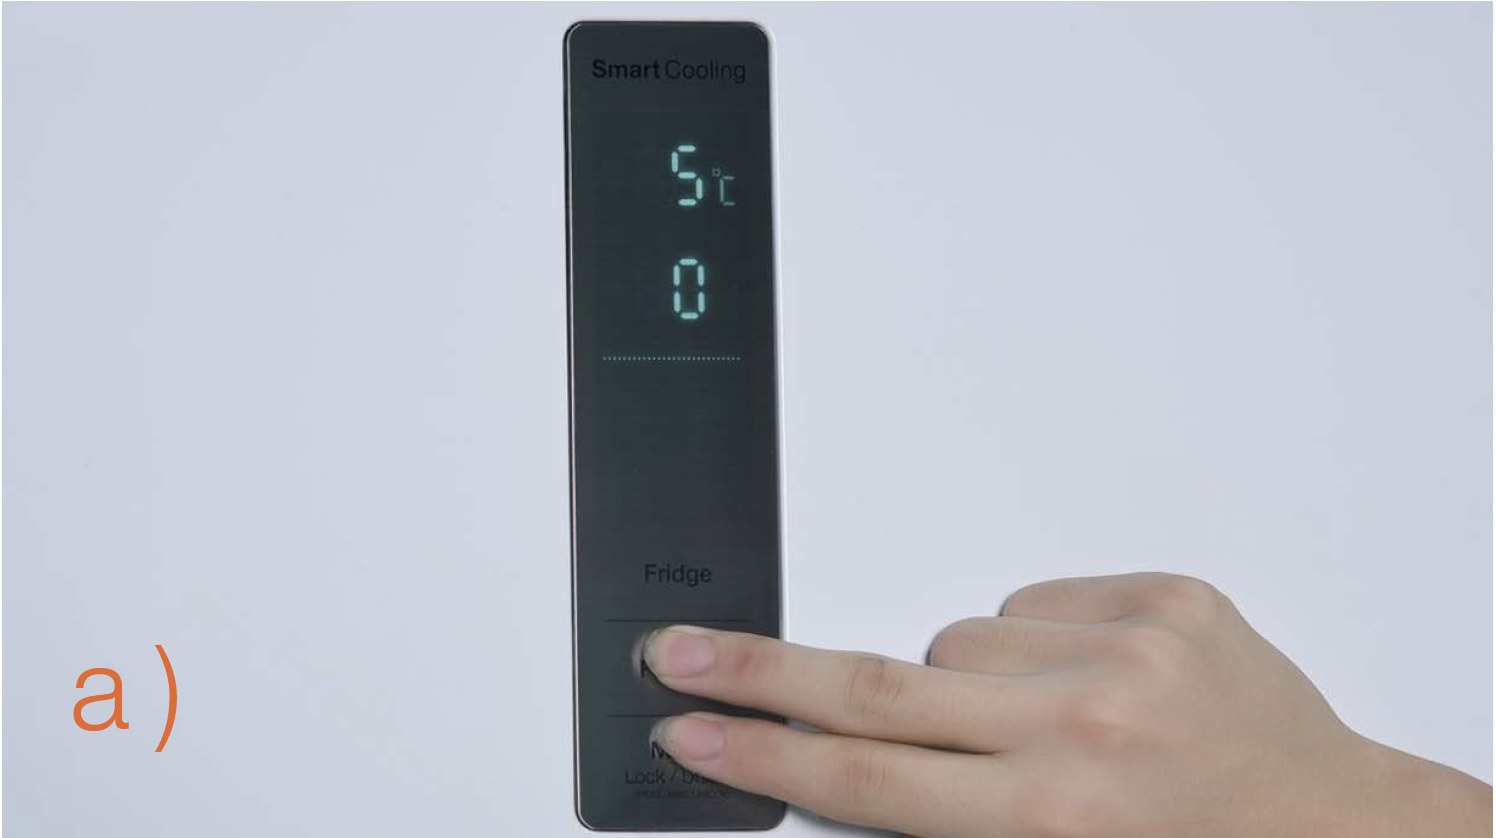
OUTSIDE DISPLAY
a) Press FREEZER button together with MODE button and hold for 5 seconds, buzzer alarm, freezer temperature shows 0 and flashes.
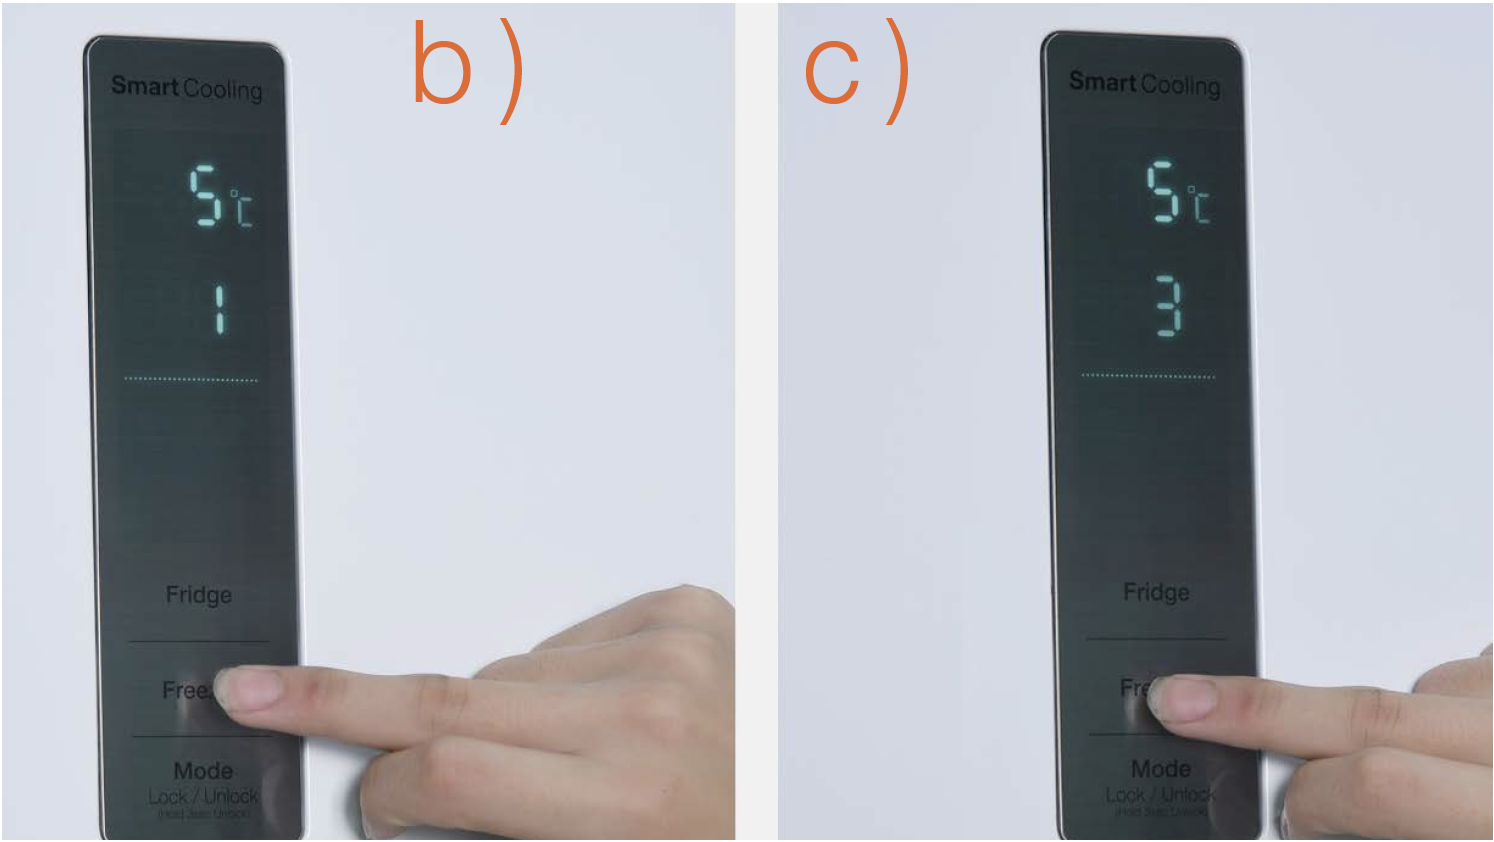
b) Then touch FREEZER
button continuously,
freezer temperature
will display 0, 1 and 3 in
a loop.
c) When freezer temperature displays 3, stop touching and manual defrost is selected.
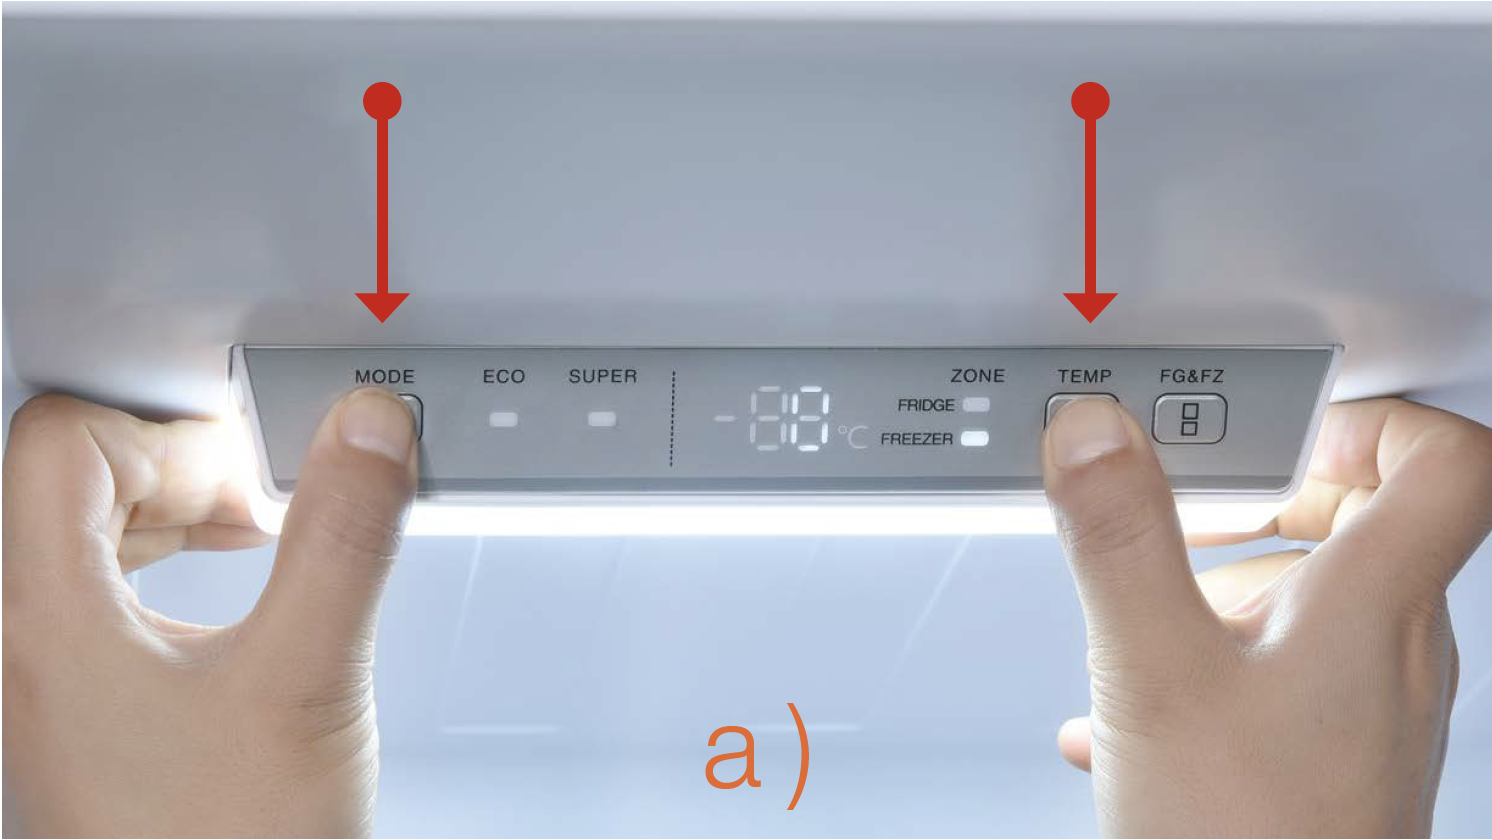
CASE2:
INTERNAL TOP
CONTROLLER
a) Press TEMP button
together with MODE
button and hold for 5
seconds. Alarm will sound, temperature shows 0
and flashes.
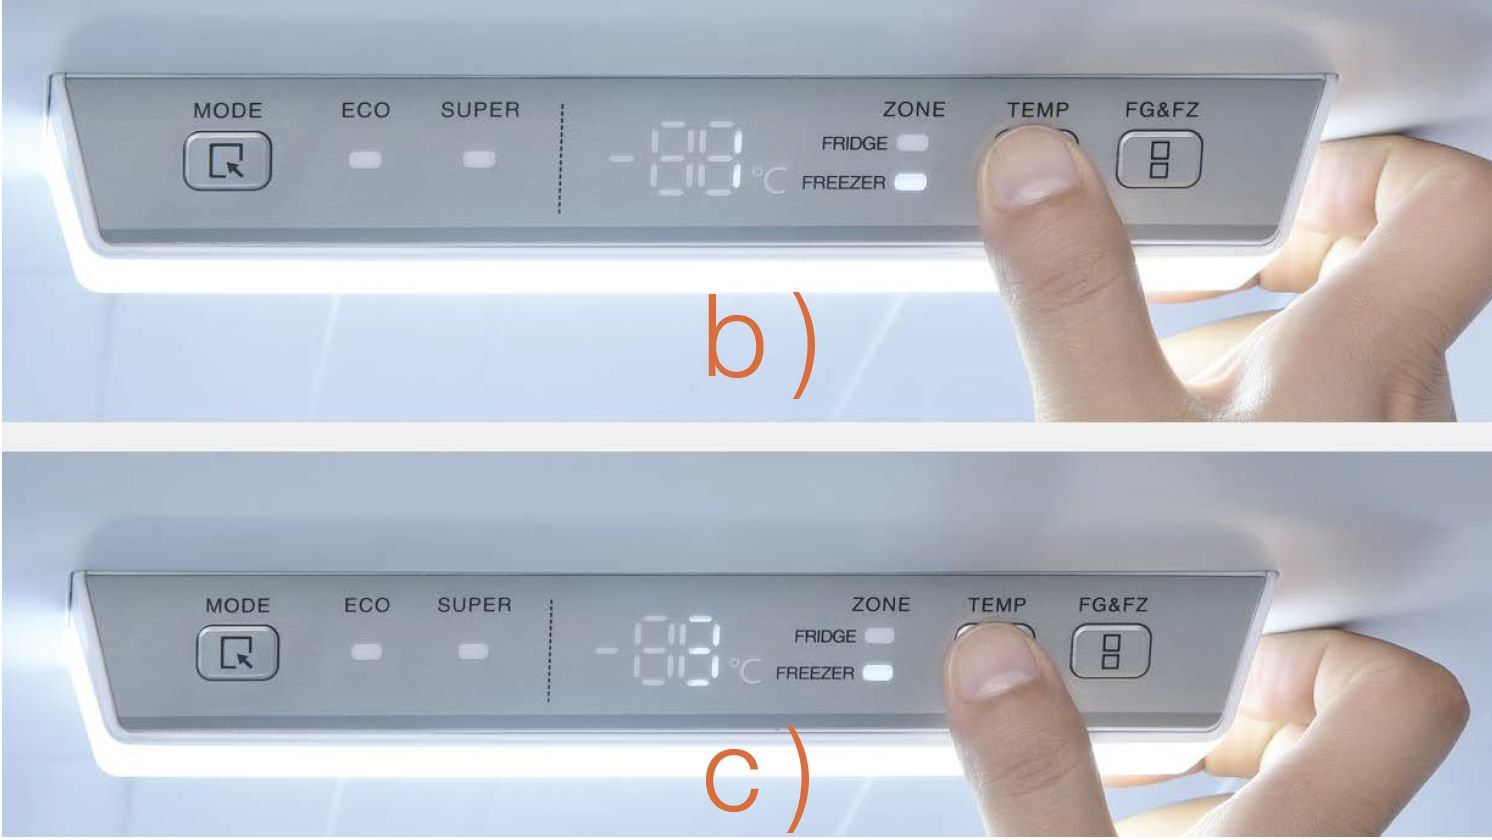
b) Then press Temp button continuously, temperature will display 0, 1 and 3 in a loop;
c) When temperature displays 3, stop pressing and manual defrost is selected.
Note
Step 2
Put your hand close to
defrost heater.
WARNING !!!
DO NOT TOUCH
DEFROST HEATER
DIAGNOSIS 4


PROCEDURE 3

Tip 1
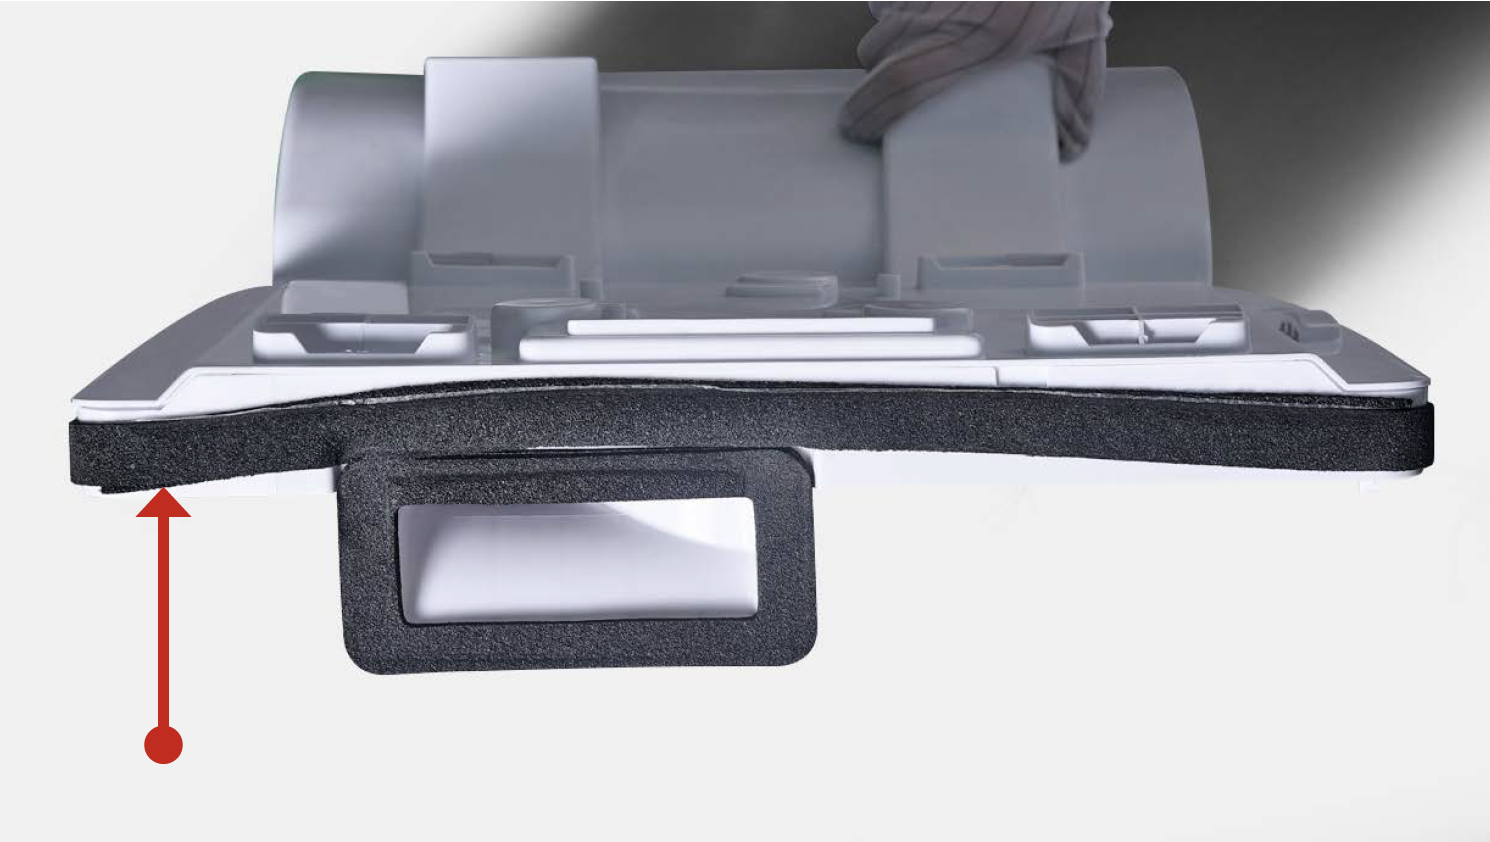
Make sure the sealing sponges are in good condition.
Tip 2
When reinstalling the air duct, fasten the wires to avoid crushing with air duct.
Tip 3
Install the top side first when installing the air duct.
Tip 4
After pushing air duct into place, you should hear a clicking sound. If not, repeat again.
Tip 5
Check to see if there is
a wide gap between air
duct and cabinet. If there
is, reinstall air duct.