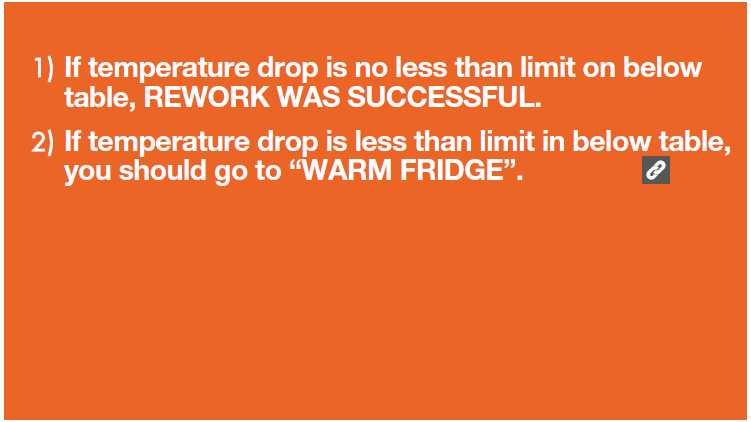
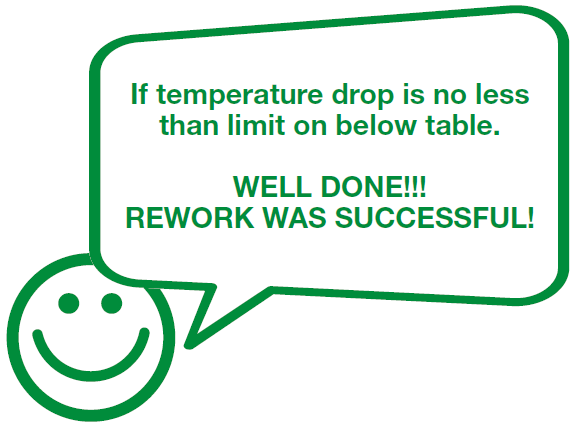
NOTE
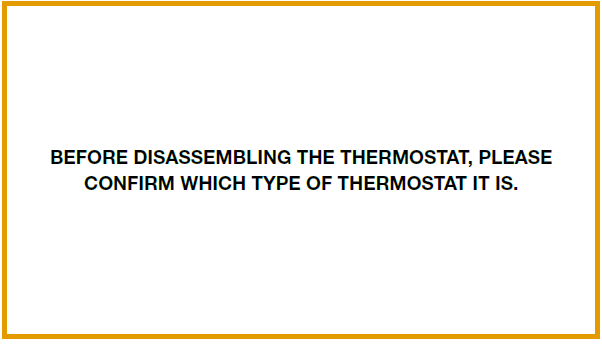
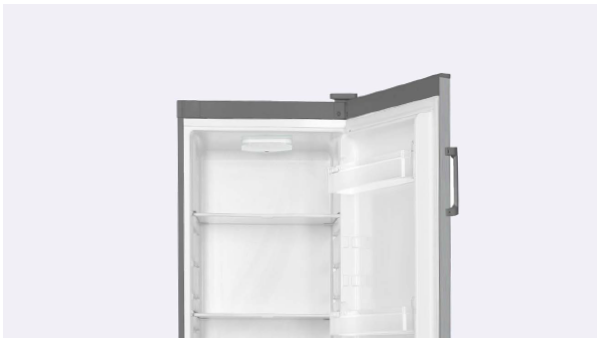
TYPE 1
If you have a top thermostat, please follow procedure below.
TYPE 2
If you have a side
thermostat, please go to link
TYPE 3
If you have a thermostat
on the side of evaporator, please go to link
TYPE 4
If you have a thermostat
in the compressor niche,
please go to link


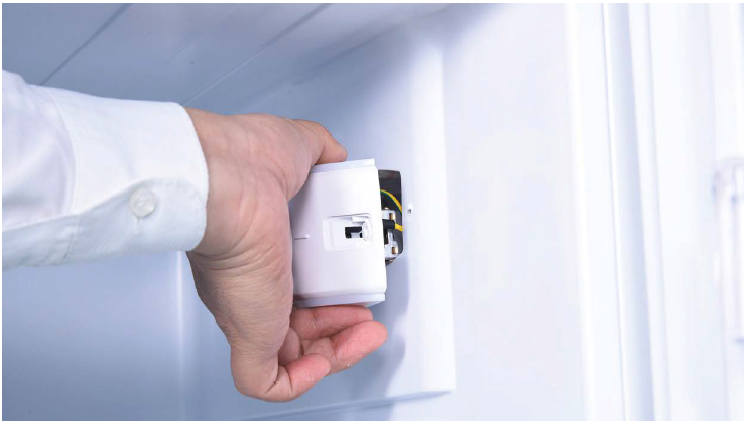
PROCEDURE 1
TOP THERMOSTAT
Step 1
Plug off the product.

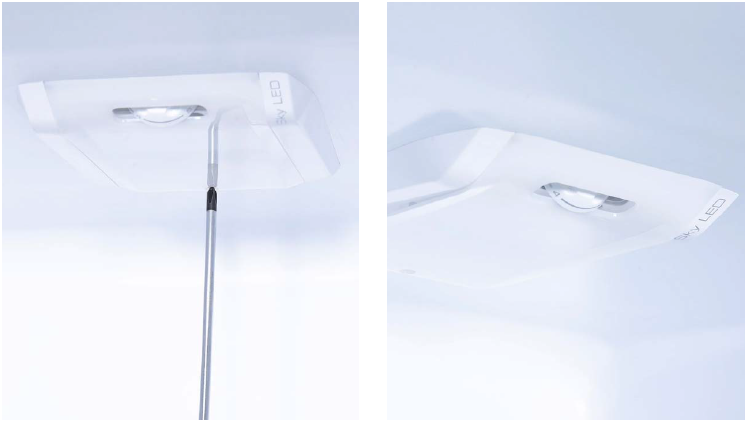
Step 2
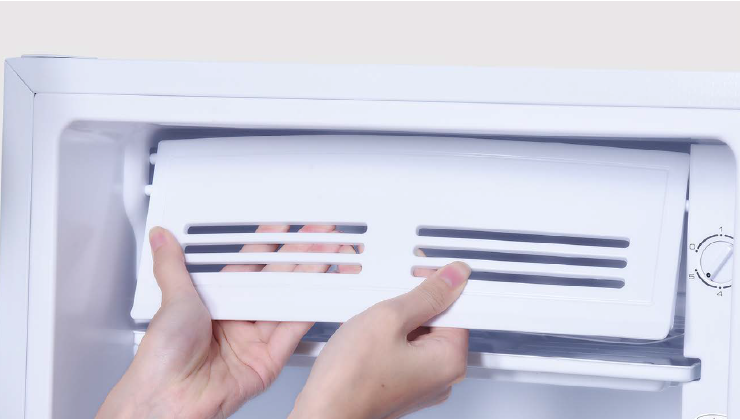
Unscrew LED cover.
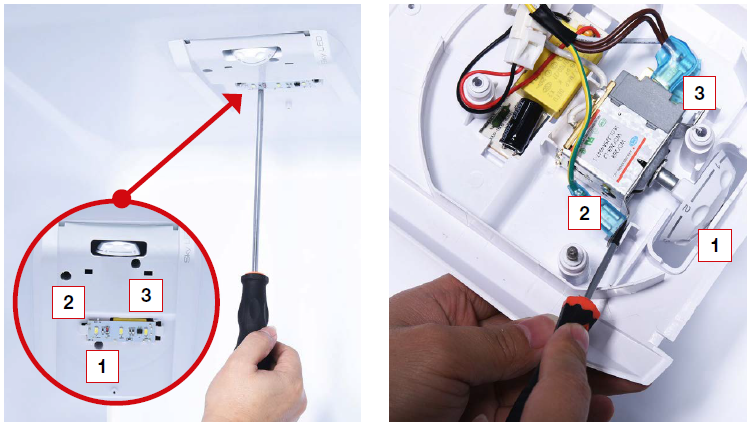
Step 3
Step 4
Unscrew thermostat cover.
Step 5
Lever off the buckle and push the thermostat out.
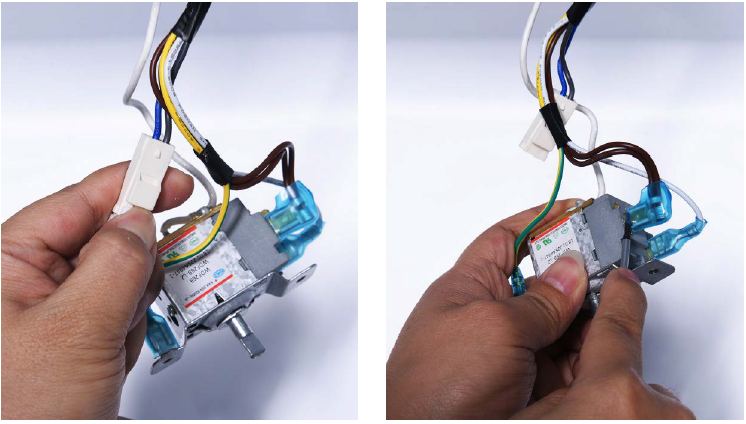
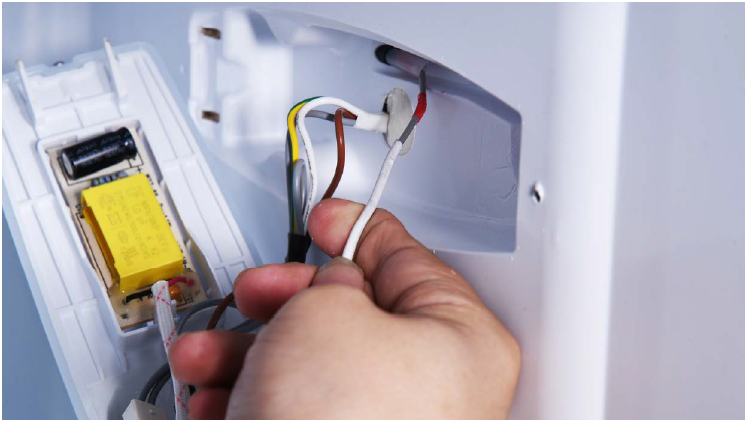
Step 6
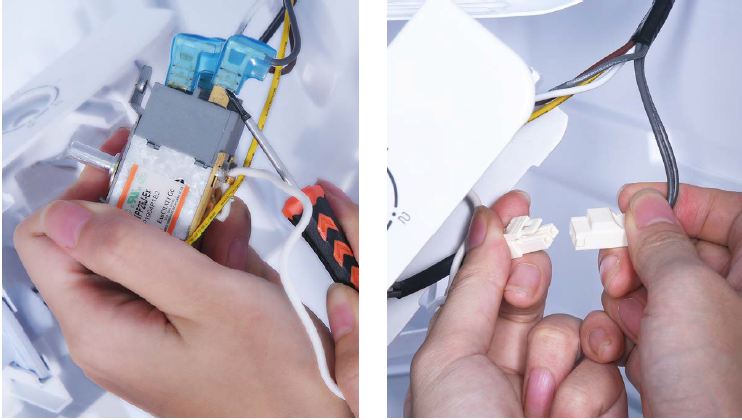
Disconnect terminal for LED.
Step 7
Disconnect terminal for thermostat.
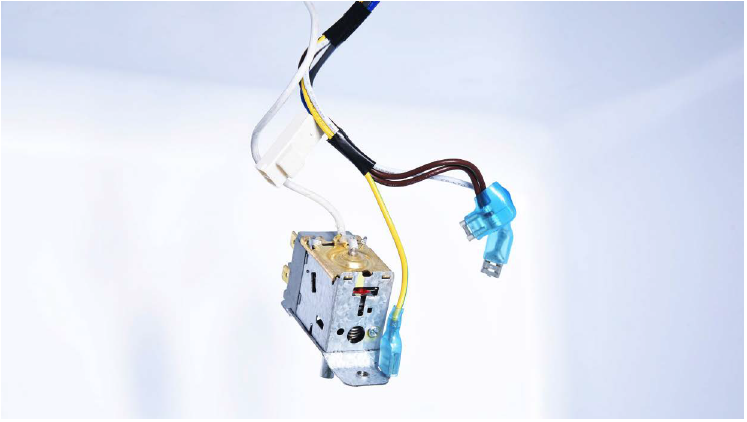
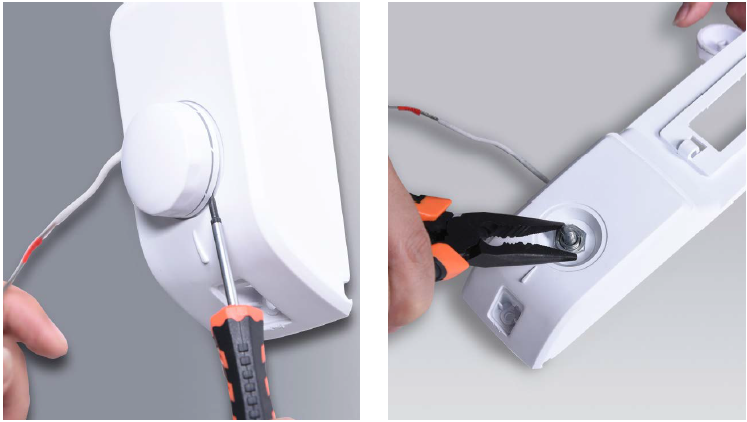
Step 8
Pull capillary out from hole.

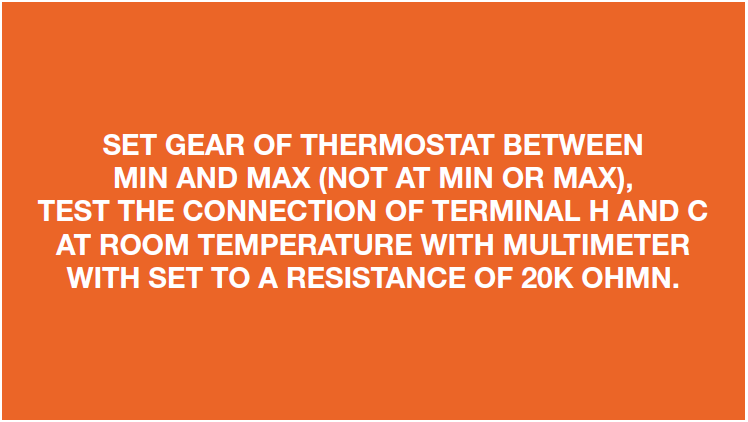
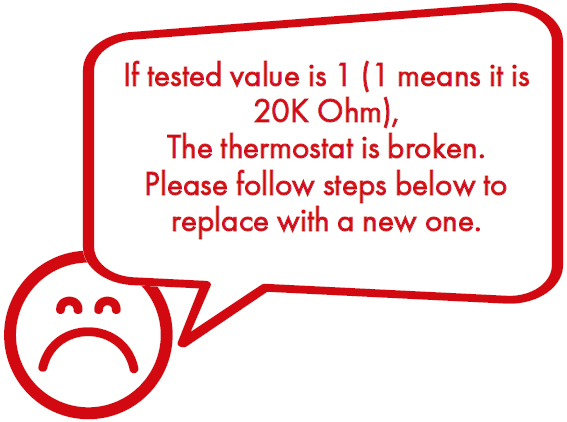
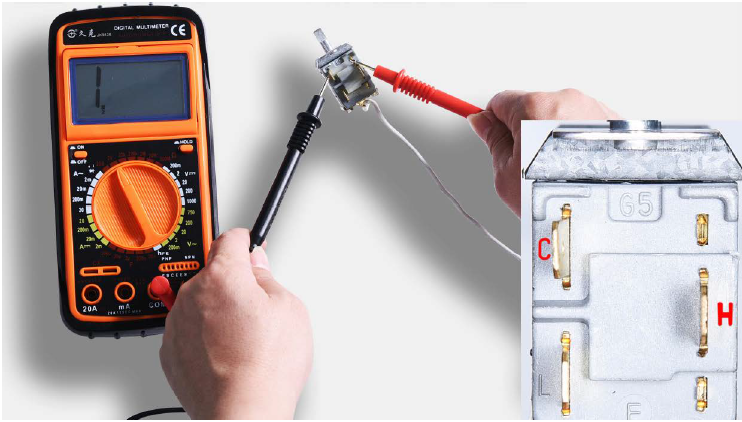
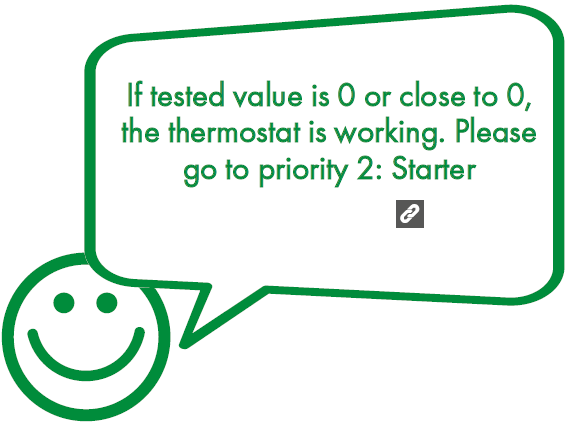
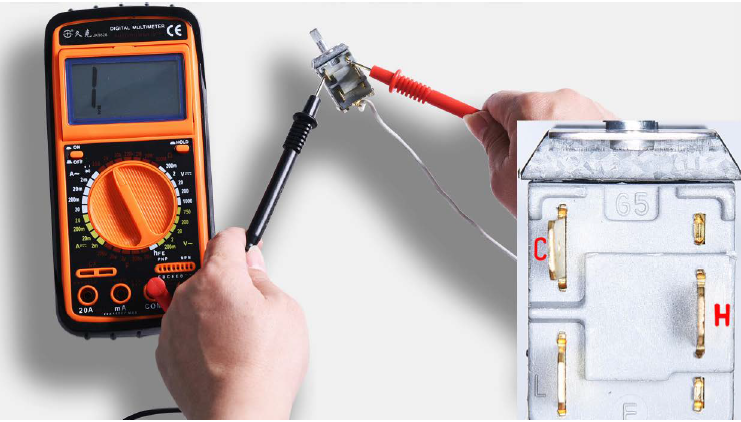
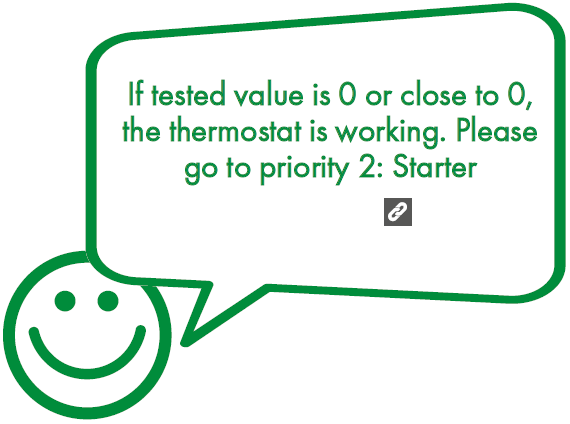
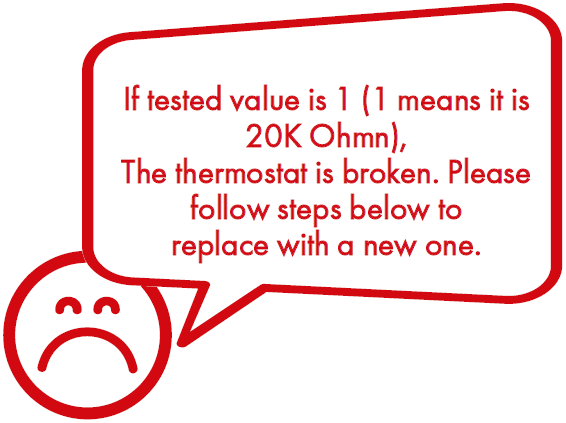
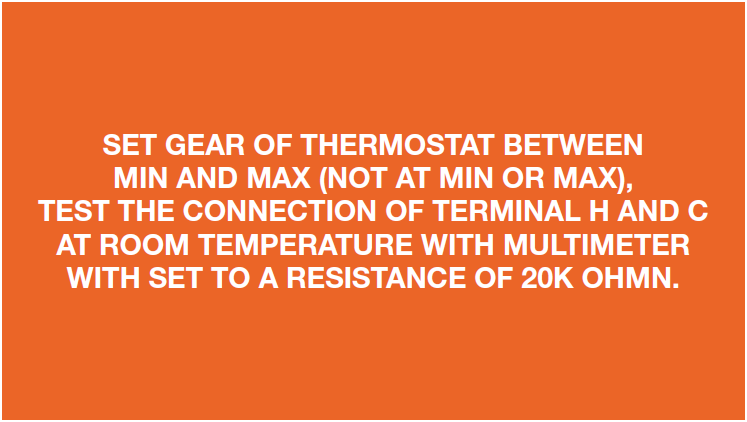
CHECK AND TEST 1
Step 1
Test thermostat individually


Tips 1:
When inserting capillary into the hole, make sure the first red mark goes in the hole, but second one remains outside of the hole.
Tips 2:
When inserting thermostat into the buckle, please push the control knob into the buckle first.
Tips 3:
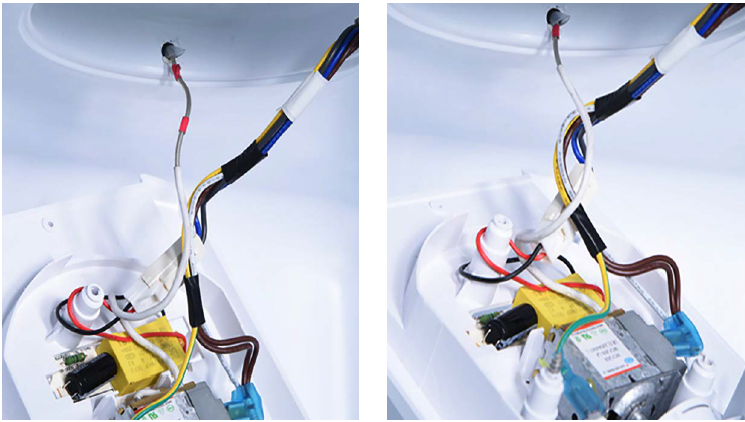
Make sure wires are twisted around screw pole to avoid damaging wires with screw.
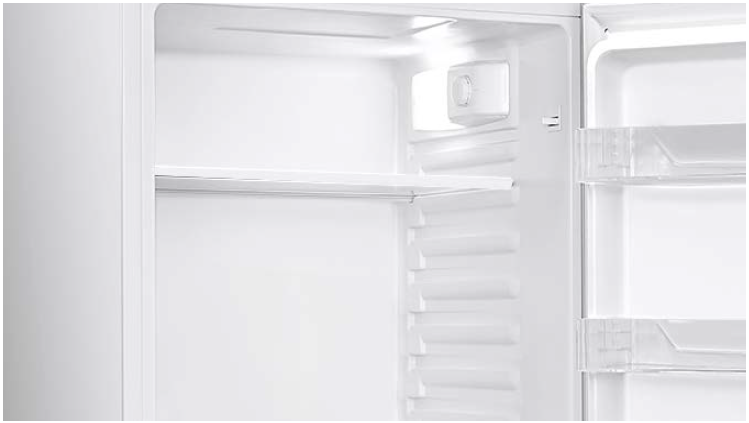
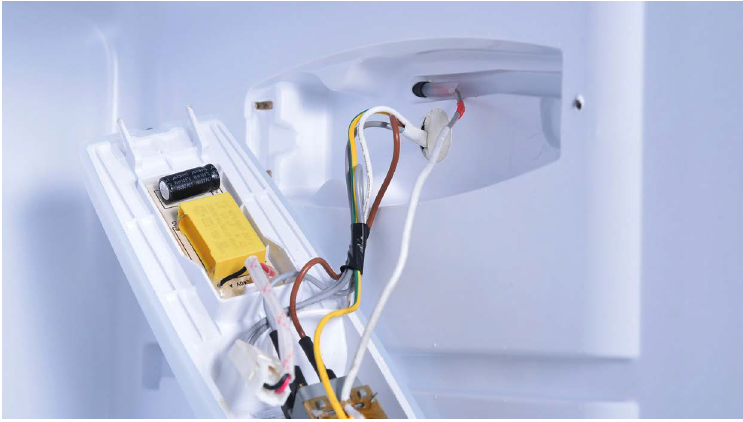
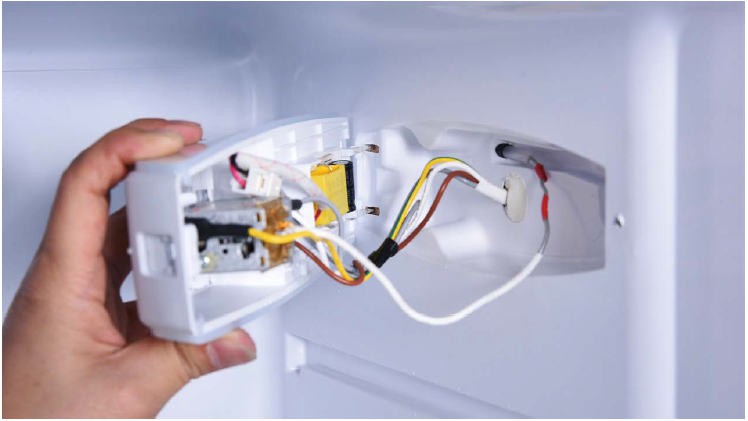
SIDE THERMOSTAT
Step 1
Unscrew LED cover.
Step 2
Remove LED cover.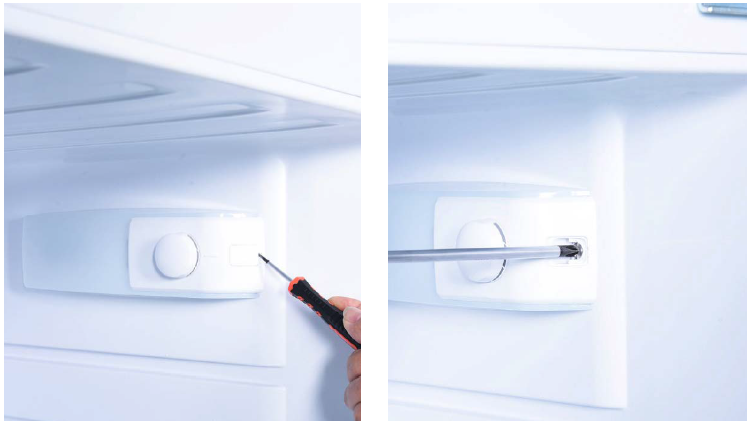
Step 3
Unscrew thermostat cover.
Step 4
Pull capillary from the hole.
Step 5
Lever off the knob.
Step 6
Step 7
Remove thermostat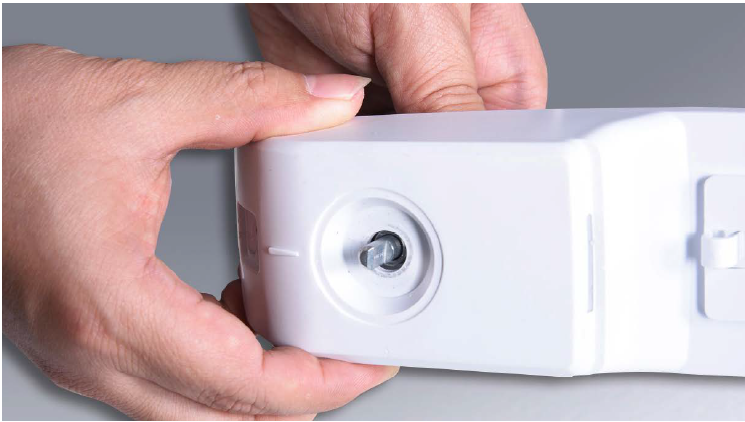
Step 8
Test thermostat individually


Tips 1:
When inserting capillary into the hole, make sure the first red mark goes in the hole, but second one remains outside of the hole.
Tips 2:
Make sure pins of thermostat cover are properly inserted into the holes.
Tips 3:
Make sure wires are pushed into cavity for
thermostat.


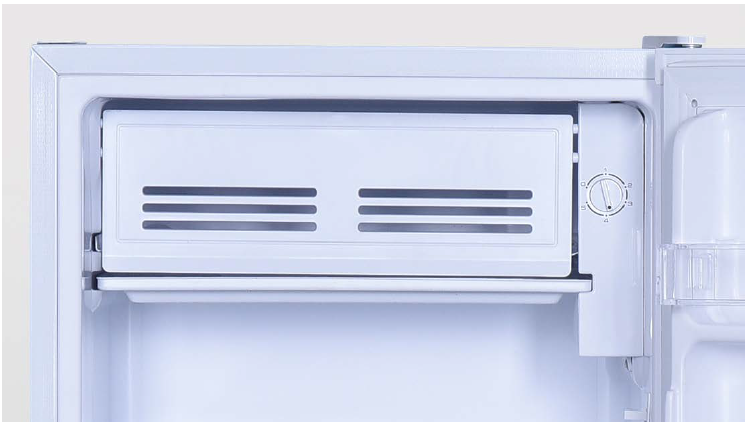
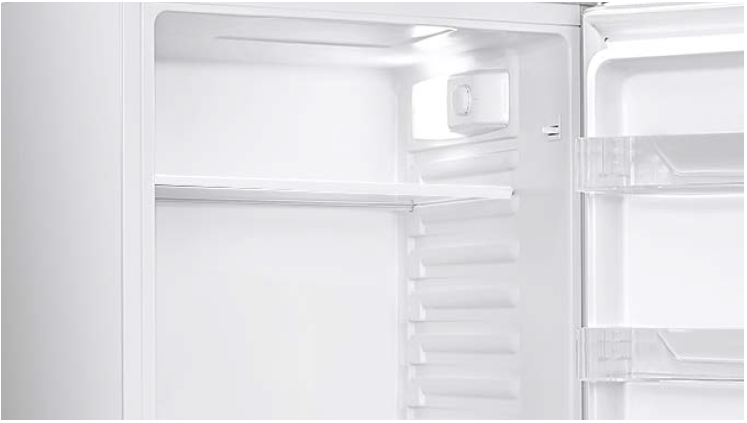
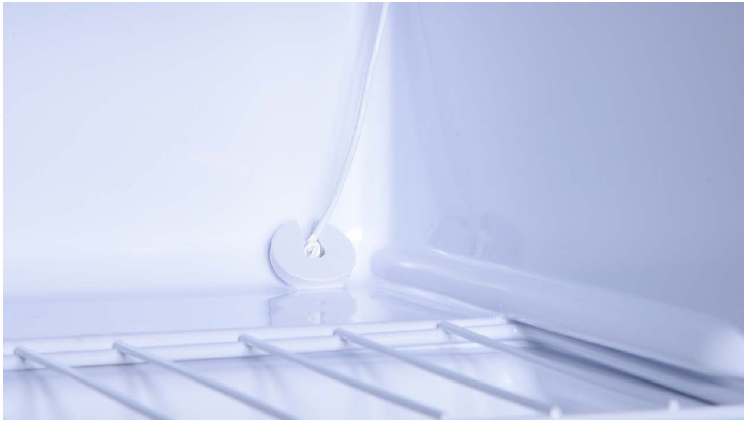
THERMOSTAT ON THE
SIDE OF EVAPORATOR

Step 1
Lever off the screw cover.
Step 2
Gently bend the door and remove the buckle
from the groove, and remove the ice-box door.
Step 3
Remove the water tray.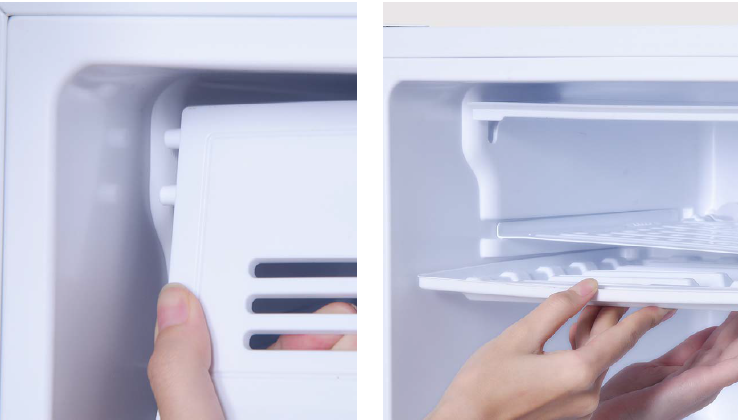
Step 4
Unscrew the screw.
Step 5
Push the thermostat box forward, remove the box.
Step 6
Remove the knob.
Step 7
Prize up the thermostat.
Step 8
Disconnect terminal for thermostat.
Step 9
Disconnect terminal for LED.
Step 10
Test thermostat individually

Tip 1
When inserting capillary into the hole, make sure the bulb of thermostat is in final position.
Tip 2
Make sure the wires are placed into cavity of thermostat.


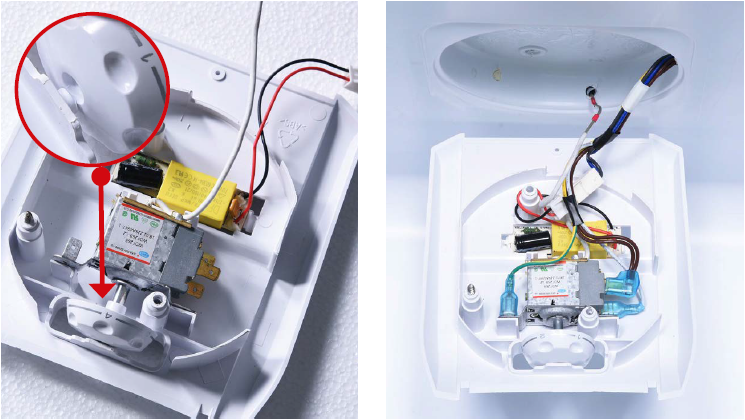
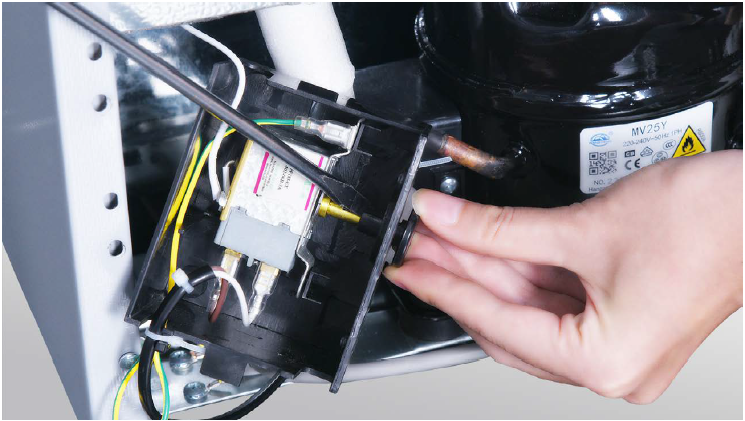
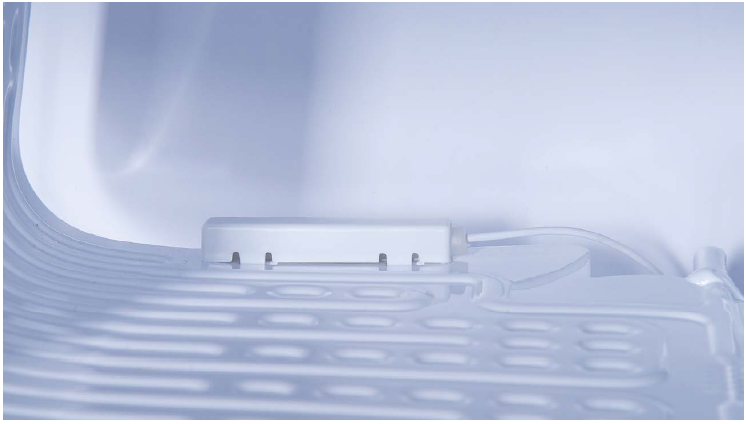
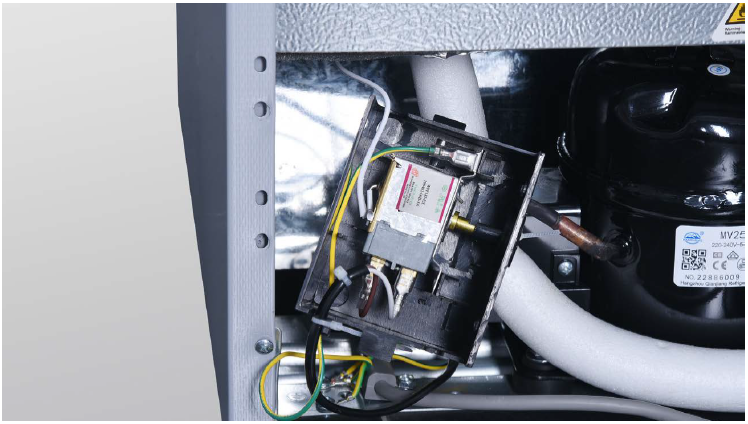
THERMOSTAT IN COMPRESSOR NICHE.
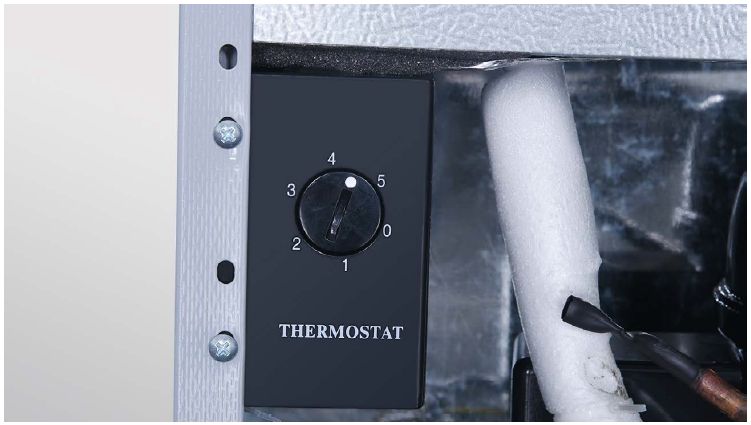
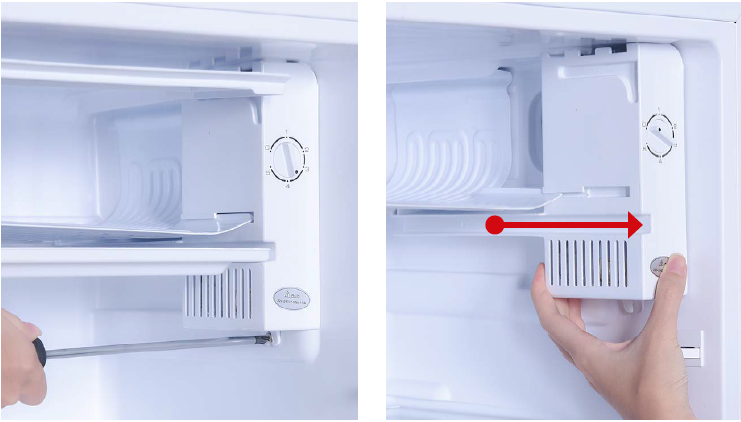
Step 1
Unscrew.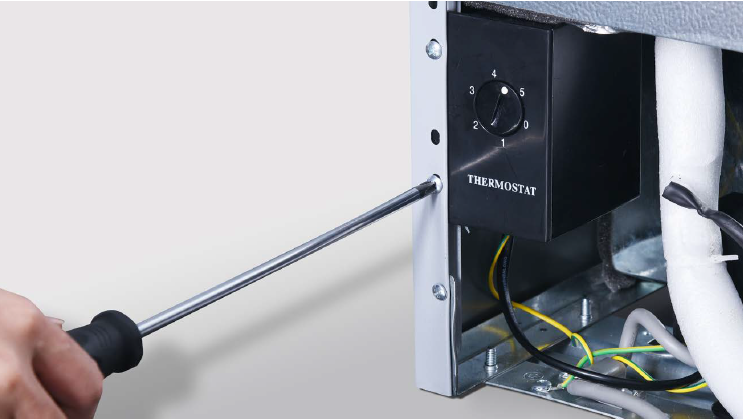
Step 2
Remove thermostat box.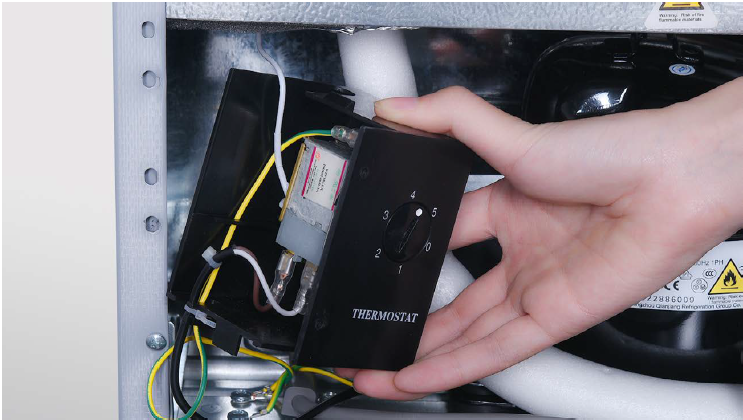
Step 3
Prize up thermostat knob
and remove.
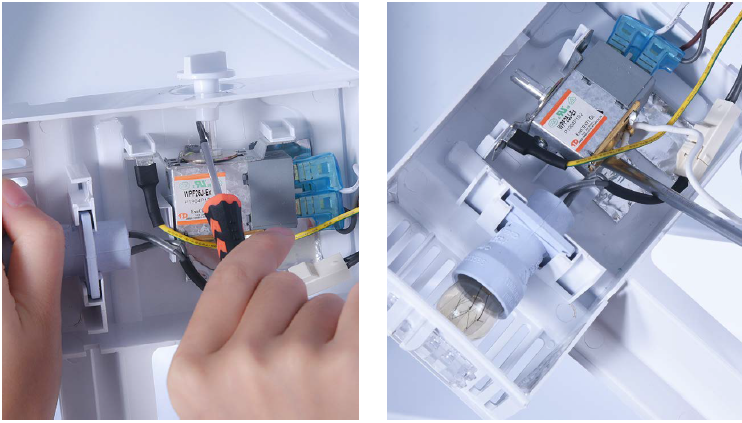
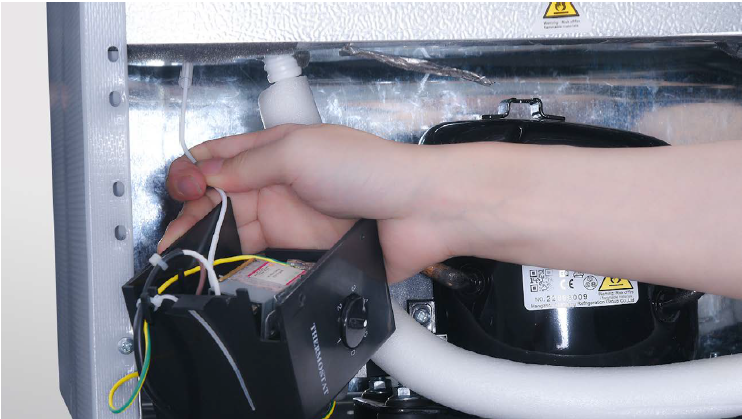
Step 4
Prize up the thermostat.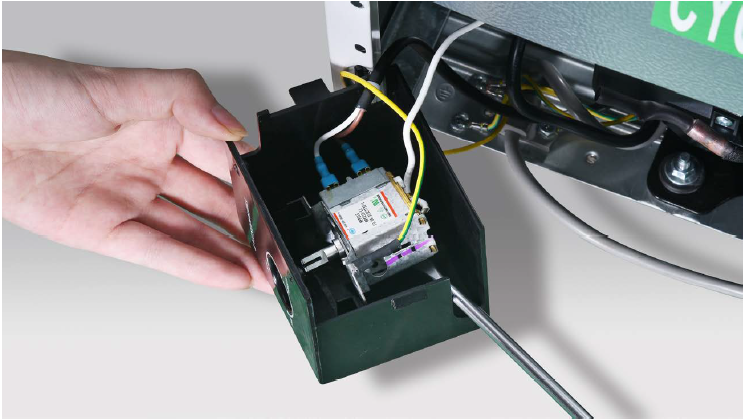
Step 5
Pull capillary out from the foam.
Step 6
Disconnect the terminal.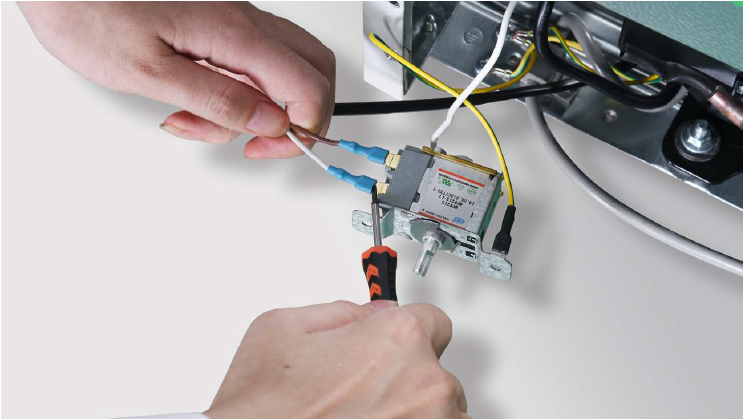
Step 7
Test thermostat individually


Tip 1
When inserting capillary into the hole, make sure the bulb of thermostat is in final position.
Tip 2
When inserting thermostat into the hole,
please verify that the seal of the hole is good.
Tip 3
Don’t forget to put the wires in the right position
and attach a cable tie.
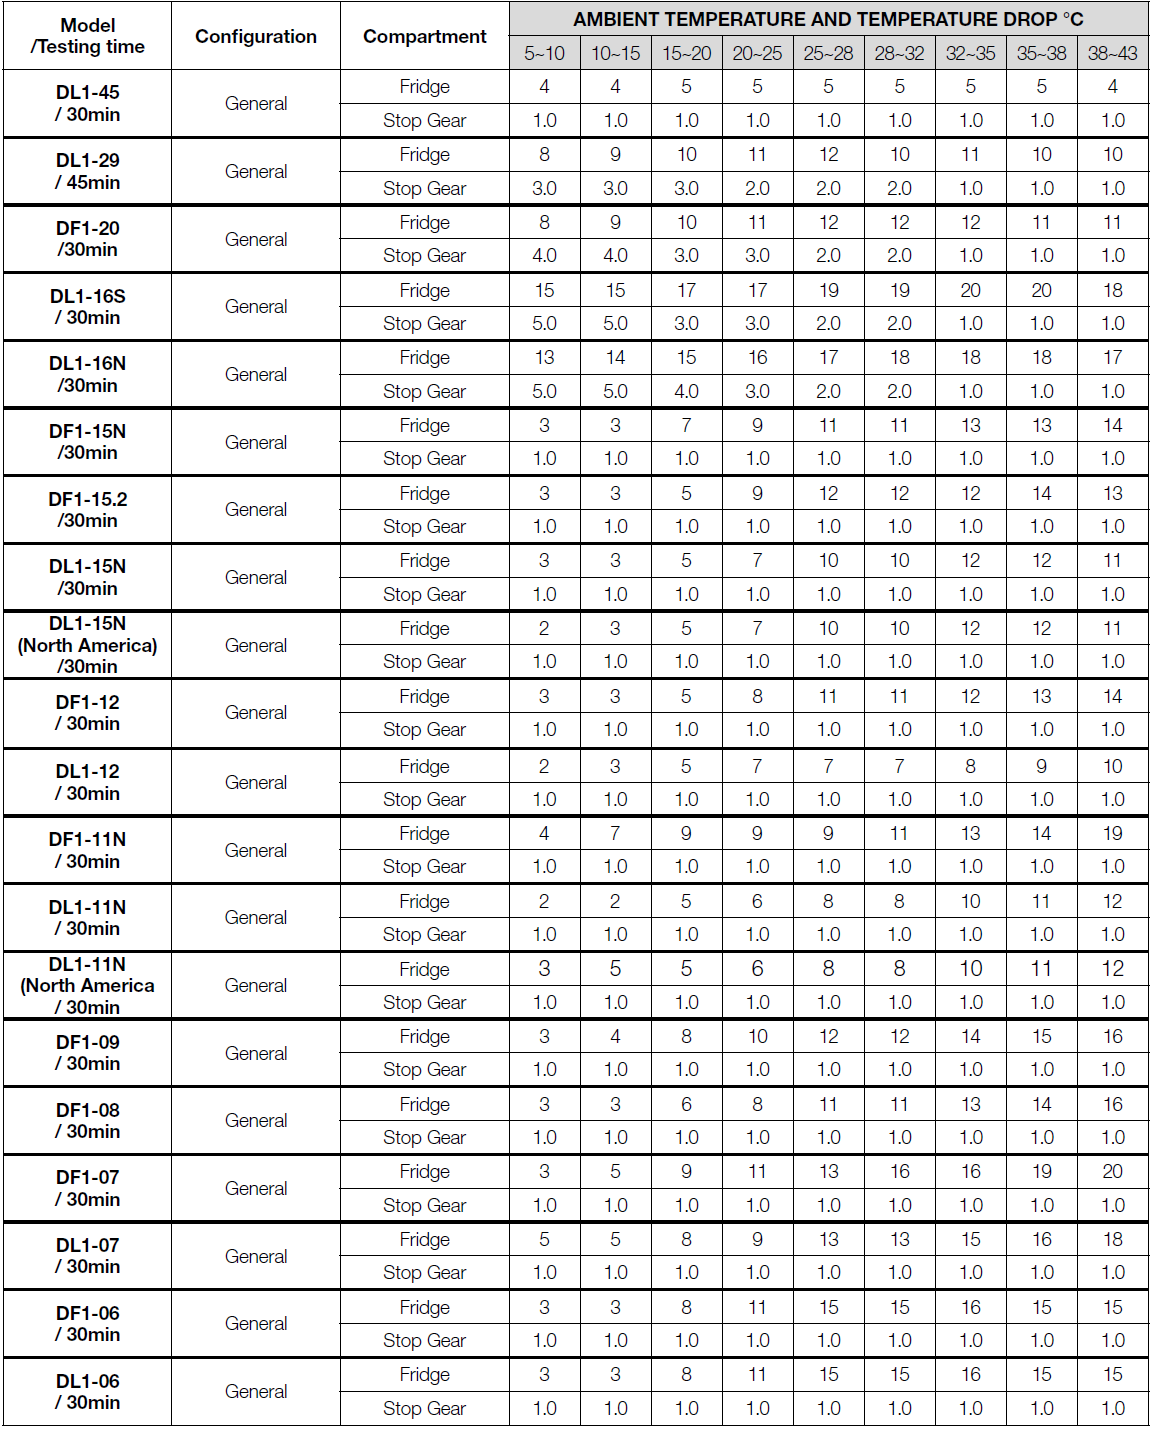
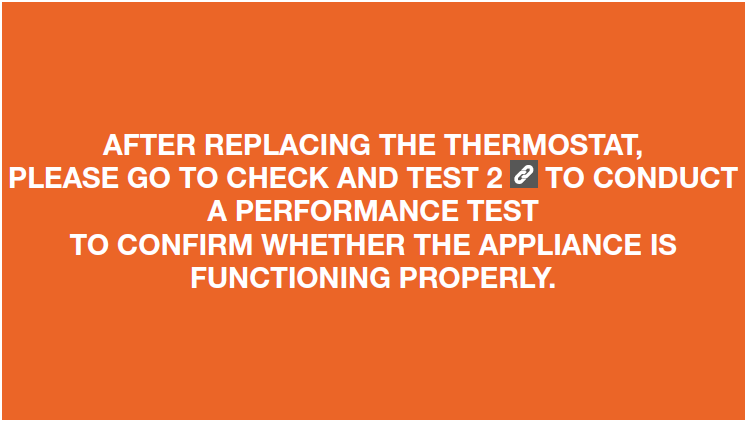
CHECK AND TEST 2
Step 1
Set the knob of thermostatto gear Max-1, and switch on the appliance to do a performance check.
Step 2
After 40min or 60 min, test the internal temp.