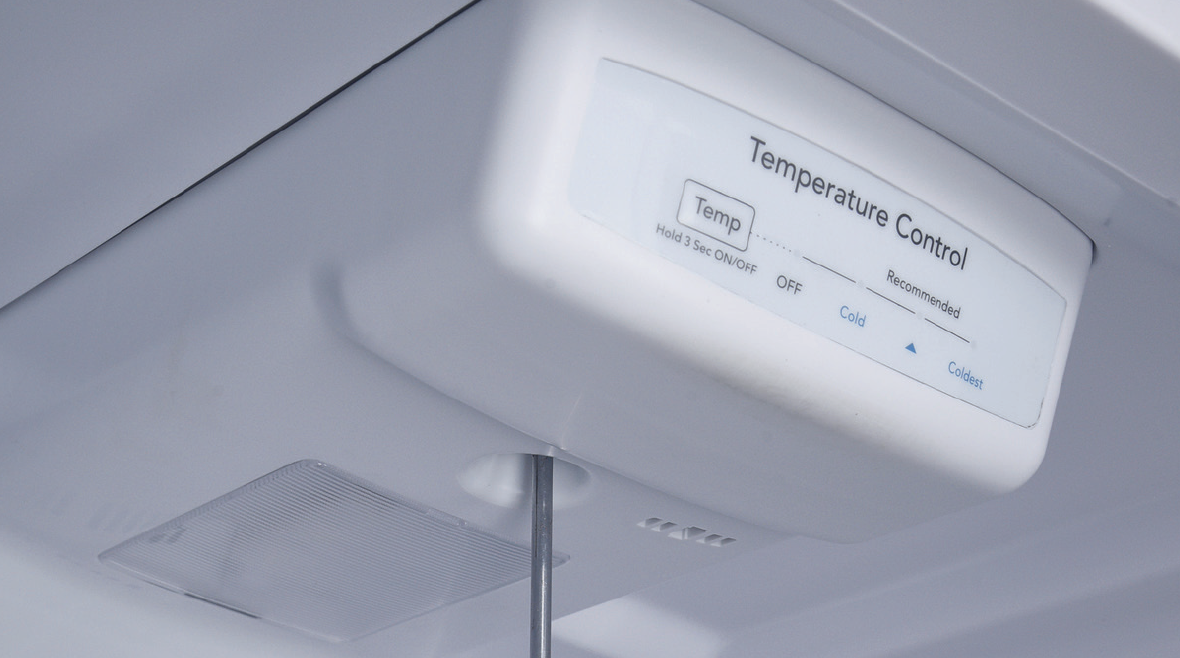
5.3 ICE IN FRIDGE:
COMPONENT LIST


Step 2
Remove the LED lamp cover and the screw.
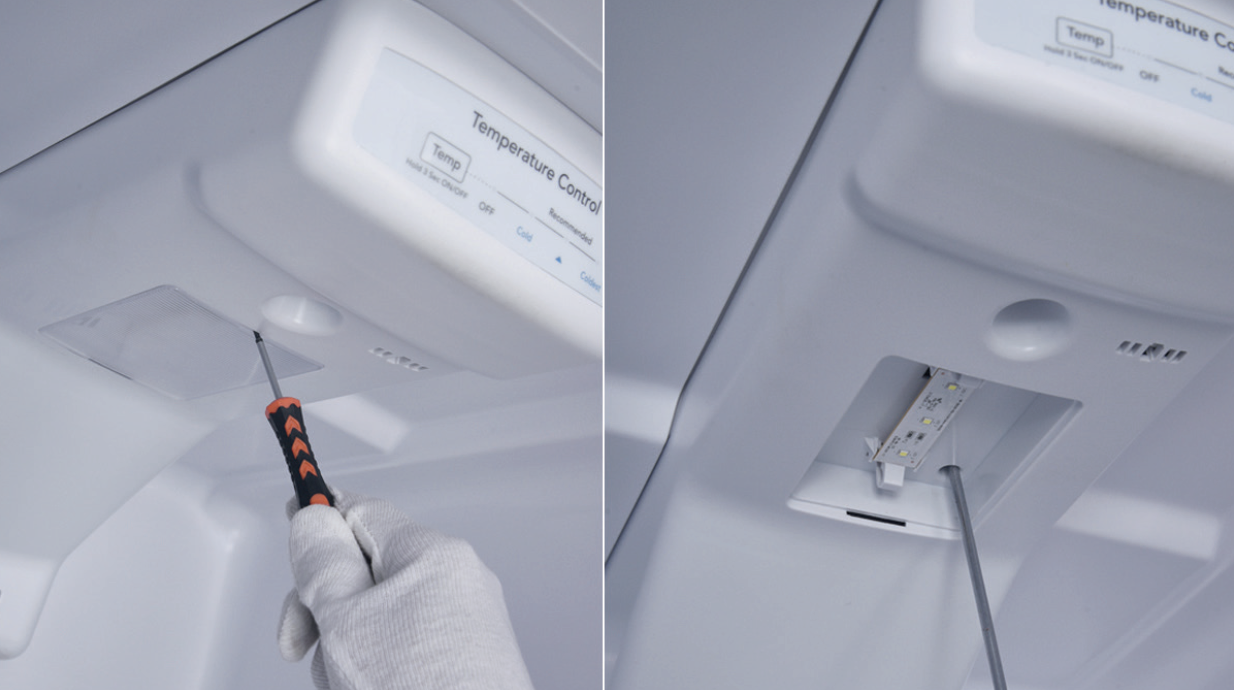
Step 3
Remove the air duct. 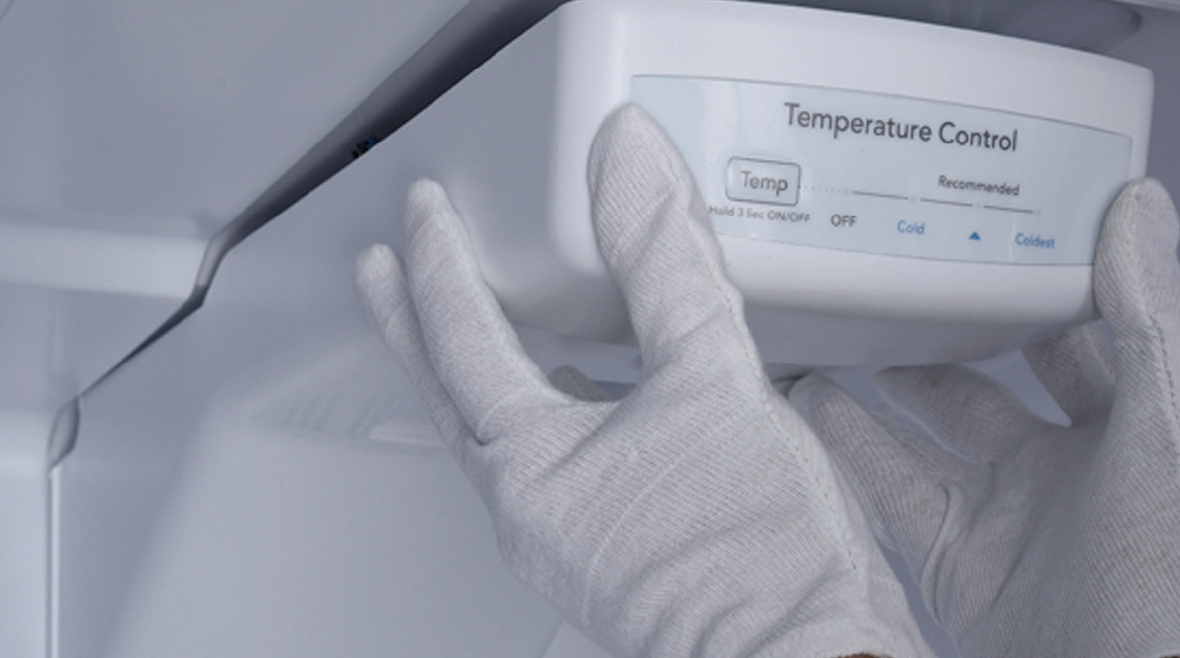
Step 4
Unplug the electrical wires.
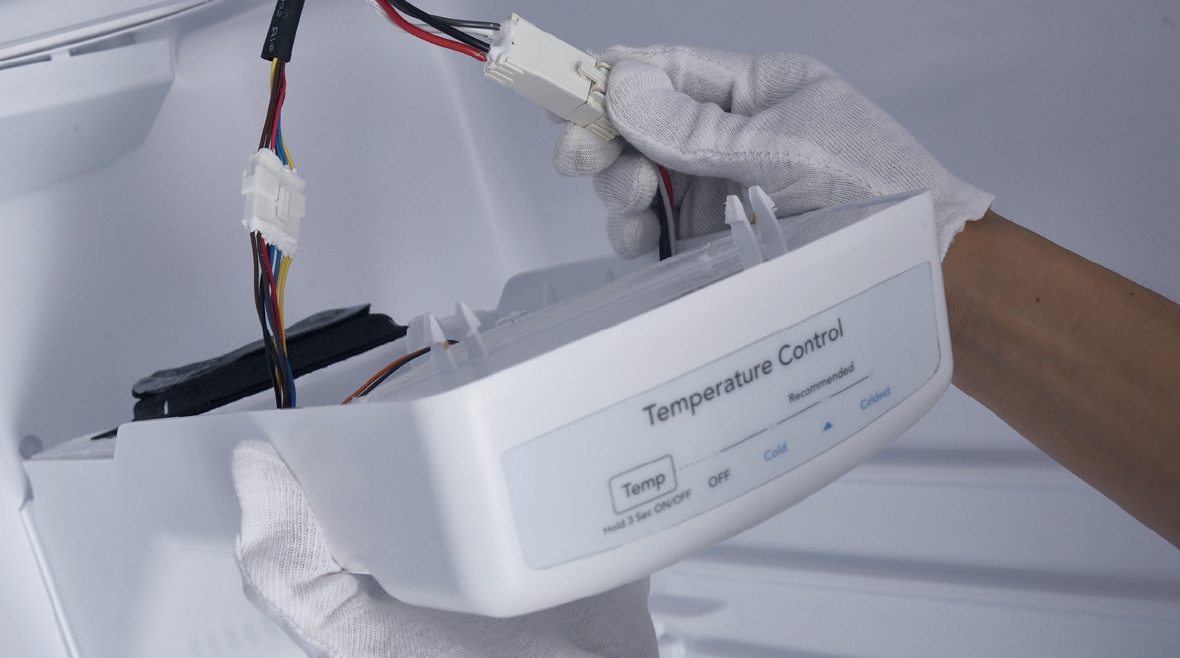
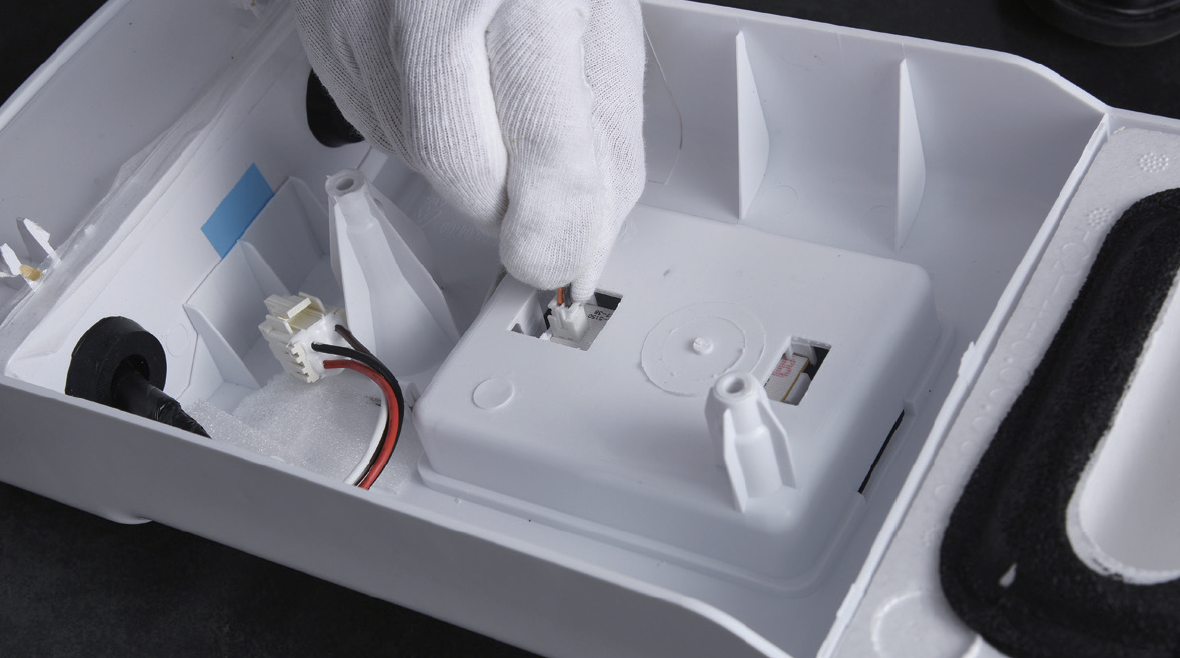
Step 5
Disconnect the terminal of potentiometer.
Step 6
Remove the UI film.
Step 7
Remove PCB box from air duct.a) Use 2 mm slot screw driver to create a gap in front side.
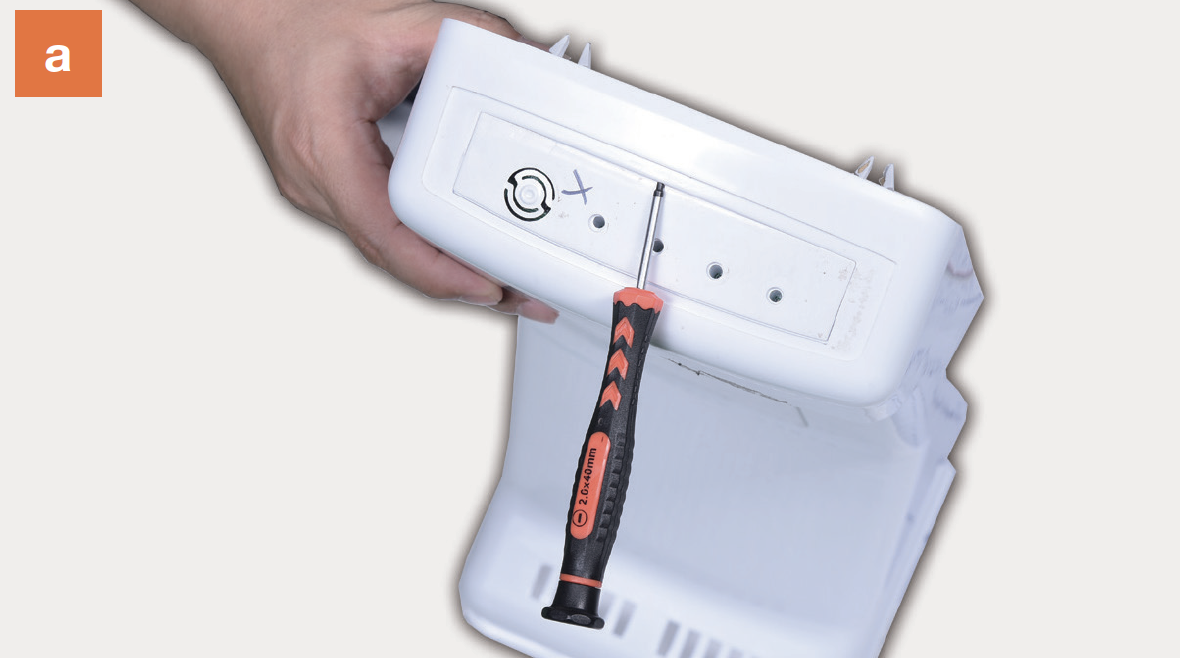
b) Insert a steel ruler to even the gap.
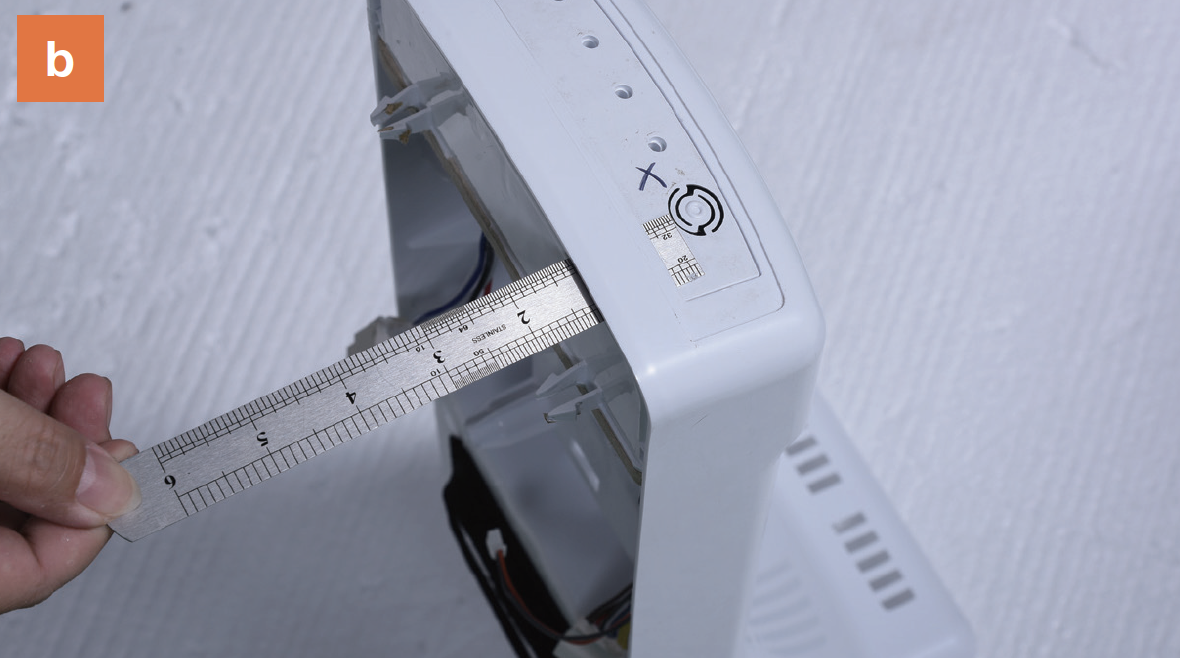
c) Pull the PCB box out.

Step 8
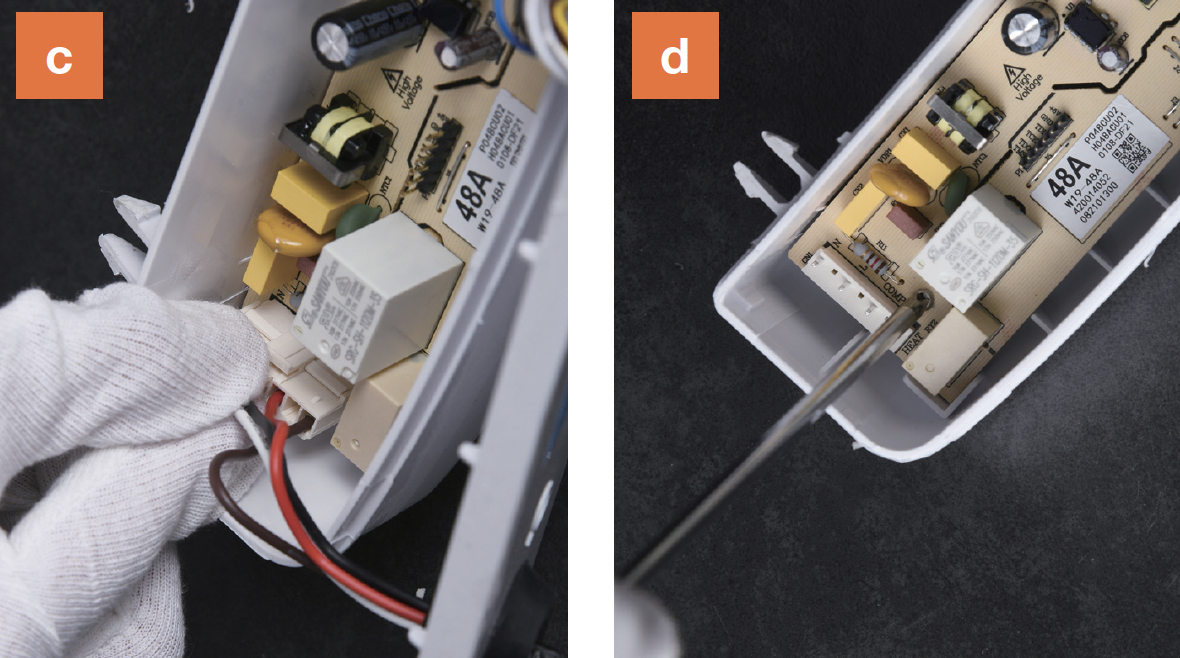
Disassemble PCB box.a)Prize off the buckle;
b) Remove the cover;

c) Disconnect the terminals;
d) Unscrew and remove the PCB;

CHECK AND TEST 1
Step 1
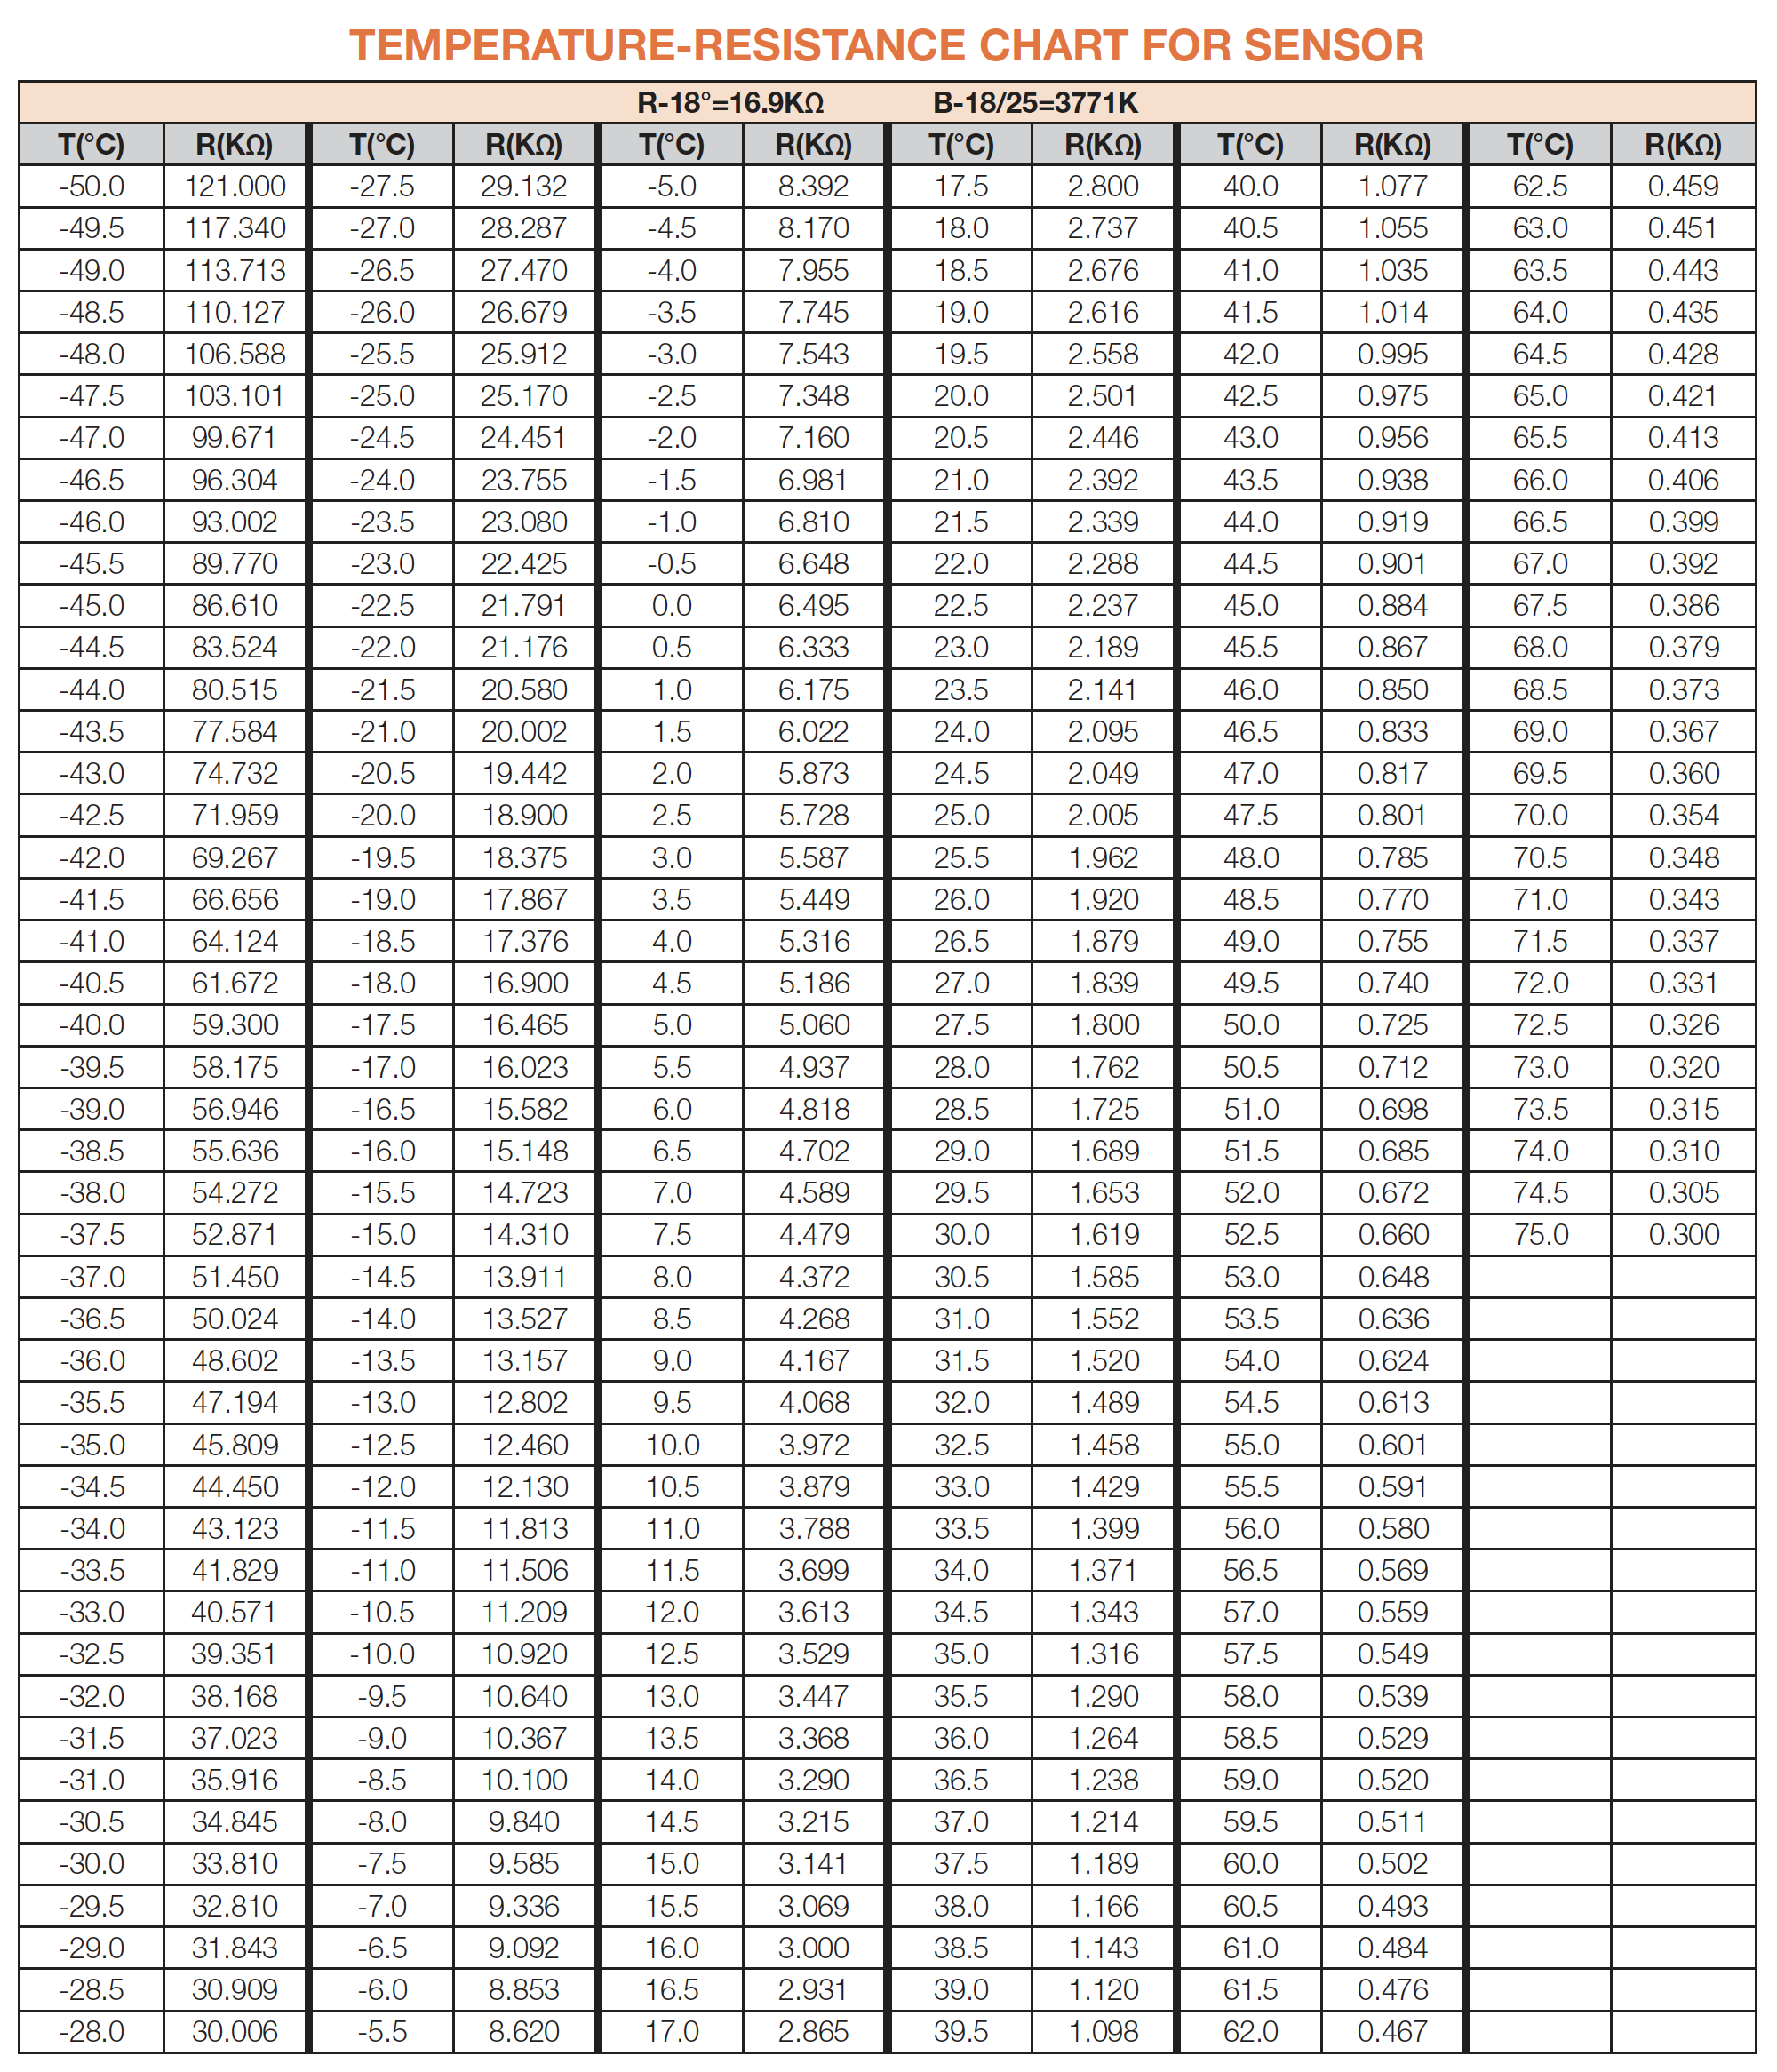
Find out the connection wires of fridgetemperature sensor and measure the reisistance of it.

Step 2
Measure the temperature of sensor.
Step 3
Take note of value.

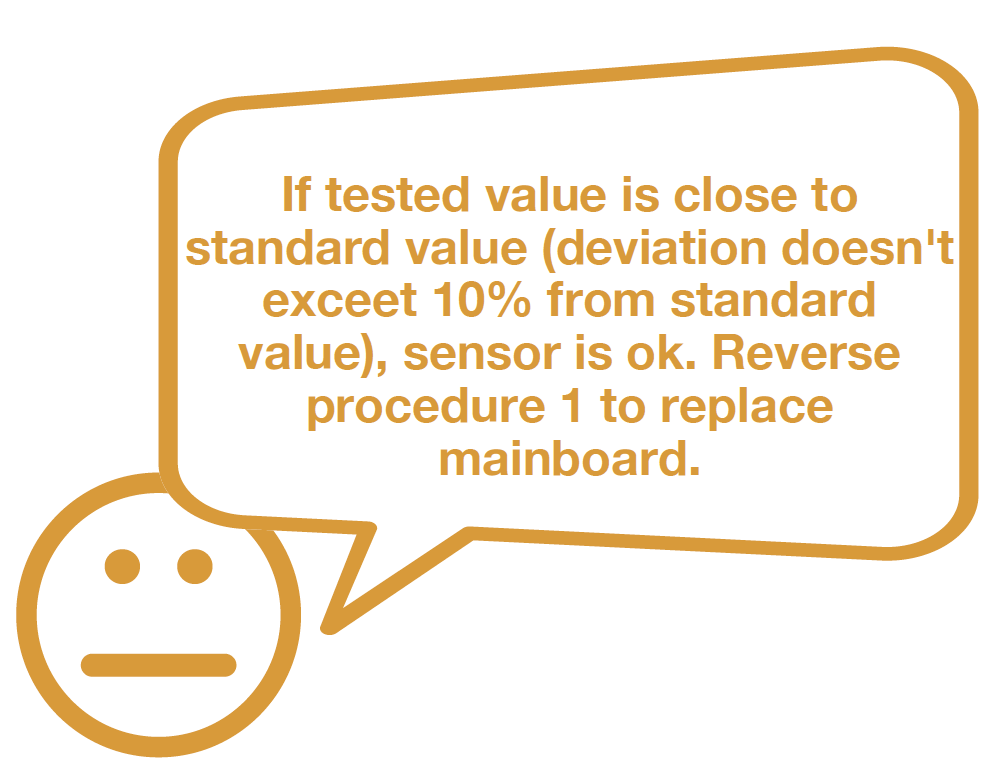
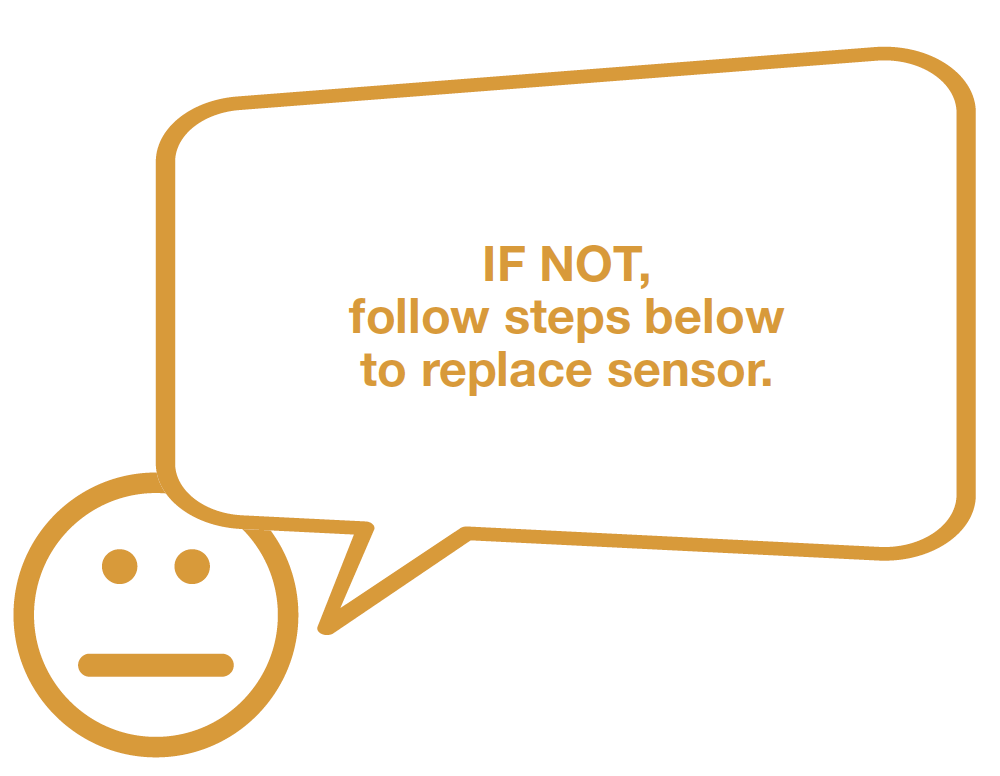
DIAGNOSIS 1


PROCEDURE 2

Step 1
Take sensor out of the buckle.
Step 2
Cut wire off from marked area.
Step 3
Peel off the sleeves.
Step 4
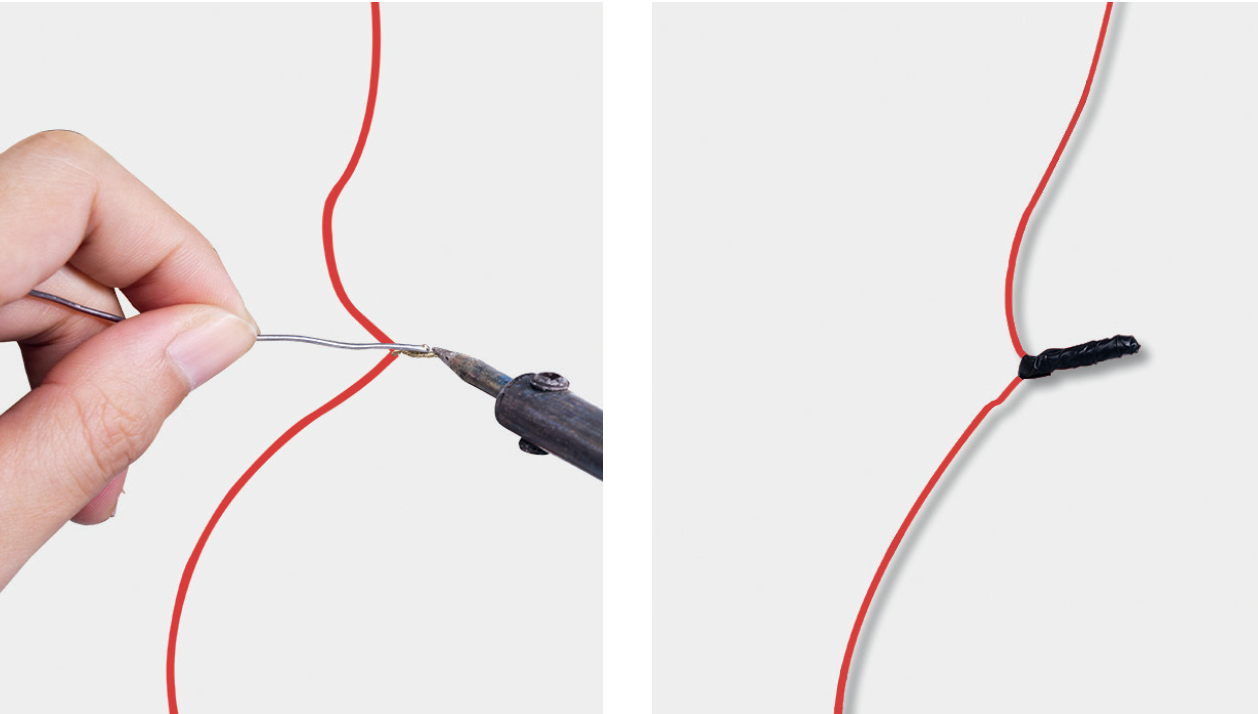
Check to ensure proper wire order and connectthem.

Step 5
Tin soldering.Step 6
Cover connection with electrical tape.
Step 3
Take note of value.

DIAGNOSIS 2


GO BACK TO COMPONENT LIST