

CHECK AND TEST 1
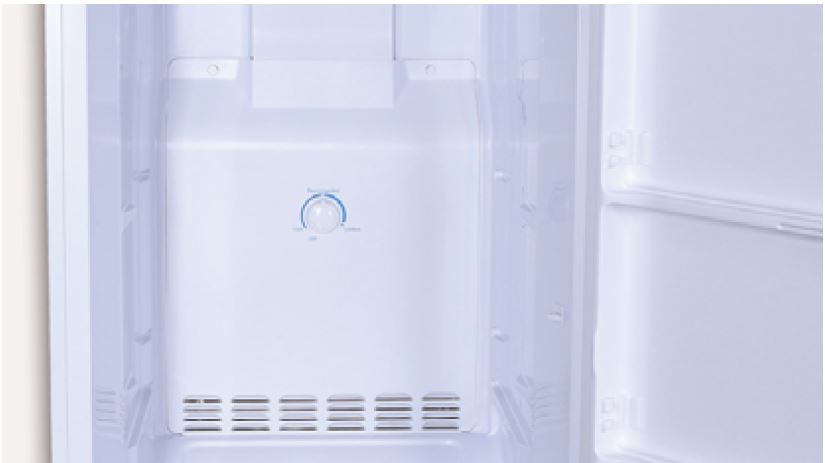
Step 1
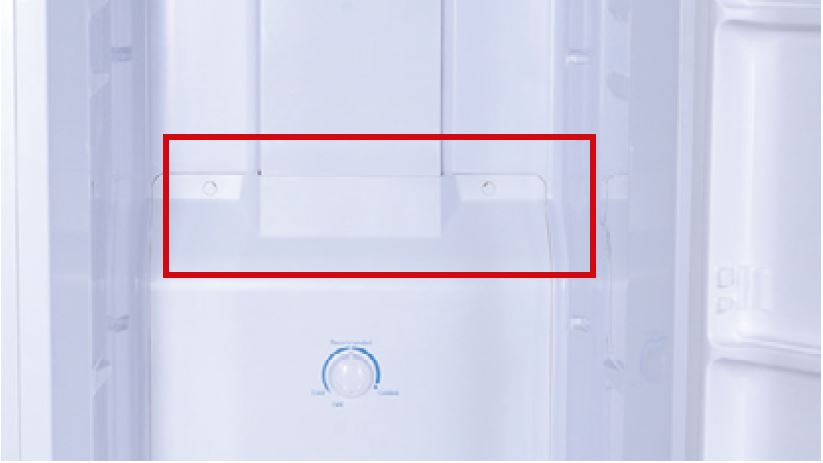
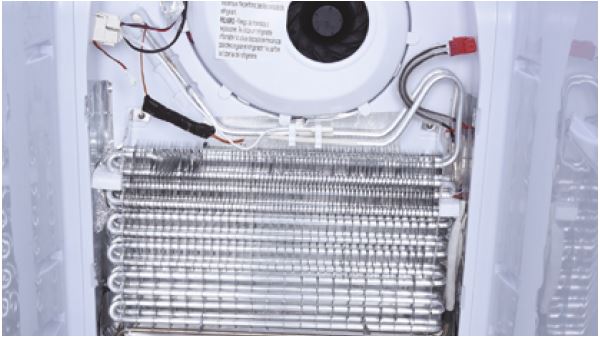
Check if there is any ice
on the top of freezer air
duct ( Bottom part).
Step 2
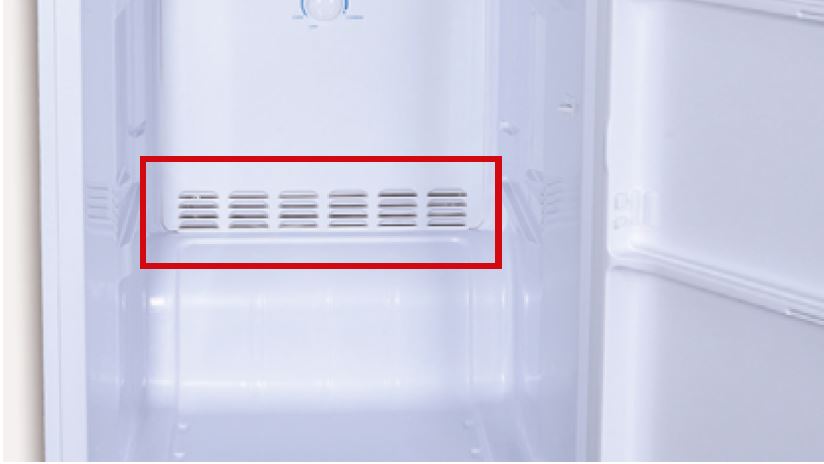
Check if there is any ice
blocking the air-back-toevaporator
duct.

DIAGNOSIS 1

PROCEDURE 1
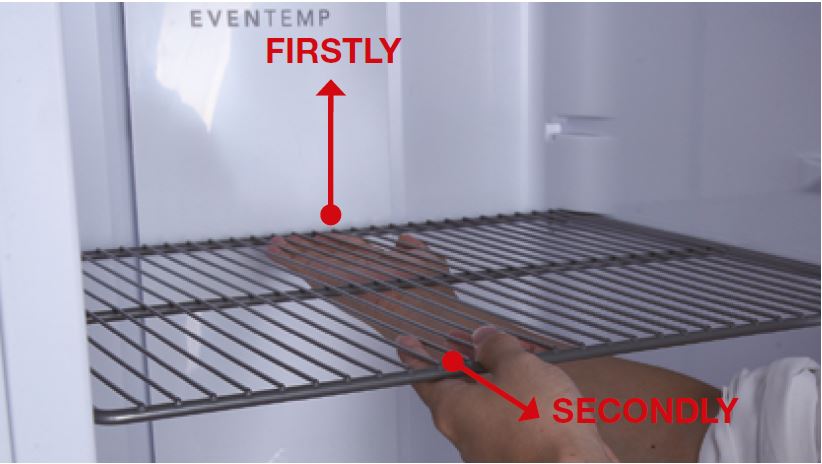
Step 1
Remove all shelves.
Step 2
Remove basket.

Step 3
Remove screw covers.
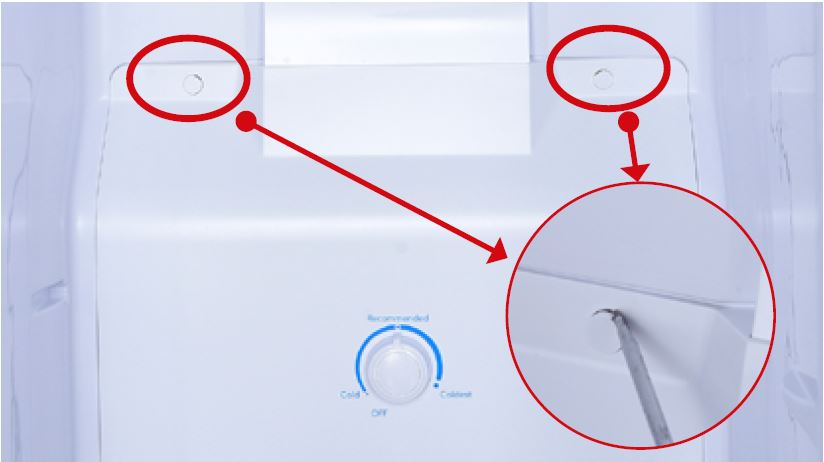
Step 4
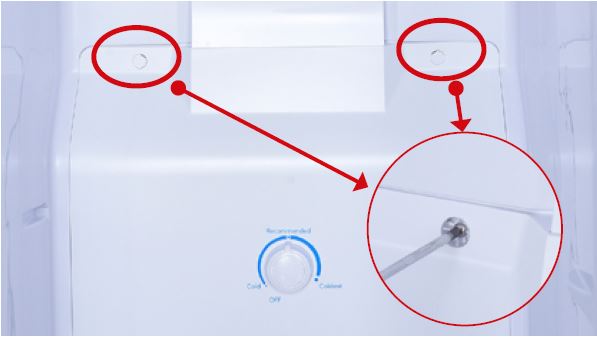
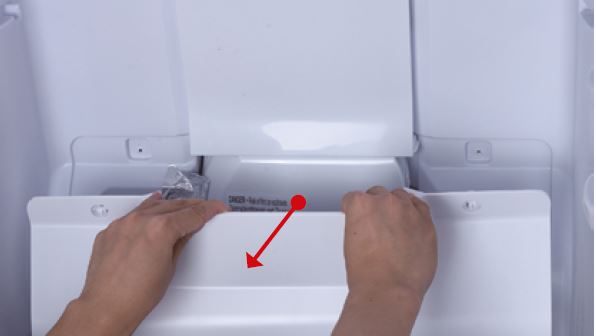
Step 5
Pull the buttom air duct
out.
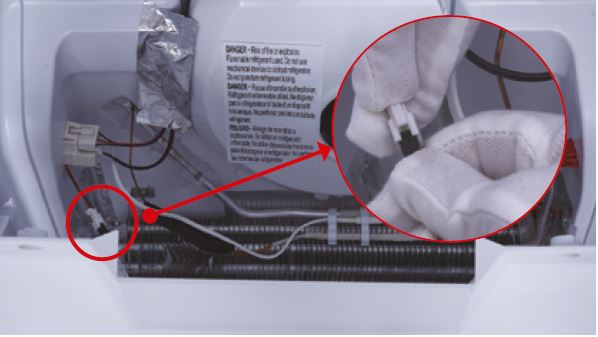
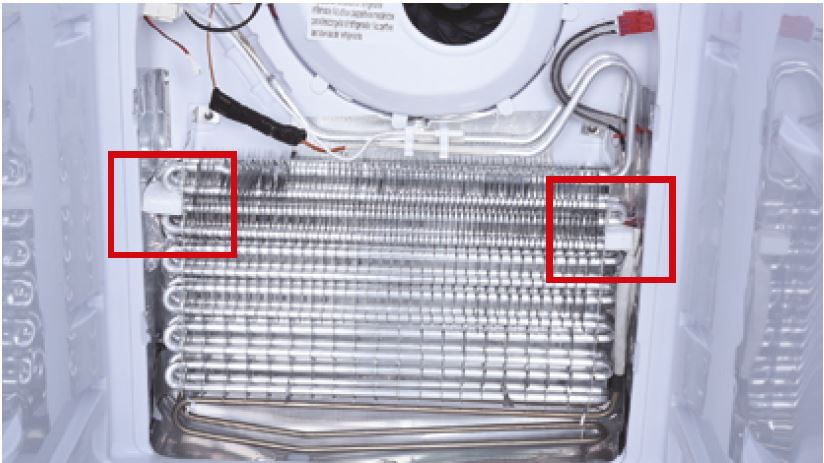
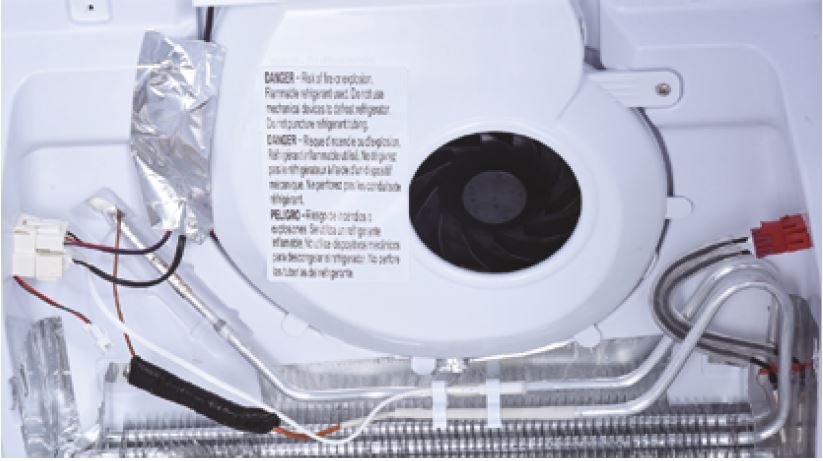
Step 6
Disconnect the wires for
thermostat.
Step 7
Take bottom air duct
away.
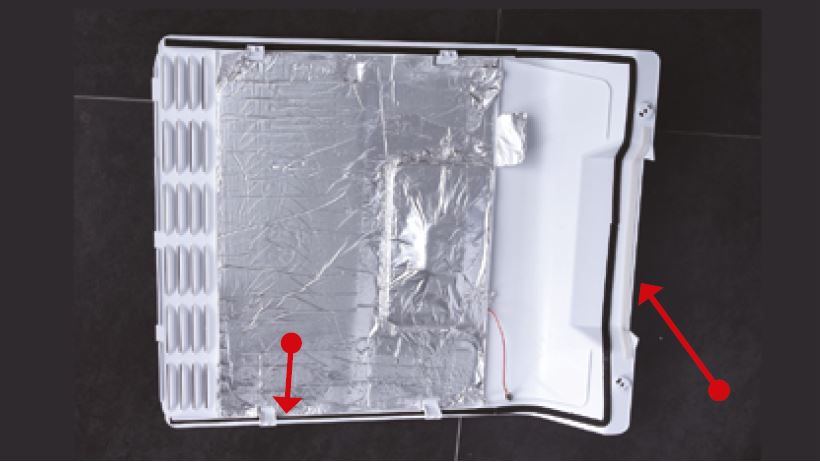
CHECK AND TEST 2
Step 1
Check if there is any
pressing mark on sealing
sponges.
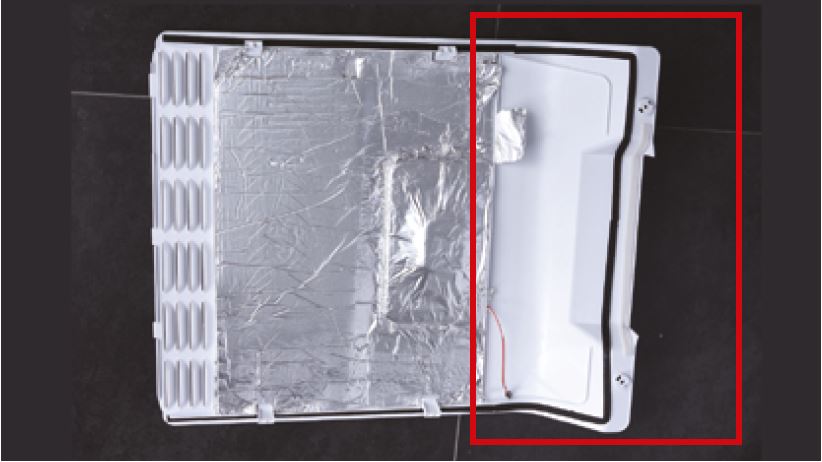
NOTE:
Please pay special
attention to the area.
when the sponge is
compressed, it means
the sealing is good.
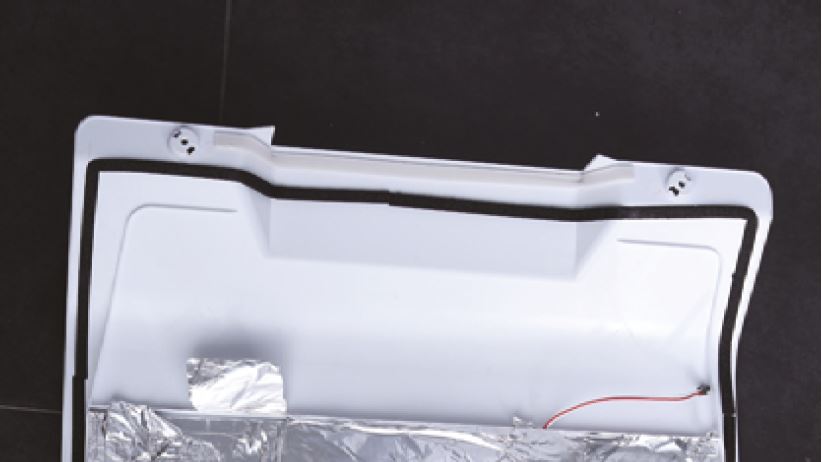
Step 2
If it is found the sealing
is not good, add another
sponge to strengthen the seal.
Step 3
Check whether the foam is
sealing the gaps properly.
If not, please replace
with new one.

PROCEDURE 2
Tip 1
Make sure the sealing
sponges are in good
condition.
Tip 2
When reinstalling the air
duct, fasten the wires to
avoid crushing with air
duct.
Tip 3
Check to see if there is
a wide gap between air
duct and cabinet. If there
is, reinstall air duct.

CHECK AND TEST 3
Step 1
Rework 1 week later,
check if there is any ice
on the top of freezer air
duct ( Bottom part).

DIAGNOSIS 3


GO BACK TO COMPONENT LIST