


Step 1
Remove screw cover.
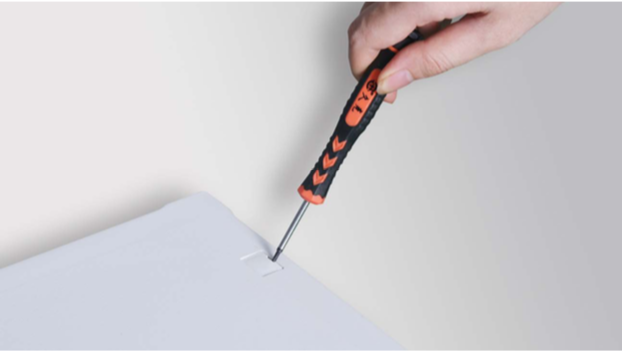
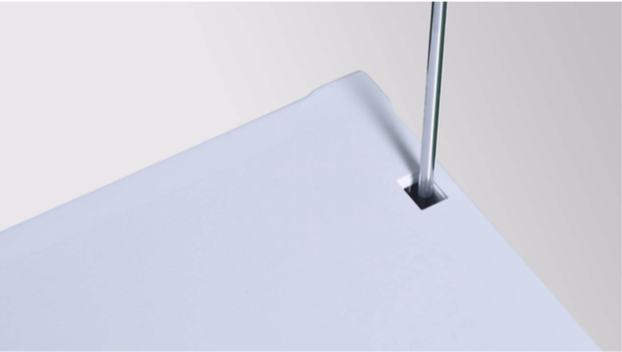
Step 2
Unscrew.
Step 3
Push the top cover forward.

Step 4
Take off the top cover.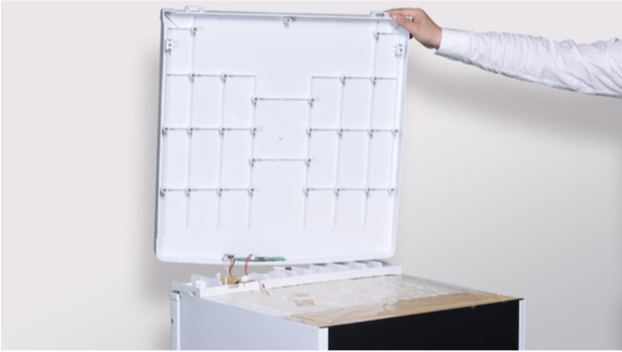
Step 5
Disconnect the terminal of display PCB.

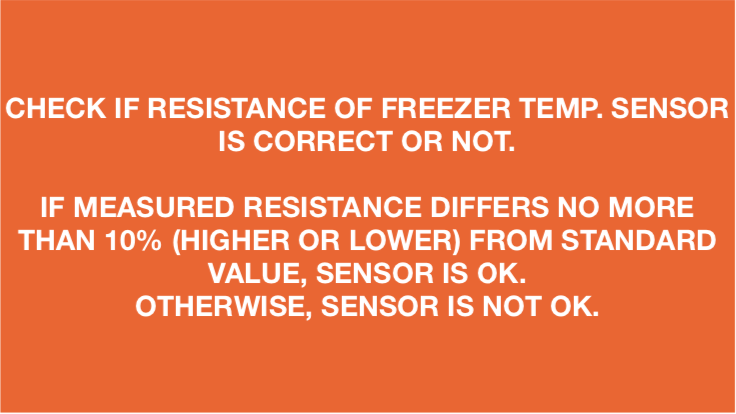
CHECK AND TEST 1
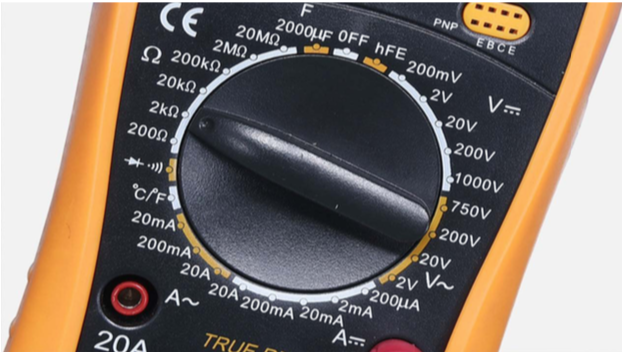
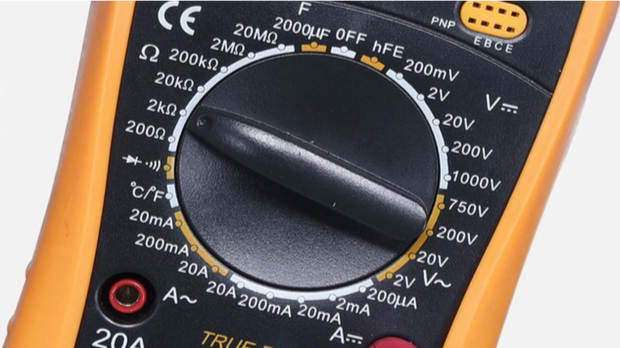
Step 1
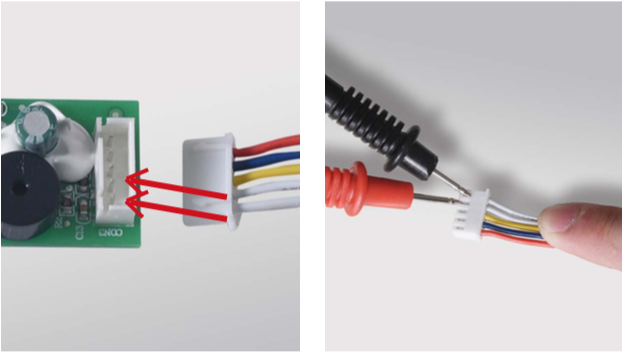
Set multimeter to resistance gear.
Step 2
Measure resistance of sensor from terminal in PCB area.
Step 3
Take note of resistance value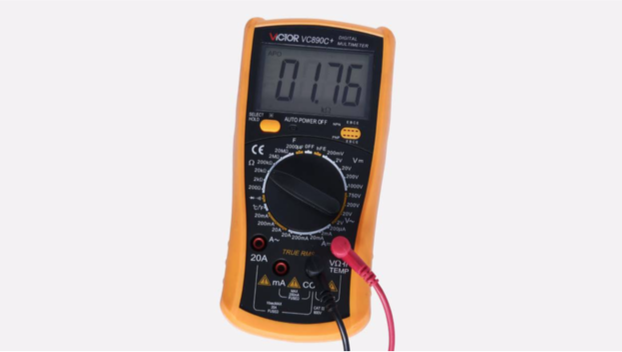
Step 4
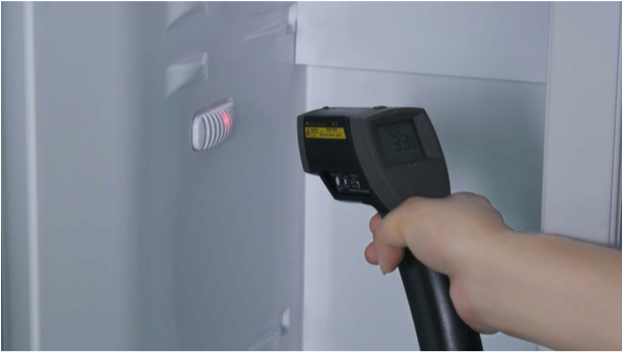
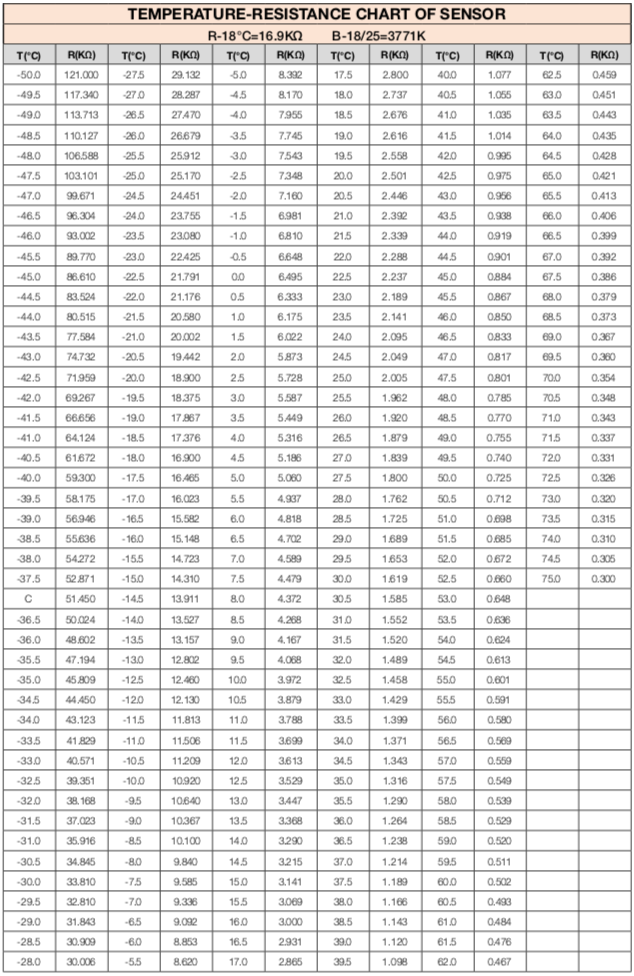
Measure temperature of freezer temp. sensor.
Use measured temperature to find out standard resistance in temperature-resistance chart below.

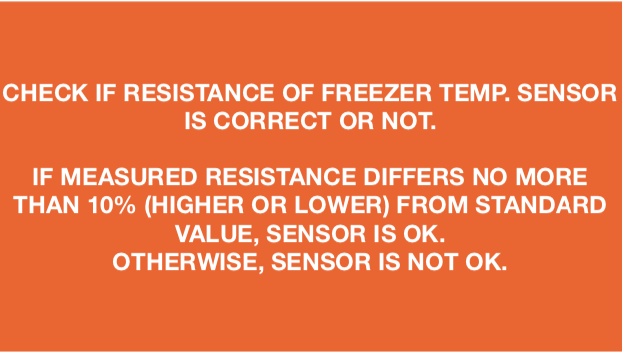
DIAGNOSIS 1


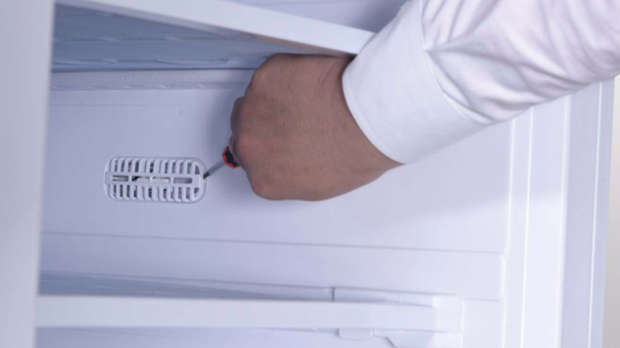
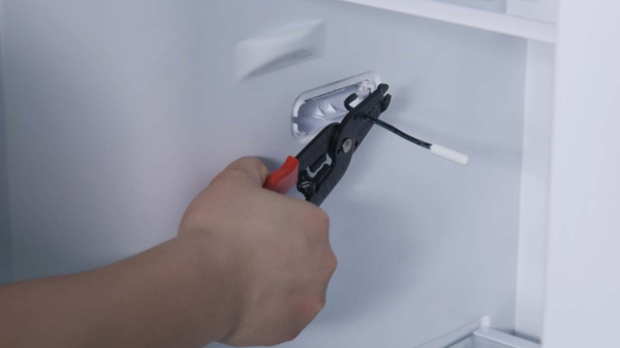
PROCEDURE 2
Step 1
Remove cover of temp.
sensor.
Step 2
Cut down the fridge temp. sensor.
Step 3
Peel off the sleeves.
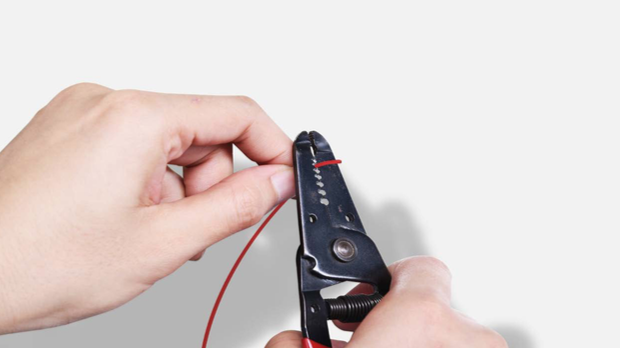
Step 4
Prepare a new sensor, and cut off the head.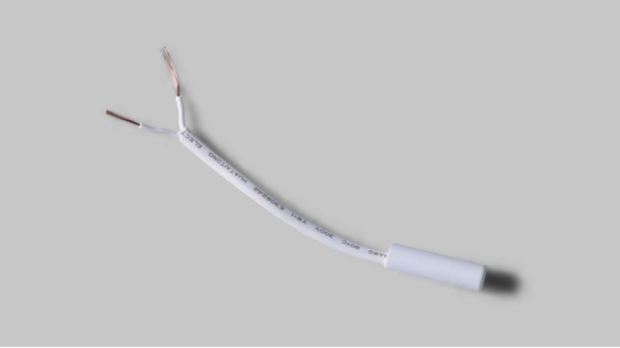
Step 5
Connect the new sensor.
Step 6
Tin soldering.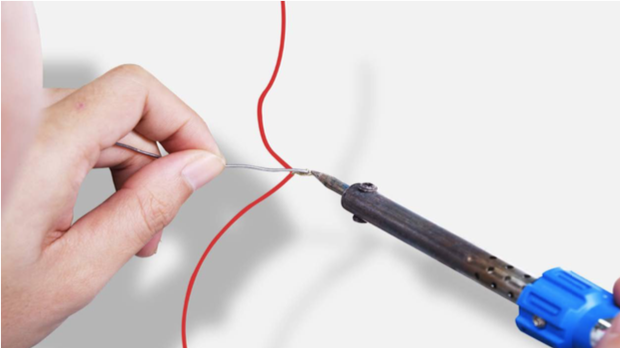
Step 7
Cover connecting points with electrical tape.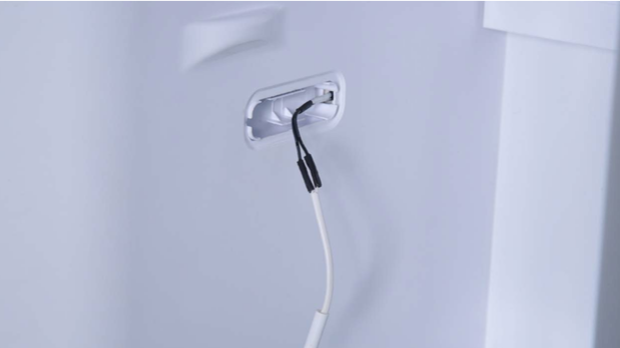

CHECK AND TEST 2
Step 1
Set multimeter to resistance gear.
Step 2
Measure resistance of sensor again from terminal in PCB area.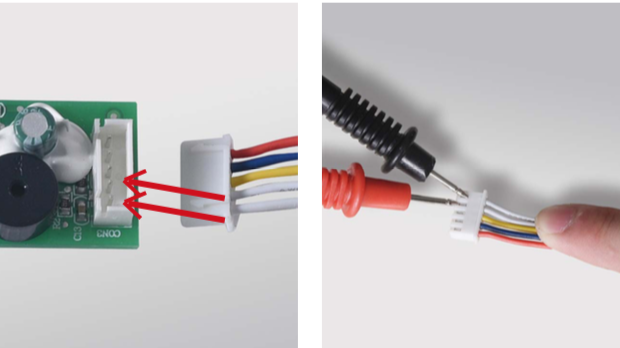
Step 3
Take note of resistance value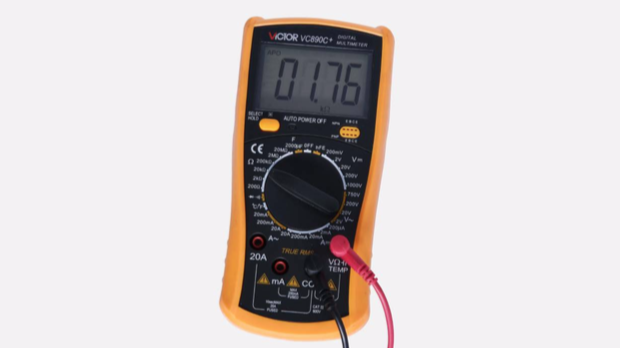
Step 4
Measure temperature of freezer temp. sensor.Use measured temperature to find out standard resistance in temperature-resistance chart below.


DIAGNOSIS 2


CHECK AND TEST 3

DIAGNOSIS 3

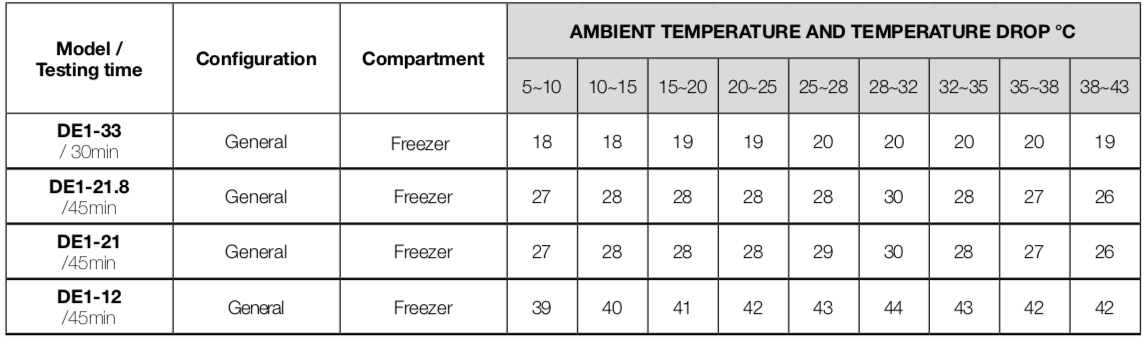
Performance Testing Procedures and Assessment Criteria for single door freezer.
1. Sensor position: Geomitric center of freezer
2. Test time: 30 or 45min.
3. Temperature drop must be no less than the value on the table.

GO BACK TO COMPONENT LIST